How to set up sFTP for using Certificate Authentication on Linux
These instructions apply to users who are receiving their statements via sFTP. If you elected to receive your statements via sFTP, you would first need to generate an RSA Key pair.
There are many Linux distributions and there are multiple methods to access the IBKR sFTP server. sFTP clients such as Filezilla can be used. In this article we explain how to realize the connection to the IBKR FTP server using Ubuntu Linux and Filezilla.
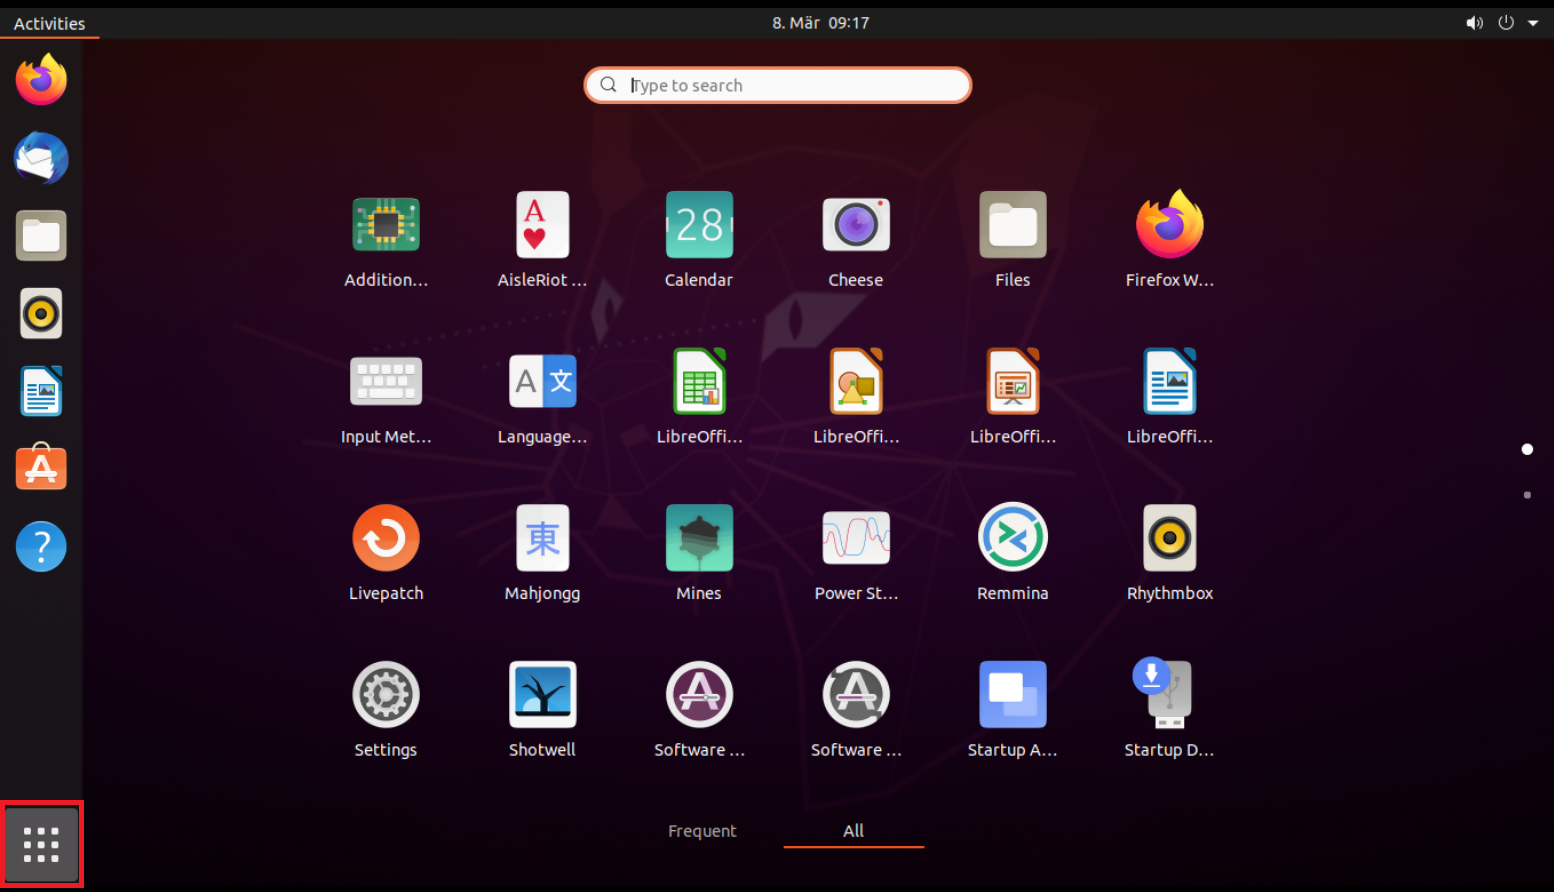
1. On your Linux machine, click on the Applications icon in the bottom left corner of you screen.
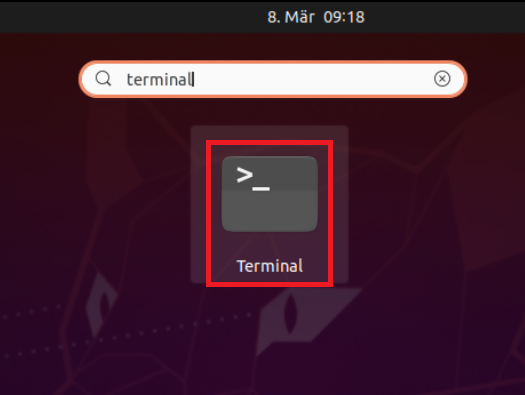
2. In the search box, type terminal and then click on the Terminal icon in the search results.
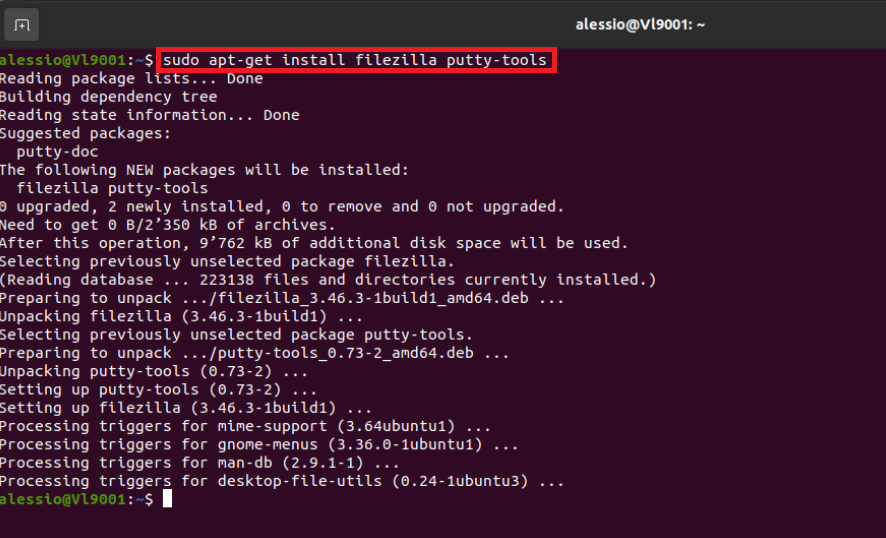
3. In the Terminal window, type sudo apt-get install filezilla putty-tools in order to install the required software. Enter your sudo password when requested.
4. Once the software installation is complete, type puttygen -t rsa -b 2048 -o privatekey.ppk in order to generate the RSA Key pair.
You will be asked to enter a passphrase and type it again to confirm.
PLEASE NOTE: Keeping a secure copy of this password is essential. Any loss of this password will require the whole process to be repeated.

5. Type puttygen -L privatekey.ppk -o public.key in order to export the public part of the Key pair to the file public.key

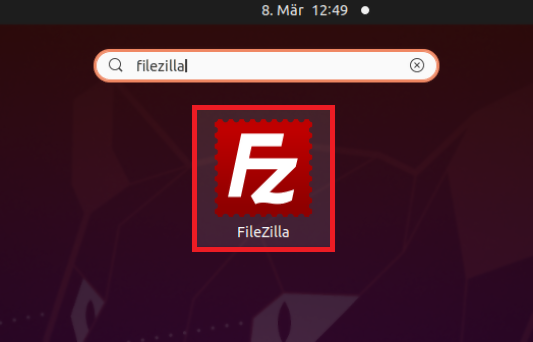
7. In the search box, type FileZilla and then click on the FileZilla icon in the search results.
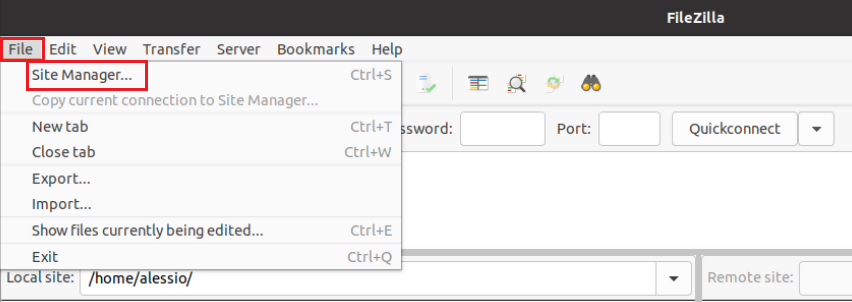
8. Click on the FileZilla top menu File -> Site Manager...
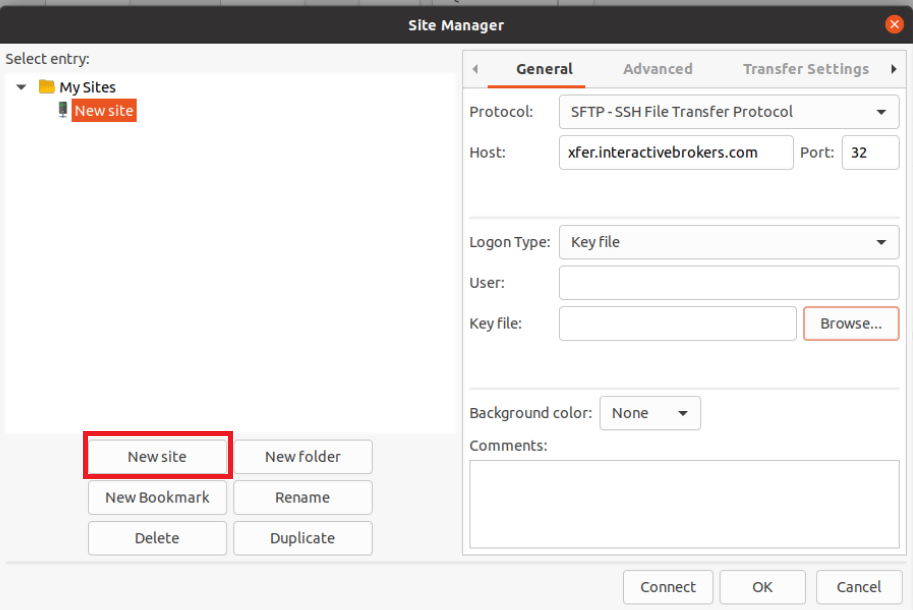
9. In the Site Manager window, click on the button New site to create a new connection.
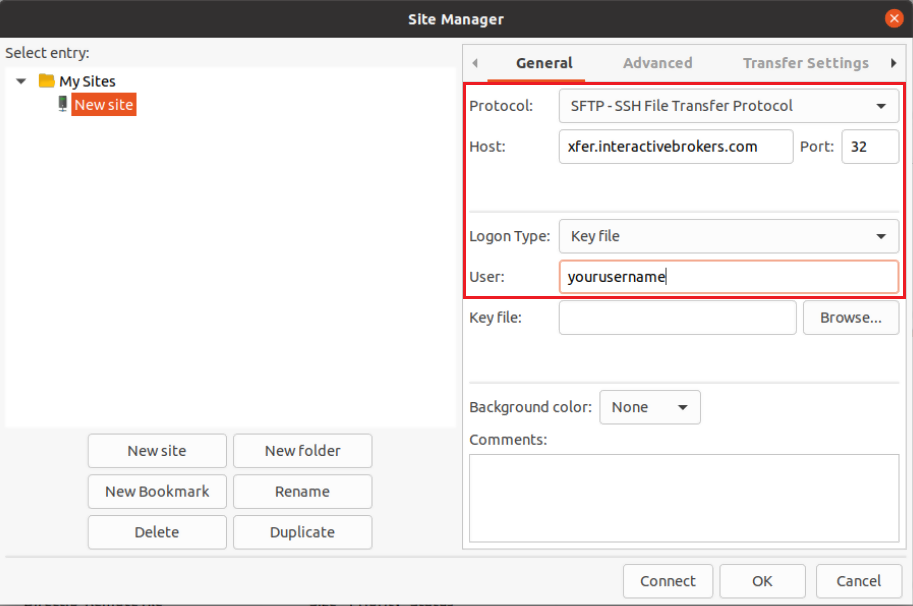
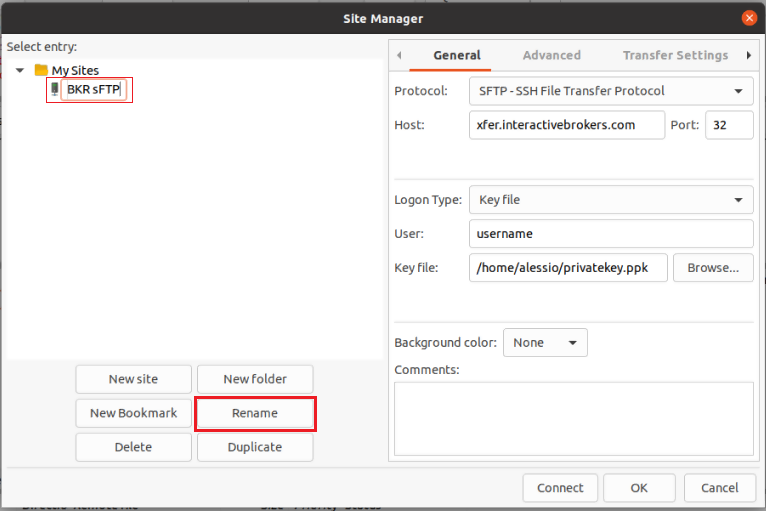
10. In the right panel (called General):
- Select SFTP - SSH File Transfer Protocol as Protocol
- Enter xfer.interactivebrokers.com in the Host field
- Enter 32 in the Port field
- Select Key file as Logon Type
- Enter the username provided to you by Interactive Brokers in the User field
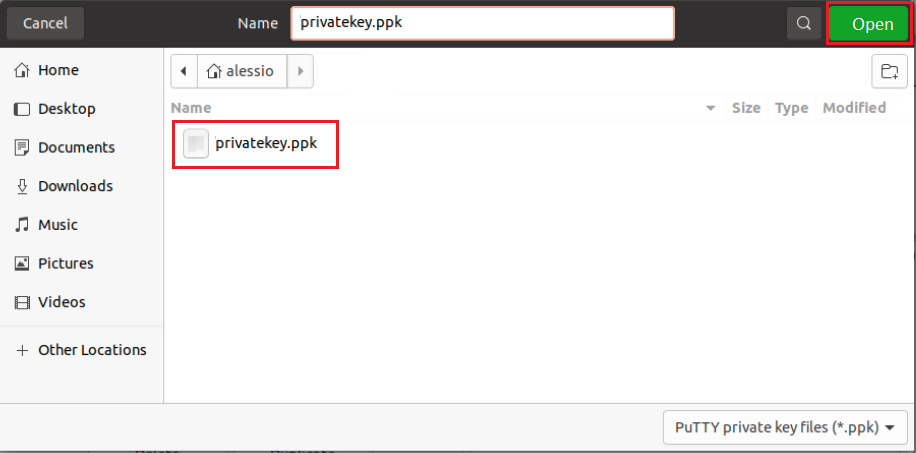
11. Click on Browse next to the Key file field.
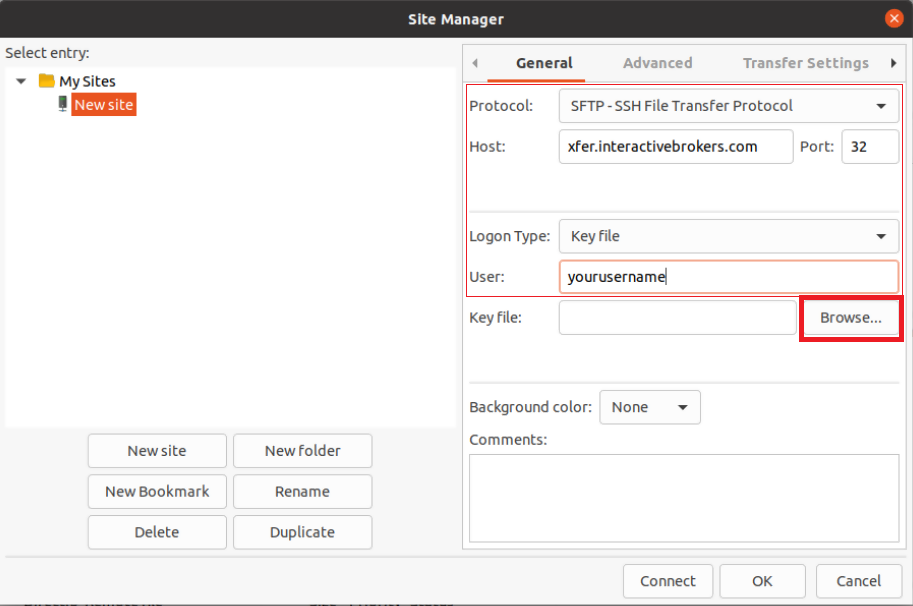
12. Move to the folder where your Key pair was created (normally your user folder: /users/yourusername/). Select the file privatekey.ppk and click on the Open button. This will set it as the Key file in your connection parameters.
13. Click on Rename and select a name of your preference for this connection (e.g. IBKR sFTP). Press Enter to confirm the name.
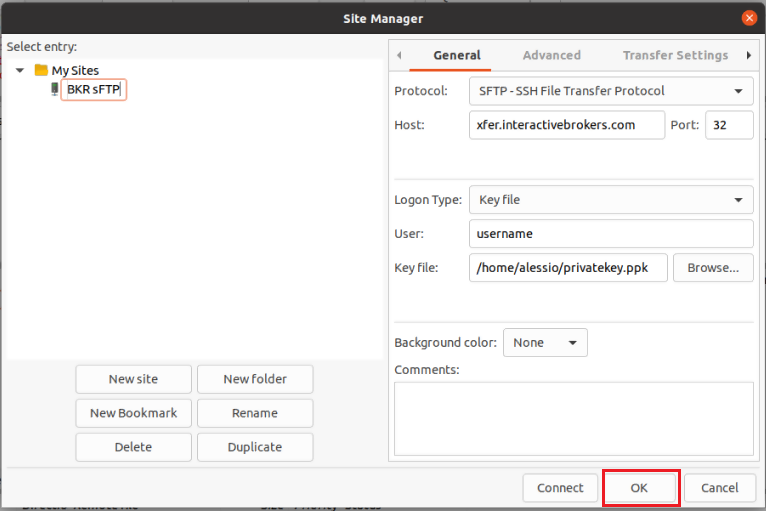
14. Click on OK to save your connection parameters.
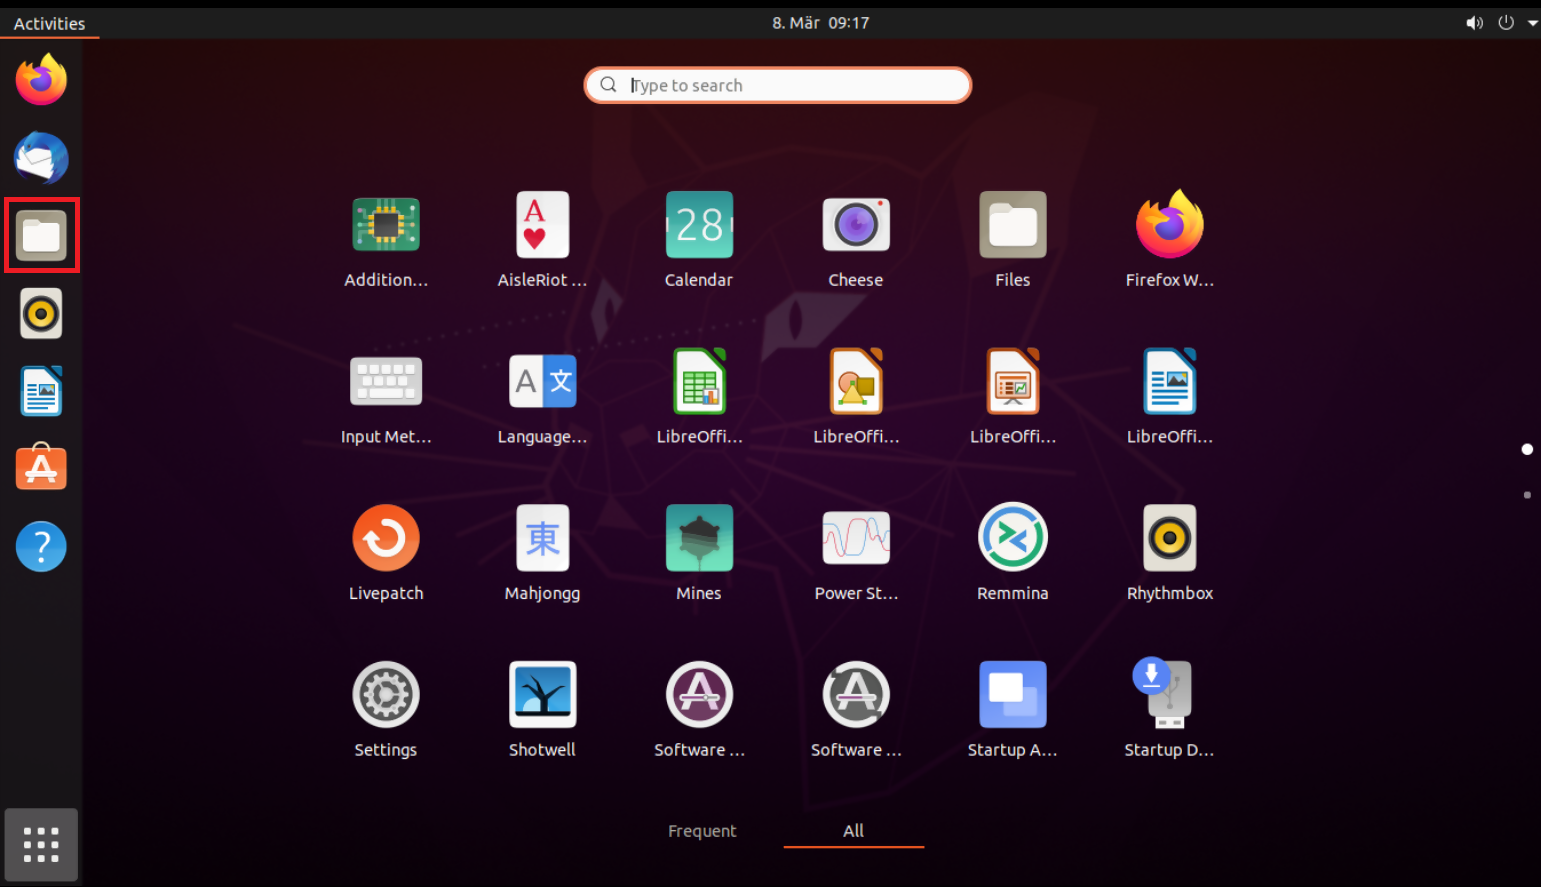
15. Click on the folder icon on the left hand toolbar of your Desktop. This will launch the File application.
16. Move to the folder where you saved your Key pair (normally your user folder: /users/yourusername/). Right click on the file public.key and select Send to...
The file will be attached to an empty email. Send the email to the Reporting Integration Team, as per IBKB3842.
Important Note: do NOT send us your private key. Send us only your public one
Once IBKR has configured the parameters for your connection on our servers, you will be notified. After that, you will be able to access your sFTP repository by using the Site connection you have created in FileZilla. In case you have not yet set up a Site connection, please follow the steps from 6. to 14. which are a prerequisite to the below steps:
1. Click on the Applications icon in the bottom left corner of you screen.

2. In the search box, type FileZilla and then click on the FileZilla icon in the search results.
3. On the FileZilla top toolbar, click the down arrow icon and select the Site connection you previously created (e.g. IBKR sFTP)

4. FileZilla will now establish a connection to our sFTP Server and show the files present in your repository.
Common issues and solutions
A. The Login Credentials Provided are Incorrect
-
Ensure the correct login details are being used to connect to the sFTP server. The username and password you are entering should match the ones you have received from the Reporting Integration Team.
-
Confirm you have configured your sFTP Client to use the Private Key file for the logon authentication (see steps 9. and 10. of the above procedure.)
B. Server Refused Our Key
-
Try accessing the sFTP server using a different Client (CyberDuck, ect.)
-
Ensure the Private Key file being used to Authenticate the server login attempt is related to the Public Key you originally sent to the Reporting Integration Team.
-
Should the above checks be unable to resolve the issue, please generate a new RSA Public/Private Key pair and send only the Public part to the Reporting Integration Team, as per IBKB3842.
C. Connection Timed Out
-
In case you have an antivirus or a security software installed on your machine, make sure it is not blocking the FTP connection attempt. Normally, security software allows to set up exceptions for specific connections in order to whitelist them.
-
Verify that the public IP Address of the machine running the sFTP client, is the same you have originally provided to the Reporting Integration Team for being whitelisted. You can discover your public IP Address by searching the Internet for “what is my IP”. If your current IP Address is not the same you provided to us, please send it to our Reporting Integration Team for being whitelisted.
-
Ask your network administrator/s to confirm that your firewall allows both incoming and outgoing traffic from/to xfer.interactivebrokers.com on port TCP 32.
-
Should the above steps be unable to resolve the issue, please generate a new RSA Public/Private Key pair and send only the new Public part to our Reporting Integration Team, as per IBKB3842.
References
KB3968 - Generate a key pair using GPG for Windows
KB4205 - Generate a key pair using GPG Suite on macOS
KB4108 - Decrypt your Reports using GPG for Windows
KB4210 - Decrypting Reports using your PGP Key pair on macOS
KB4407 - Generate RSA Key Pair on Windows
KB3968 - Generate a key pair using GPG for Windows
KB4205 - Generate a key pair using GPG Suite on macOS
KB4108 - Decrypt your Reports using GPG for Windows
KB4210 - Decrypting Reports using your PGP Key pair on macOS
KB4407 - Generate RSA Key Pair on Windows
KB4578 - How to Access your Reports using FTP on Windows
KB4580 - How to Access your Reports using FTP on MacOS
KB4409 - How to set up sFTP for using Certificate Authentication on Windows
KB4410 - How to set up sFTP for using Certificate Authentication on macOS
KB4411 - How to backup your public/private Key pair
KB4323 - How to transfer your public/private key pair from one computer to another
KB4410 - How to set up sFTP for using Certificate Authentication on macOS
KB4411 - How to backup your public/private Key pair
KB4323 - How to transfer your public/private key pair from one computer to another
Cryptocurrency Trading at Interactive Brokers Hong Kong
How do I trade cryptocurrency with Interactive Brokers HK?
Before you can trade cryptocurrencies, you need to log into Client Portal and request Cryptocurrency trading permissions. To add the trading permissions:
- Login into Client Portal and selecting the User menu (head and shoulders icon in the top right corner) followed by Settings
- Under Account Settings find the Trading section and click on Trading Permissions.
- Select Cryptocurrency permissions and complete the steps on screen.
Please note, you must be a “Professional” Investor in order to be eligible for Cryptocurrency trading permissions.
Once trading permissions are approved you will be able to trade Bitcoin (BTC) or Ethereum (ETH) in the same way that you trade other products via your Interactive Brokers HK account. Search for the symbol and open it in Quote Details or add it to your Watchlist. Select the symbol to trade, then complete the available parameters to create and then submit the order.
What cryptocurrencies can I trade with Interactive Brokers HK?
Interactive Brokers HK currently offers trading in Bitcoin (BTC) and Ethereum (ETH).
Where are my cryptocurrency assets held?
Cryptocurrency trading through Interactive Brokers Hong Kong is powered by OSL Digital Securities, the world's first Type 1 and 7 Securities and Futures Commission (SFC)-licensed digital asset brokerage and trading platform for professional investors. Interactive Brokers HK customer positions will be maintained 100% in wallets in cold storage with OSL Digital Securities.
What are the trading hours for crypto trading?
IBHK supports cryptocurrency opening and closing trades from Sunday at 3 AM EST through Friday at 4PM EST.
Only closing trades (sells) are supported from Friday at 4 PM EST through Sunday at 3 AM EST.
Who is eligible to trade cryptocurrency with Interactive Brokers HK?
You must be a Professional Investor in order to qualify for Cryptocurrency trading. Eligible clients include individuals with over HKD 8 million in investable assets or institutions with assets greater than HKD 40 million who are residents of Hong Kong.
Are there added spreads or markups for cryptocurrency trades? What are the commissions on crypto trades?
No, there are no added spreads or markups. Cryptocurrency trading on Interactive Brokers’ platform has a low commission of just 0.20% to 0.30% of trade value depending on monthly trade volume with a USD 2.25 minimum per order.
A monthly custody fee of 8 basis points will also be charged on the average daily value of cryptocurrency held in your account.
What order types can I use for cryptocurrency orders?
You can trade cryptocurrencies only using Market or Limit orders. Market orders can be submitted in cash value only (e.g. $10000 worth of BTC). Limit orders can be submitted in either trade value or quantity terms, but the entered trade value will be converted to quantity and transmitted to OSL in quantity terms.
Are cryptocurrency positions marginable?
No, cryptocurrency positions are not marginable.
Can I deposit Bitcoin into/withdraw Bitcoin from my Interactive Brokers HK account?
No, deposits and withdrawals in Bitcoin/Ethereum are not supported.
Are there limits on the amount of cryptocurrency that can be traded/held in my Interactive Brokers HK account?
Cryptocurrency trading is limited to the lesser of 10% of the account’s total equity or USD 1 million.
Can I short-sell cryptocurrencies in my Interactive Brokers HK account?
No, IBHK does not support the short-selling of cryptocurrencies.
How long does it take for cryptocurrency trades to settle at Interactive Brokers HK?
Cryptocurrency trades settle in real time.
What is the minimum order size for cryptocurrency trades at Interactive Brokers HK?
The minimum order size for cryptocurrency trades at Interactive Brokers HK is USD 10.
What times-in-force can I use when trading cryptocurrencies with Interactive Brokers HK?
Times-in-force for BUY limit orders:
- IOC: Immediate or cancel
- Minutes: Order is canceled if not filled within five (5) minutes.
Times-in-force for SELL orders:
- IOC: Immediate or cancel
- Minutes: Order is canceled if not filled within five (5) minutes.
- Day: Order is canceled if not filled by the end of the trading day.
- GTC: Good til Canceled
如何从IBKR平台上传诊断包
Overview:
某些支持相关的问题除了需要提供截图外还需要上传诊断文件与日志。这些信息可帮助我们调查并解决您遇到的问题。
本文详细说明了如何通各盈透证券交易平台上传诊断文件与日志。
请注意:IBKR不会实时监控诊断包信息库。如果您在没有盈透证券明确要求的情况下自行决定上传诊断包,请通过咨询单或电话通知我们的客户服务人员,否则我们可能会注意不到您的错误报告。
请根据您使用的平台点击对应链接:
-
移动IBKR(Android版)
-
移动IBKR(iOS版)
1. 登录TWS,试着重现您遇到的问题
2. 点击左上角的“帮助”,然后选择“上传诊断”。或者,您也可以根据自己的操作系统使用以下按键组合
- Windows和Linux操作系统:按Ctrl+Alt+Q
- Mac:按Cmd+Option+H

3. 将出现”上传诊断“窗口。您可以在文本框内输入上传诊断的原因
4. 如果有盈透证券代表明确要求您在上传诊断时将前几天的日志也包含进来或要求您勾选特定选项,请点击右上角的下拉框,选择“高级视图”,然后在左下角勾选对应复选框
5. 确保勾选了“包含整个桌面截图”,然后点击“提交”

6. 在看到弹框确认诊断已成功上传之前请勿进行任何操作
A) 如果您位于登录界面:
1. 点击右上角的三个点图标,选择“上传诊断”
2. 在评论区注明您的用户名,然后点击“上传”
1. 点击左上角的三个点图标打开菜单
2. 点击“配置”>“故障报告”>勾选“故障排除模式”旁边的复选框
3. 如果有盈透证券代表明确要求,勾选“扩展日志”旁边的复选框
5. 点击屏幕右上角的三个点图标,选择“上传诊断”
6. 在评论区输入您的评论并勾选“附上截图”旁边的复选框。然后点击“上传”
A) 如果您位于登录界面:
1. 连续快速点击IBKR标志五次打开测试菜单
2. 在配置下,打开“故障排除模式“旁边的开关
3. 点击“上传诊断”旁边的“发送”
4. 在评论区输入您的用户名,然后点击“确定”
1. 直接在手机上对出现问题的界面截屏(同时按住电源和音量加按键)
2. 点击屏幕右下角的“更多”选项
3. 点击“配置”,展开“故障报告”
4. 打开“故障排除模式”旁边的开关,然后点击“上传诊断”旁边的“发送”
5. 将出现“发送诊断”页面。在评论区输入您的评论
6. 点击“附上图片”按钮附上您已保存到相册的问题页面截图
7. 点击“发送”
1. 登录应用程序
2. 点击左上角的使用者图标,选择“设置”
3. 点击“高级”选项,打开“故障排除模式“旁边的开关
4. 如果有盈透证券代表明确要求,打开“扩展日志”旁边的开关

5. 您将看到“上传诊断”弹框。输入您的评论,点击“上传”
请注意:如果需要向我们发送IMPACT或IBKR GlobalTrader(Android版)的截图,您需要在消息中心将截图作为附件添加到咨询单发送,具体步骤请参见IBKB1071
1. 登录应用程序
2. 直接在手机上对出现问题的界面截屏(同时按住电源和音量加按键)
3. 点击左上角的使用者图标,选择“设置”
4. 点击“高级”
5. 打开“故障排除模式”旁边的开关,点击“上传诊断”
6. 将出现“发送诊断”界面
7. 输入您的评论,点击“附上图片”按钮附上您已保存到相册的问题页面截图
8. 点击“发送”
客户端的诊断上传请参见IBKB3512
How to Access Your Reports Using FTP on Windows
Overview:
This tutorial assumes you received reports via email or via FTP that were encrypted with the public key you sent to IBKR. If you need guidance to set up the encrypted statement delivery, please refer to this article, which is a prerequisite to the instructions below.
There are multiple methods to access the IBKR FTP server. FTP clients such as Filezilla can be used or you could as well launch the command ftp ftp2.interactivebrokers.com from the Command Prompt or use the Windows Explorer. In this article, we explain how to realize the connection to the IBKR FTP server using Windows Explorer.
Important Note: You will not be able to connect using your browser.
Once you are connected to the IBKR FTP Server, you will have both read and write access to your folder. The retention policy for the files is 100 days - IBKR will automatically purge files after that.
To access your reports using Windows File Explorer:
1. Open the Windows File Explorer by either pressing Windows Key + E on the keyboard. Alternatively, you can type File Explorer into the Windows search box and click on Open

2. In the File Explorer window, type the FTP address, ftp://ftp2.interactivebrokers.com, into the file path at the top of the window and hit Enter.
.png)
3. A window prompting your for credentials will appear. Enter the FTP username and password IBKR provided you with into the correspondent fields and click Log On.
.png)
4. You now have direct access to your FTP folder. Documents and files contained in your FTP folder can now be decrypted using your PGP key, as described in IBKB4108.
.png)
Common issues and solutions
A. Could not log in to the FTP server with the username and password specified
Ensure the correct login details are being used to connect to the FTP server. The username and password you are entering should match the ones you have received from the Reporting Integration Team.
B. Connection Timed Out
-
Enable the Passive (PASV) mode for FTP connections. press Windows Key + S, type Internet Options and open the panel. Move to the Advanced tab and activate the option Use Passive FTP (for firewall and DSL modem compatibility). The passive mode is more firewall-friendly then the active one, since all the connections are initiated from the Client side. If you are using a specific FTP Client, check its connection settings or advanced settings in order to find and enable the Passive (PASV) mode switch.
-
In case you have an antivirus or a security software installed on your machine, make sure it is not blocking the FTP connection attempt. Normally, security software allows to set up exceptions for specific connections in order to whitelist them.
-
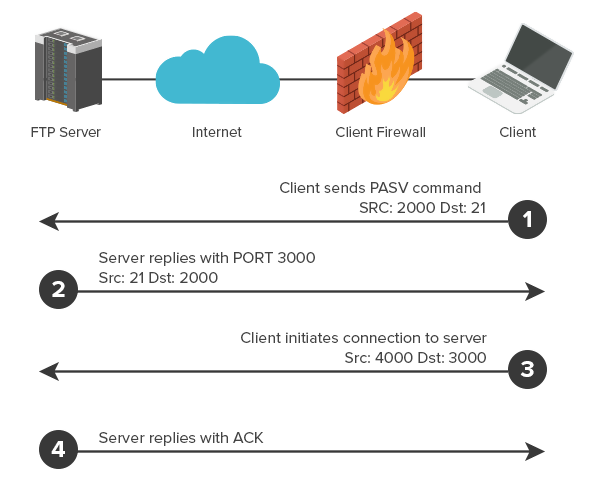
Should the above steps be unable to resolve the issue, ask your network administrator/s to confirm that your firewall allows traffic from/to ftp2.interactivebrokers.com. Note: Your network administrator should consider that every time your FTP Client attempts connecting to our FTP server with Passive mode, it establishes two connections: a command channel (outbound, from random TCP port above 1024 to TCP port 21) and a data channel (outbound, from a random TCP port above 1024 to the TCP port above 1024 which was negotiated through the command channel). Both connections are initiated by the Client side. In the picture below, you can find an example of this connections schema. Please notice that the ports 2000, 3000, 4000 are examples of randomly selected ports and may very well not correspond to the ones used within your specific FTP connection attempt.
References
KB3968 - Generate a key pair using GPG for Windows
KB4205 - Generate a key pair using GPG Suite on macOS
KB4108 - Decrypt your Reports using GPG for Windows
KB4210 - Decrypting Reports using your PGP Key pair on macOS
KB4407 - Generate RSA Key Pair on Windows
KB4580 - How to Access your Reports using FTP on MacOS
KB4409 - How to set up sFTP for using Certificate Authentication on Windows
KB4410 - How to set up sFTP for using Certificate Authentication on macOS
KB4411 - How to backup your public/private Key pair
KB4323 - How to transfer your public/private key pair from one computer to another
KB4409 - How to set up sFTP for using Certificate Authentication on Windows
KB4410 - How to set up sFTP for using Certificate Authentication on macOS
KB4411 - How to backup your public/private Key pair
KB4323 - How to transfer your public/private key pair from one computer to another
How to Upload a Diagnostic Bundle from an IBKR Platform
Overview:
Some support related issues require diagnostics files and logs to be uploaded along with screenshots. The information will help our team to investigate and resolve the issue that you are experiencing.
This article will help you with detailed steps on how to upload diagnostics files and logs from various Interactive Brokers’ trading platforms.
Note: IBKR does not monitor the diagnostic bundle repository throughout the day. Should you spontaneously decide to upload a diagnostic bundle, without being instructed by Interactive Brokers, please inform our Client Services via Message Center ticket or phone call otherwise your error report will go unnoticed.
Please click on one of the links below, according to the platform you are using:
-
IBKR Mobile (Android)
-
IBKR Mobile (iOS)
1. Log in to TWS and try to replicate the issue that you are experiencing
2. Press ‘Help’ at the top left corner and select ‘Upload Diagnostics’. Alternatively, depending on your Operating System, you can use the following keyboard combinations
- For Windows and Linux Operating system: Press Ctrl+Alt+Q
- For Mac: Press Cmd+Option+H
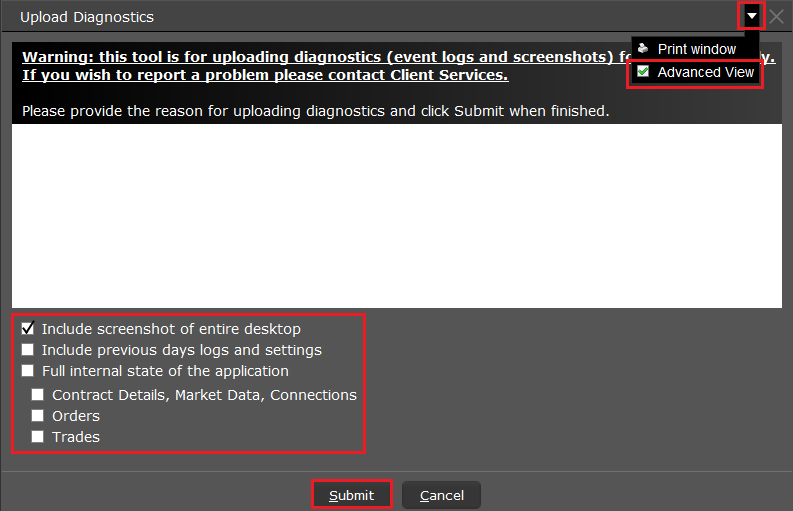
3. The ‘Upload Diagnostics’ window will appear. You may enter the reason for uploading diagnostics in the text box
4. If an Interactive Brokers representative has instructed you to include previous days logs or select specific options when uploading diagnostics, click the dropdown on the right top corner, select ‘Advanced View’ and tick the correspondent checkboxes which will appear on the bottom left part
5. Make sure the checkbox ‘Include screenshot of entire desktop’ is enabled and press ‘Submit’
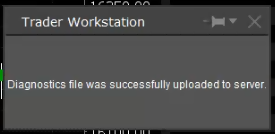
6. Do not perform any action/activity on your computer until you see the below pop-up, confirming that the diagnostics have been successfully uploaded
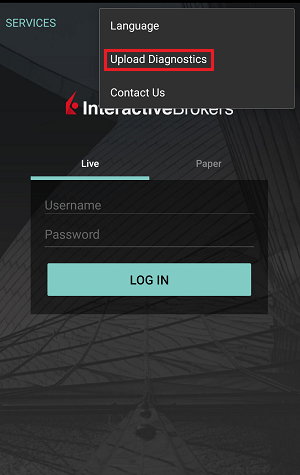
A) If you are at the login Screen:
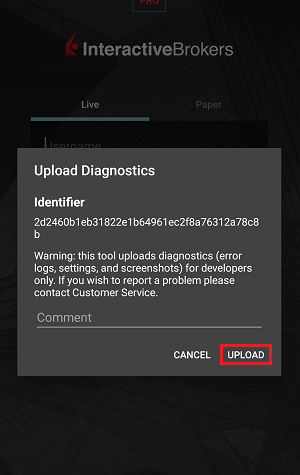
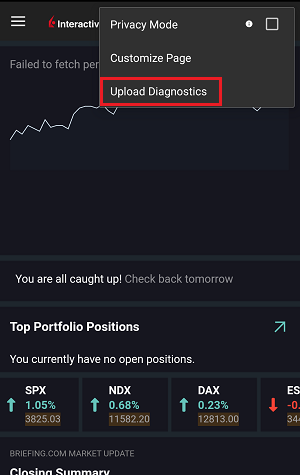
1. Tap the three dots icon in the right top corner and select ‘Upload Diagnostics’
2. Add your username in the comment section and tap ‘Upload’
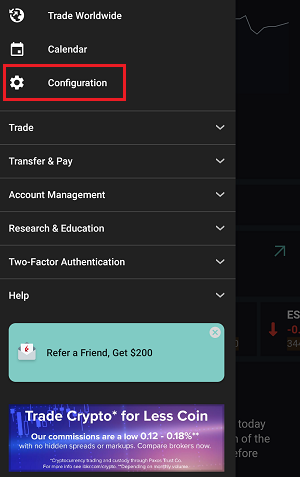
1. Tap the three lines icon in the top left corner to open the menu
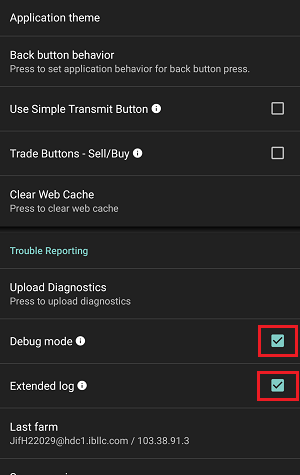
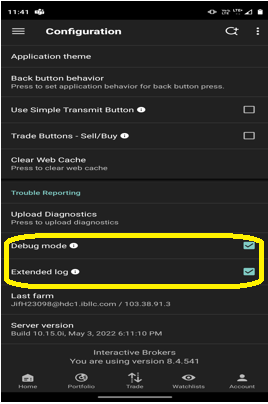
2. Tap ‘Configuration’> ‘Trouble Reporting’> enable the check box next to ‘Debug mode’
3. If requested by an Interactive Brokers representative, enable the check box next to ‘Extended Log’ as well
5. Tap the three dots icon in the top right corner of the screen and select ‘Upload Diagnostics’
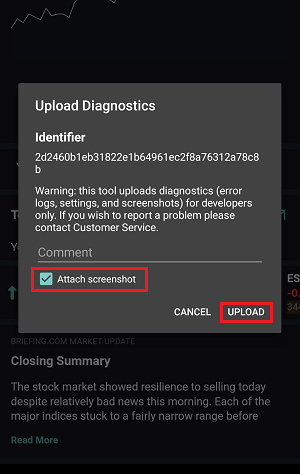
6. Enter your comments in comment section and enable the checkbox next to ‘Attach Screenshot’. Then tap ‘Upload’
A) If you are at the login Screen:
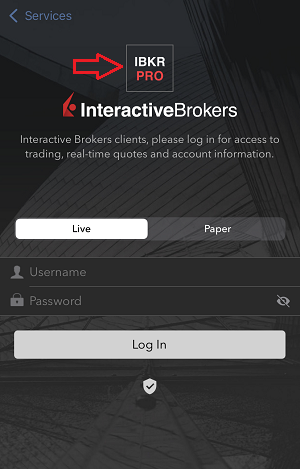
1. Tap five times in a quick sequence on the IBKR logo to open the testing menu
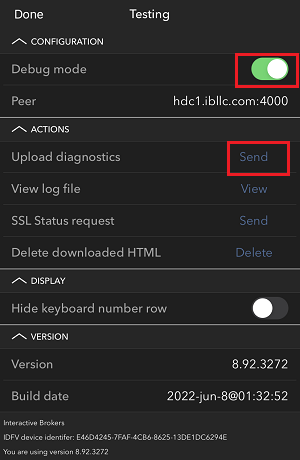
2. Under Configuration, enable the toggle button next to ‘Debug mode’
3. Tap ‘Send’ next to ‘Upload diagnostics’
4. Enter your username in the comments section and tap ‘OK’
1. Capture screenshots displaying the issue you are experiencing directly on the phone (pressing together the physical buttons Power + Volume Up)
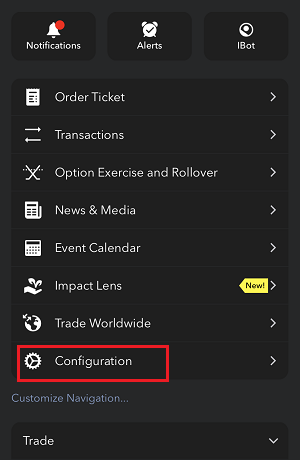
2. Tap the option ‘More’ in the right bottom corner of the screen
3. Tap ‘Configuration’ and expand the section ‘Trouble Reporting’
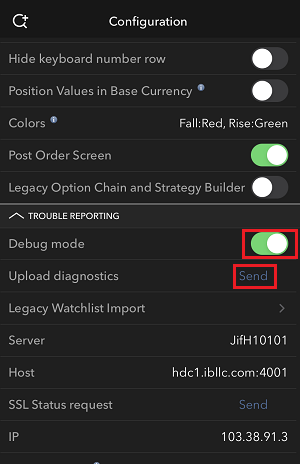
4. Enable the toggle button next to ‘Debug mode’ and, next to ‘Upload diagnostics’, tap ‘Send’
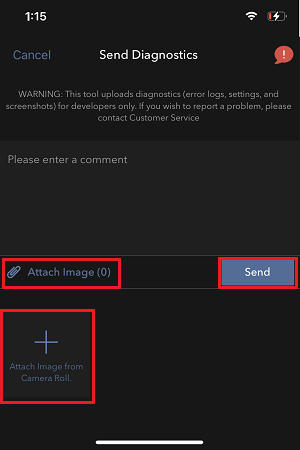
5. The ‘Send Diagnostics’ page will appear. Enter your comments in comment section
6. Tap the ‘Attach Image’ button to attach screenshots of the issue that you have previously saved in your camera roll
7. Tap ‘Send’
1. Log in to the app
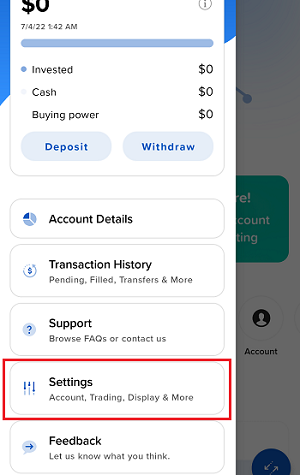
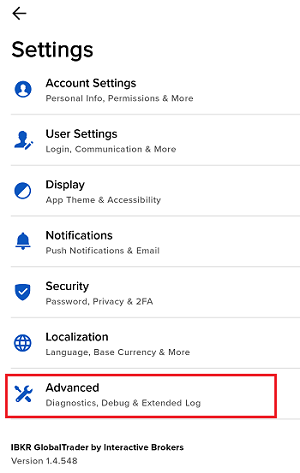
2. Tap the User icon in the top left corner and select ‘Settings’
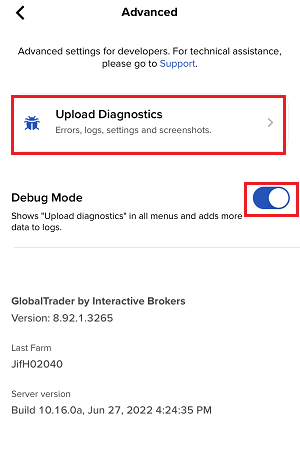
3. Tap the option ‘Advanced’ and enable the toggle button next to ‘Debug mode’
4. If requested by an Interactive Brokers representative, enable as well the toggle button next to ‘Extended Log’
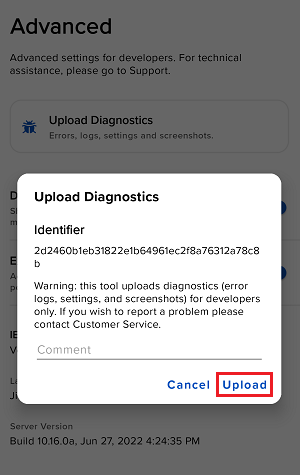
5. You will see an ‘Upload Diagnostics’ pop-up. Enter your comments in the field and tap ‘Upload’
Note: If you need to send us screenshots of IMPACT or IBKR GlobalTrader for Android, you would have to attach them to a Message Center web ticket, as explained in IBKB1071
1. Log in to the app
2. Capture one or more screenshots displaying the issue you are experiencing directly on the phone (pressing the physical buttons Power + Volume Up simultaneously)
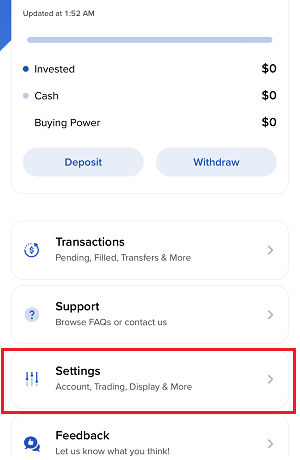
3. Now tap the User icon in the top left corner and select ‘Settings’
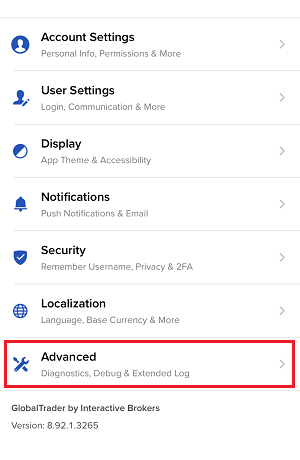
4. Tap ‘Advanced’
5. Enable the toggle button next to ‘Debug mode’ and tap ‘Upload Diagnostics’
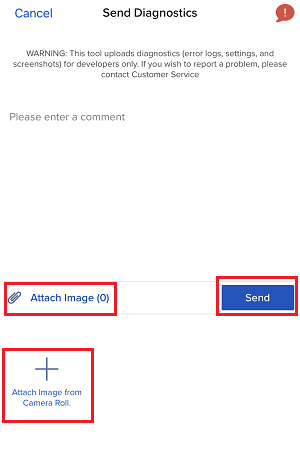
6. The ‘Send Diagnostics’ screen will appear
7. Enter your comments in the field and tap ‘Attach Image’ to attach the screenshot/s you previously saved in your camera roll
8. Tap ‘Send’
A diagnostic trace for Client Portal can be captured following the steps on IBKB3512
如何生成".har"文件
Background:
在解决重大的网站问题时,有时我们的客服团队需要您提供有关您的浏览器的更多信息。我们可能会要求您录制并提供.har文件。该文件包含有关您的浏览器发送及收到的网络请求的更多信息。您的浏览器可在问题发生时记录HTTP/HTPS请求和响应的内容、时间轴及状态,从而生成此类文件。
我们将在本文中解释如何生成.Har文件。请在下方点击您正在使用的浏览器:
1. 打开Google Chrome并前往发生问题的页面。
2. 点击键盘上的 CRTL +SHIFT + I。或者,点击Chrome菜单图标(浏览器窗口右上角的三个垂直点),然后选择 “更多工具” > “开发者工具”
3. “开发者工具”会以停靠面板的形式在Chrome侧面或底部打开。选择 “网络”选项卡(如图1)
图1
.png)
4. 在“开发者工具” 工具栏左上角找到圆形的“录制”按钮并确保它是红色的。 如果它是灰色的,点击一次开始录制或点击 CTRL+E(如图2)
图2

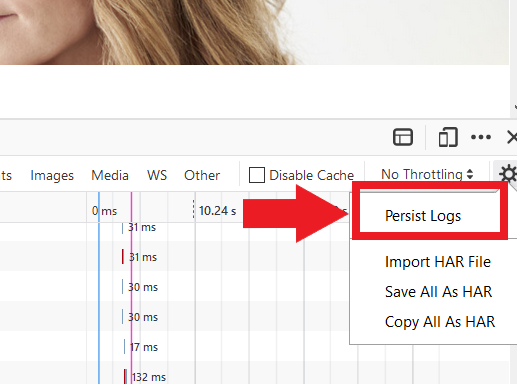
5. 激活 “保留日志”选项框(如图3)
图3
.png)
6. 点击 “清除” 按钮清除已有的日志。“清除” 按钮显示为停止图标,位于 “录制” 按钮的右侧 (如图4)
图4
![]()
7. 再现您遇到的问题并录制网络请求。
8. 当您完成问题再现后,右击已记录的网络请求列表上的任意地方,选择 “以HAR格式保存所有内容”, 并将文件保存在您计算机上任意您想保存的位置 (如桌面)。
9. 在IBKR客户端中, 前往消息中心并创建 一个新的网络咨询单(或使用已有的咨询单)
10. 在网络咨询单内,将之前生成的.har文件作为附件添加。 如果IBKR客服向您提供过咨询单号或客服代表的名字,请在咨询单中加上这些信息。
11. 提交网络咨询单
1. 打开Firefox并前往发生问题的页面
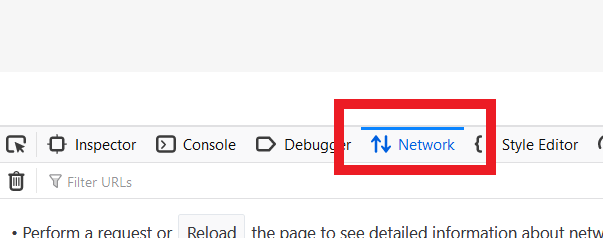
2. 点击键盘上发 F12 。或者,点击Firefox菜单按钮(浏览器窗口右上角的三条平行线),然后选择 “Web 开发者工具”> “网络”
3. 开发者网络工具会以停靠面板的形式在Firefox底部打开。选择 “网络”选项卡(如图5)
图5
4. 激活 “保存日志”选项框(图6)
图6
5. 再现您遇到的问题。系统会自动开始录制网络请求。
6. 再现问题后,右击已录制的请求列表并选择 “所有内容另存为HAR”
7. 将文件保存在计算机上的任意位置(如桌面)
8. 在IBKR客户端中, 前往消息中心并创建 一个新的网络咨询单(或使用已有的咨询单)
9. 在网络咨询单内,将之前生成的.har文件作为附件添加。 如果IBKR客服向您提供过咨询单号或客服代表的名字,请在咨询单中加上这些信息。
10. 提交网络咨询单
1. 打开Edge并前往发生问题的页面。
2. 点击键盘上发 F12 。或者点击Edge菜单图标(浏览器窗口右上角的三个平行点),然后选择 “更多工具” > “开发者工具”
3. 点击 “网络” 图标(如图10)
图10
.png)
4. 再现您遇到的问题并录制网络请求。
5. 完成后,点击软盘图标 (导出为HAR) 或按CTRL+S(如图11)
图11
6. 为文件命名并将文件保存在您计算机上的任意位置(如桌面)。然后点击 “保存” 按钮
7. 在IBKR客户端中,前往消息中心并创建一个新的网络咨询单(或使用已有的咨询单)
8. 在网络咨询单内,将之前生成的.har文件作为附件添加。 如果IBKR客服向您提供过咨询单号或客服代表的名字,请在咨询单中加上这些信息。
9. 提交网络咨询单
注:在生成HAR文件前,请确保您可在Safari中看到 “开发者” 菜单。如果您看不到这个菜单, 请点击Safari, 浏览器,选择 “偏好设置”,前往 “高级” 选项卡并激活菜单栏 “显示开发” 菜单旁的选项框。
1. 打开 “开发” 菜单并选择 “显示网页检查器” 或点击CMD+ALT+I
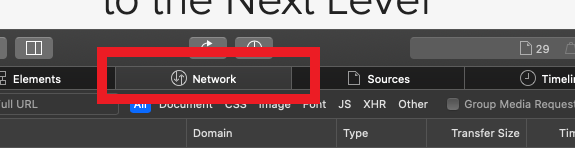
2. 点击“网络” 选项卡 (如图12)
图12
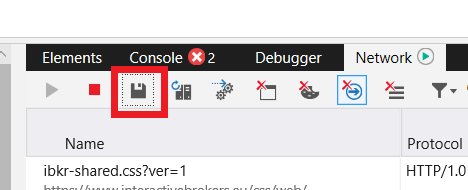
3. 激活 “保留日志”选项卡(图13)
图13
.png)
4. 点击 “导出” 图标(或按 CMD+S)为文件命名并将其保存在计算机上的任意位位置(如桌面)并保存.har文件
5. 在IBKR客户端中,前往消息中心并创建一个新的网络咨询单(或使用已有的咨询单)
6. 在网络咨询单内,将之前生成的.har文件作为附件添加。 如果IBKR客服向您提供过咨询单号或客服代表的名字,请在咨询单中加上这些信息。
7. 提交网络咨询单
IBKR支持的加密货币产品
Overview:
下方列出了IBKR支持的部分加密货币产品*。 如果没有看到您想找的产品,您可以通过我们网站上的“合约搜索工具”搜索IBKR合约数据库 。点击“支持”菜单然后选择账户类型(个人账户或机构账户),在这里您可以输入产品名称或代码进行简单搜索、或增加搜索条件进行高级搜索、或按产品类型搜索。
加密货币
- BTC- 比特币
- ETH- 以太币
- LTC- 莱特币
- BCH- 比特币现金
股票/ETF
美国
- GBTC (PINK)- Grayscale Bitcoin Investment Trust
- BCHG (PINK)- Grayscale Bitcoin Cash Trust
- ETCG (PINK)- Grayscale Ethereum Classic Trust
- ETHE (PINK)- Grayscale Ethereum Trust
- GDLC (PINK)- Grayscale Digital Large Cap Fund
- LTCN (PINK)- Grayscale Litecoin Trust
非美国
- BITCOINXB (SFB)- Bitcoin Tracker One
- COINETH (SFB)- XBT Provider Ethereum
- COINETHE (SFB)- XBT Provider Ethereum
指数
- NYXBT (NYSE)- NYSE Bitcoin Index
- GXBT (Cboe)- The Gemini Bitcoin Trace Price Index(自2019年6月起无新合约可供交易)
- BRR (CME)- CME Bitcoin Reference Rate Index
- BRTI (CME)- CME Bitcoin Real Time Index
期货
- GXBT (Cboe/CFE)- The Gemini Bitcoin Trace Price Futures(自2019年6月起无新合约可供交易)
- BRR (CME)- CME Bitcoin Reference Rate Futures
- ETHUSDRR (CME) – CME Ether Dollar Reference Rate Futures
- BAKKT (ICECRYPTO)- Bakkt Bitcoin Futures
*对于某些行政辖区的IBKR客户,上方产品中可能有部分或全部不适用。
返回目录:IBKR的比特币和其它加密货币产品
IBKR的比特币和其它加密货币产品
IBKR支持的加密货币产品
https://ibkr.info/zh-hans/article/3060
加密货币产品市场数据
https://ibkr.info/zh-hans/article/3061
通过IBKR交易比特币期货
https://ibkr.info/zh-hans/article/3049
比特币期货产品页面
https://www.interactivebrokers.com/cn/index.php?f=29308
IBKR保证金要求
https://www.interactivebrokers.com/cn/index.php?f=27149
如何用手机向IBKR发送文件
Overview:
即使您一时无法扫描文件,盈透证券也支持您给我们发送文件副本。您可以用手机将所需文件拍下来。
下方介绍了在不同手机操作系统下如何拍照并将照片通过电子邮件发送给盈透证券的详细步骤:
如果您已经知道如何拍照并通过电子邮件发送图片,请点击此处——电子邮件应该发送到哪里以及邮件主题应该写什么。
iOS
1. 从手机屏幕的底部向上滑,然后点击相机图标。
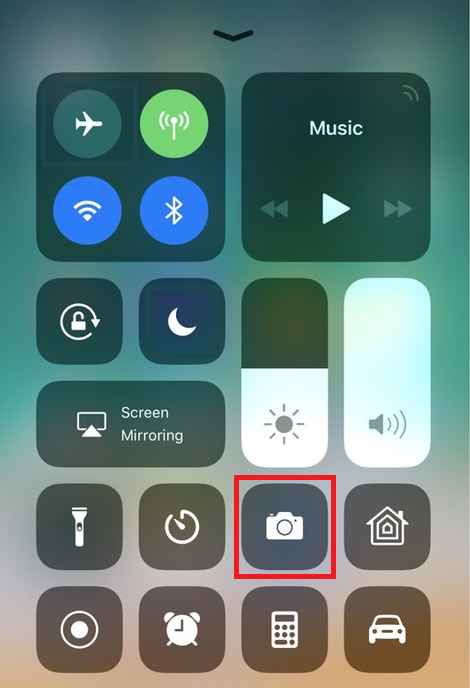
如果没找到相机图标,您可以从iPhone主屏幕点击相机应用程序图标。
通常情况下打开的应该是后置摄像头。如果打开的是前置摄像头,请点击摄像头切换按钮。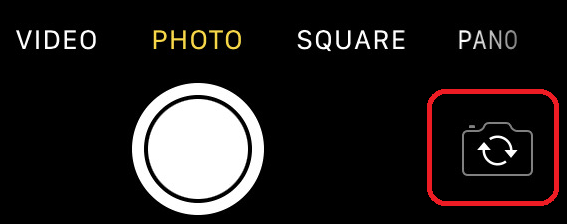
2. 将手机移到文件上方,镜头对准需要的位置或页面。

3. 确保光线均匀、充足,避免因为拿手机的姿势在文件上投下任何阴影。手机拿稳,防止抖动。点击拍照按钮拍照。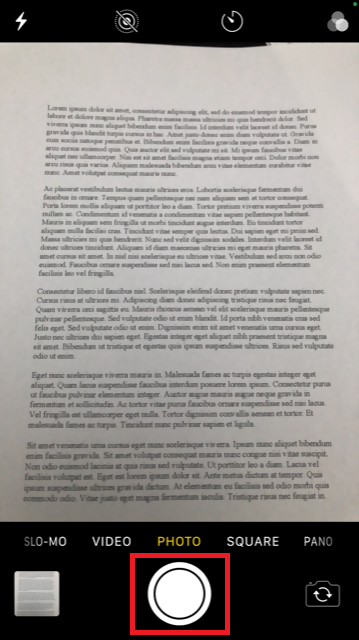
4. 点击左下角的缩略图查看您刚刚拍的照片。
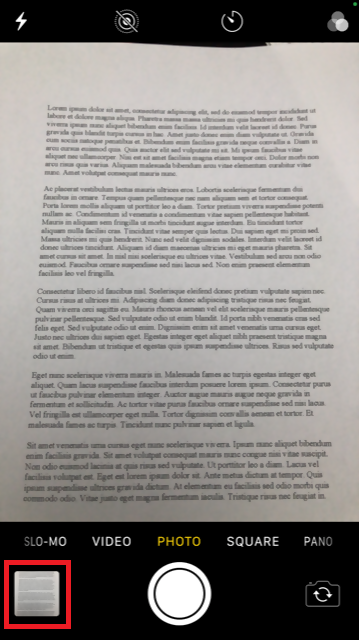
5. 确保照片清晰,文件字迹清楚。您可以用两个手指在图片上划开来放大图片查看细节。

如果图片质量或亮度不好,请重复上述步骤重新拍照。
6. 点击屏幕左下角的分享图标。

7. 点击电子邮件图标。
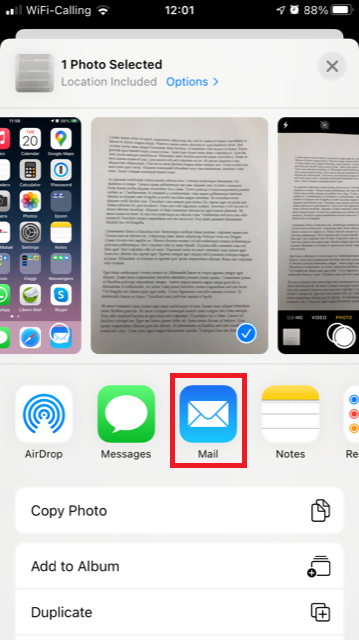
注意:要发送电子邮件,您的手机必须有相应配置。如果不知道如何配置,请联系您的电子邮件供应商。
8. 请参见此处了解如何填写电子邮件收件人(To:)和主题(Subject:)。填写完毕后,点击右上方的向上箭头发送邮件。

安卓
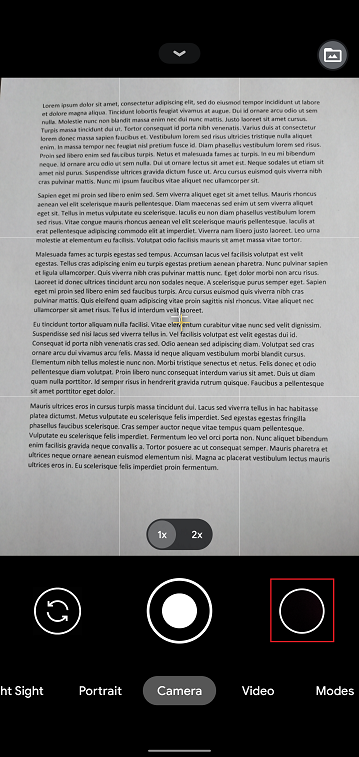
1. 打开应用程序列表,启动相机应用程序。或者直接从手机主屏幕启动相机。取决于您的手机型号、制造商或设置,相机应用程序的叫法可能有所不同。
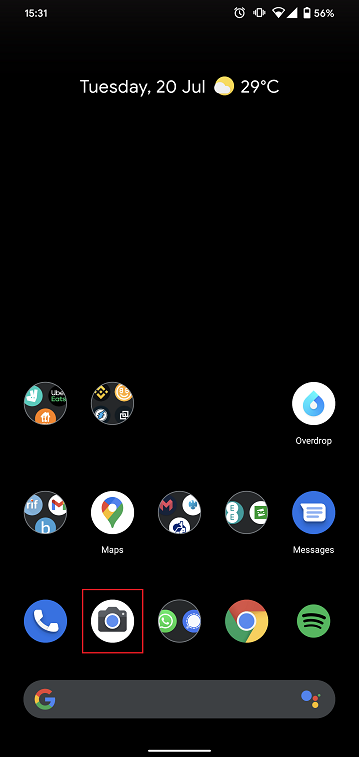
通常情况下打开的应该是后置摄像头。如果打开的是前置摄像头,请点击摄像头切换按钮。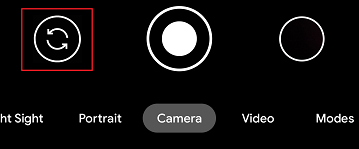
2. 将手机移到文件上方,镜头对准需要的位置或页面。
3. 确保光线均匀、充足,避免因为拿手机的姿势在文件上投下任何阴影。手机拿稳,防止抖动。点击拍照按钮拍照。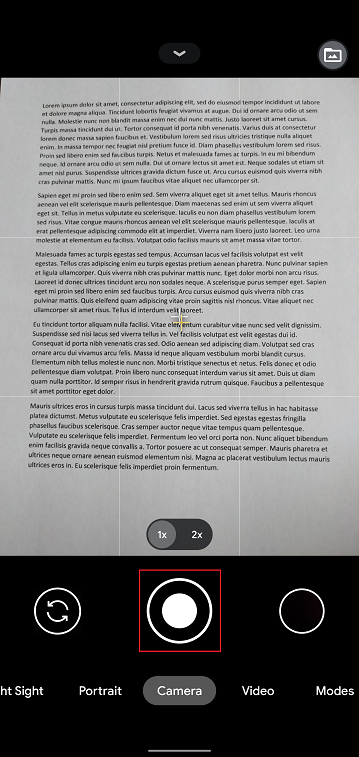
4. 确保照片清晰,文件字迹清楚。您可以用两个手指在图片上划开来放大图片查看细节。
如果图片质量或亮度不好,请重复上述步骤重新拍照。
5. 点击屏幕右下角的空白圈圈图标。
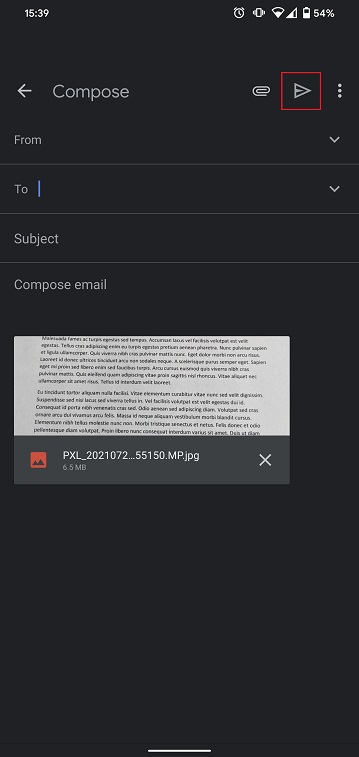
6. 点击屏幕左下角的分享图标。

7. 在显示的分享菜单中点击手机上安装好的电子邮件客户端的图标。下图显示的是Gmail,但手机设置不同,电子邮件程序也会不同。
.png)
注意:要发送电子邮件,您的手机必须有相应配置。如果不知道如何配置,请联系您的电子邮件供应商。
8. 请参见此处了解如何填写电子邮件收件人(To:)和主题(Subject:)。填写完毕后,点击右上方的飞机图标发送邮件。
电子邮件应该发送到哪里以及邮件主题应该写什么
应按照以下说明发送邮件:
1. 在收件人(To:)字段,输入:
- newaccounts@interactivebrokers.com(如果您是非欧洲国家居民)
- newaccounts.uk@interactivebrokers.co.uk(如果您是欧洲国家居民)
2. 主题(Subject:)字段必须注明所有以下信息:
- 您的账户号码(通常格式为Uxxxxxxx,其中x是数字)或您的用户名
- 发送文件的目的。请采用以下惯例:
- 居住地证明请写PoRes
- 身份证明请写PID
如何向已激活的移动IBKR验证程序(IB Key)添加使用者 - iOS版
Overview:
本文阐述了如何在iOS版移动IBKR的验证部分添加使用者。
要求:
- iOS安卓设备上必须安装了移动IBKR应用程序并且已激活移动IBKR验证。
- 有关如何在iOS设备上安装并激活移动IBKR验证程序(IB Key)的详细信息,请参见KB2278。
说明:
1. 在iOS设备上打开移动IBKR应用程序。
1.a. 如果打开时出现的是登录界面(图1),点击左上角的服务(红色箭头),然后继续第2步。
1.b. 如果打开时出现的是主页、投资组合、自选列表或其它类似界面,点击右下角的更多(图2)。然后点击双因素验证(图3),再点击添加使用者(图4),接着进入第3步。
图 1. 图 2. 图 3.
(1).jpeg)
.jpeg)
.jpeg)
图 4.
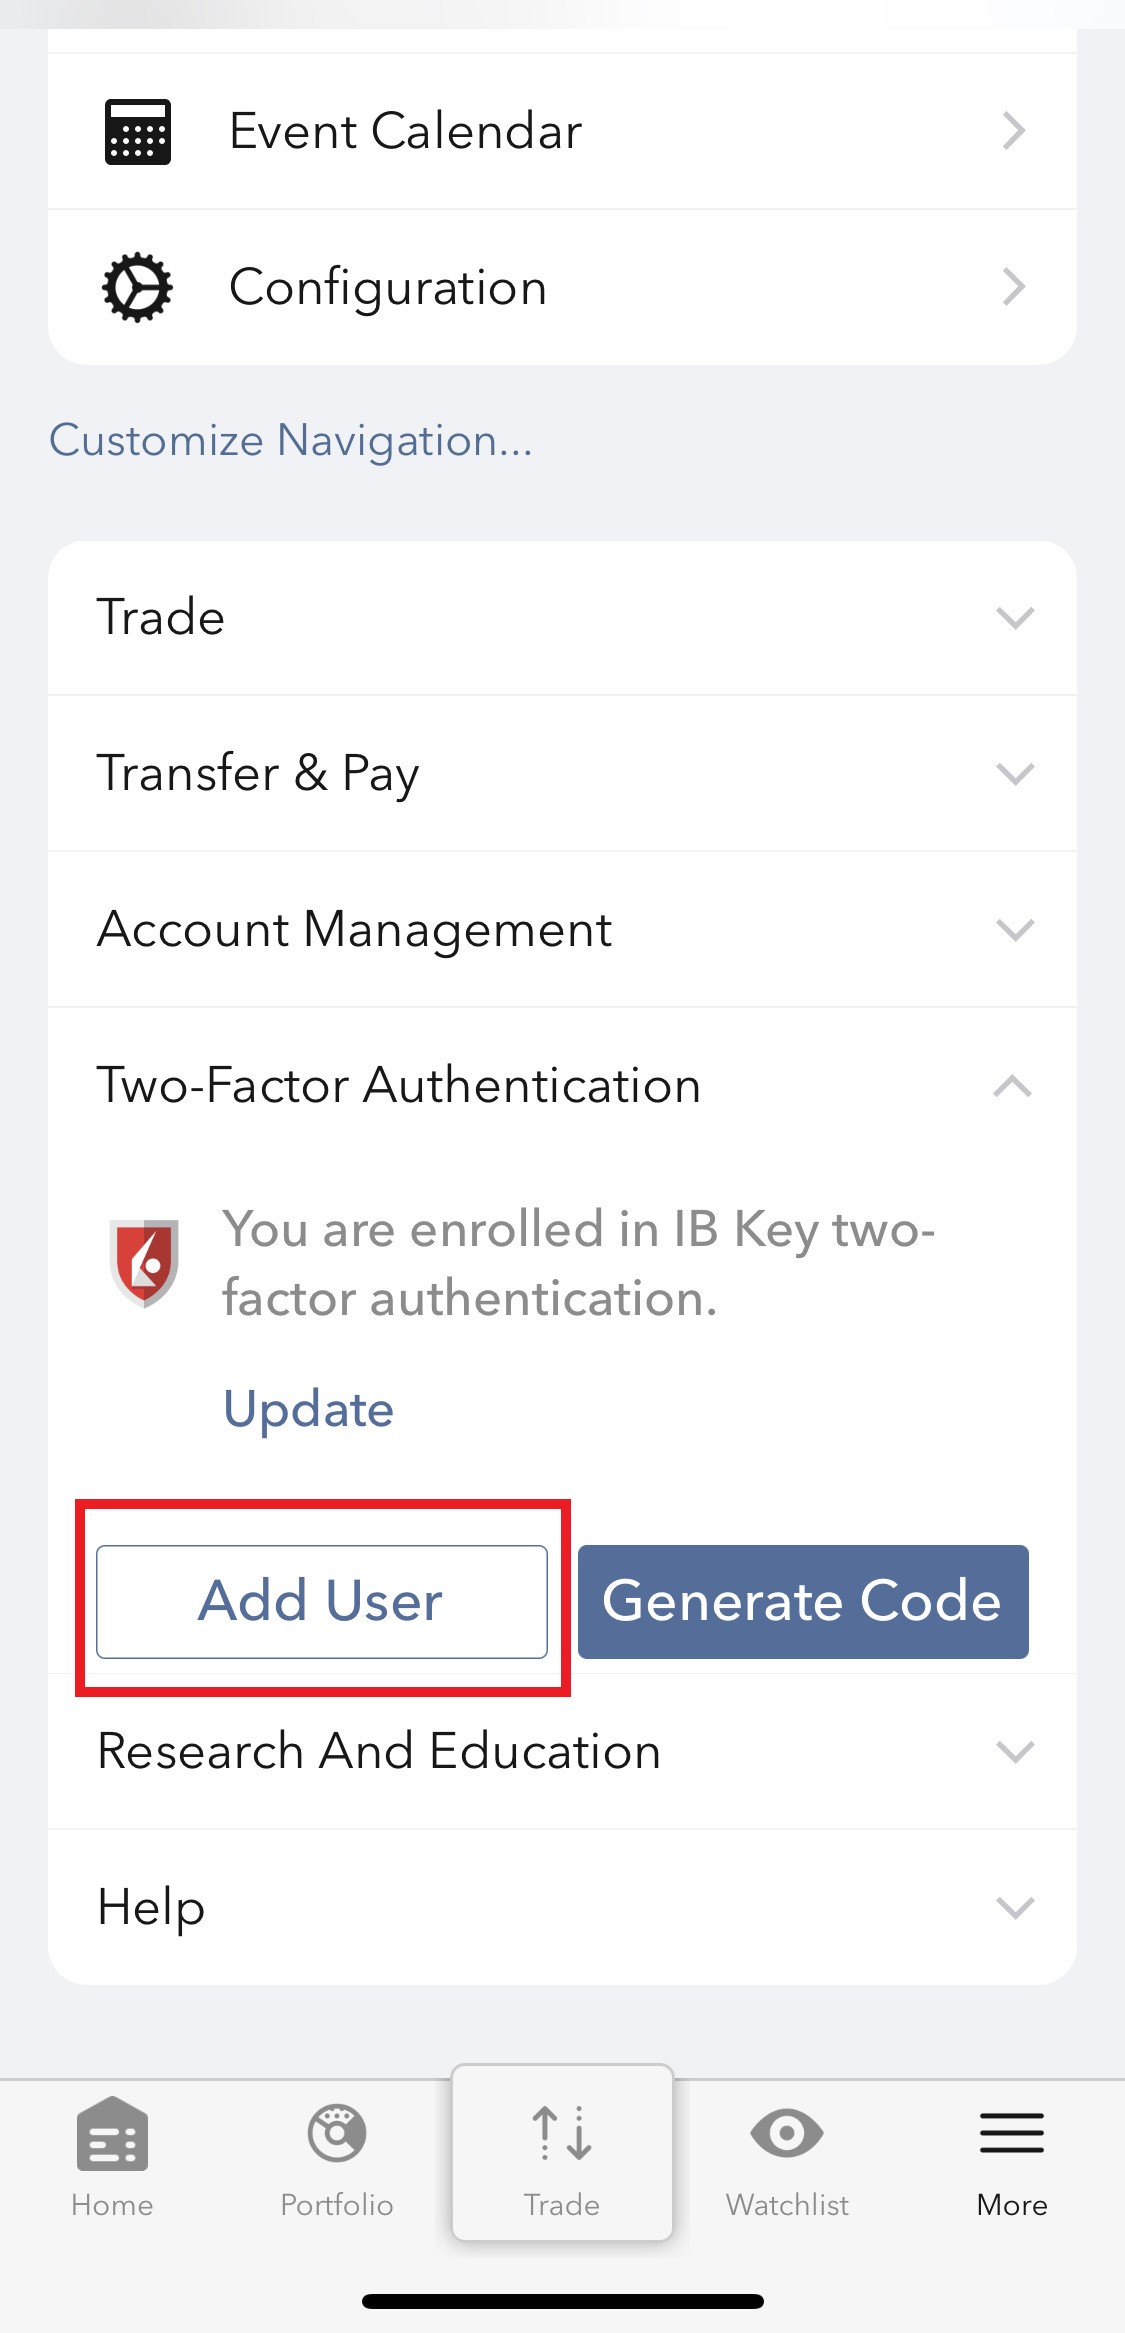
图 5. 图 6.
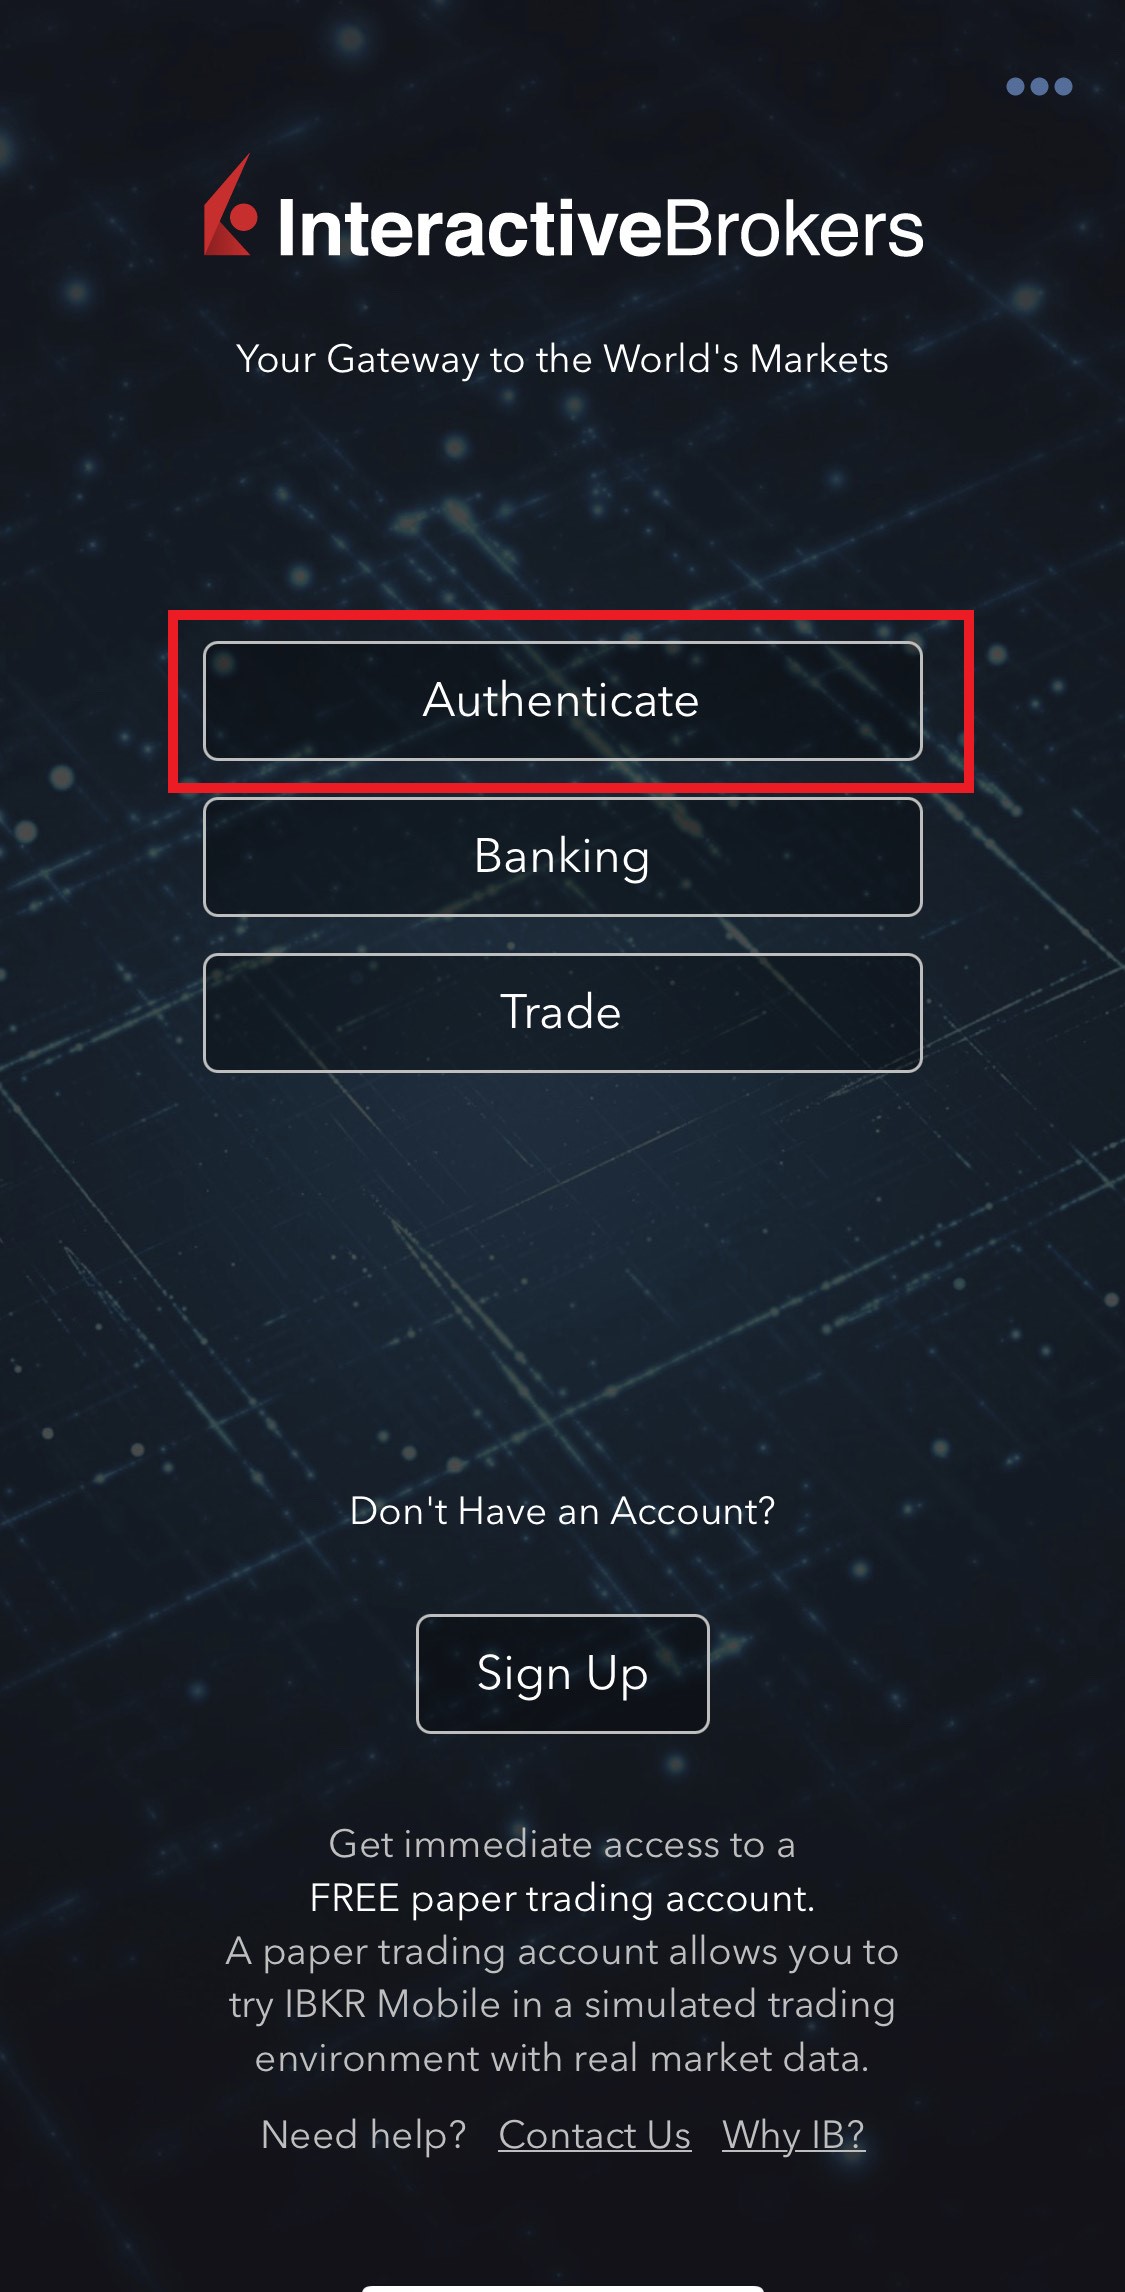

图 7.

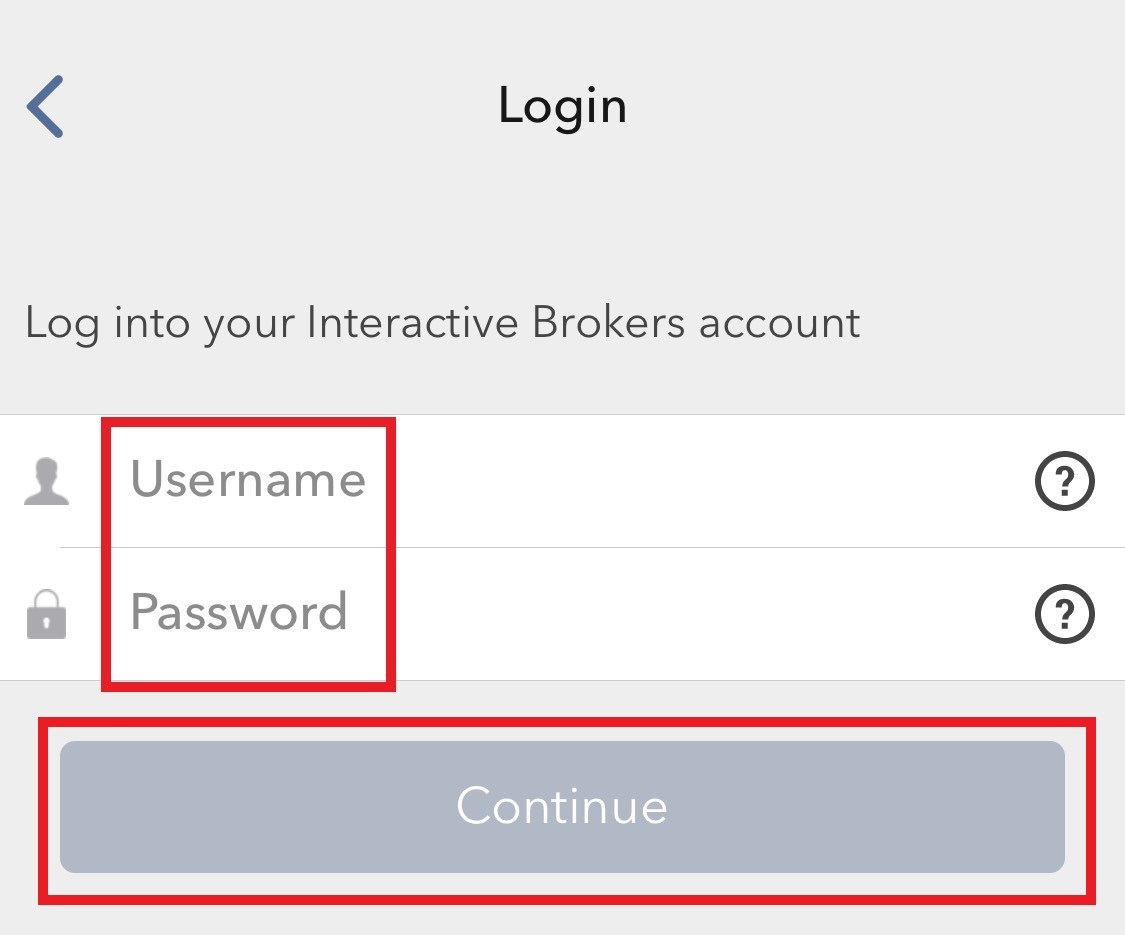
3. 输入您的用户名和密码,然后点击继续(图8)。
图 8.
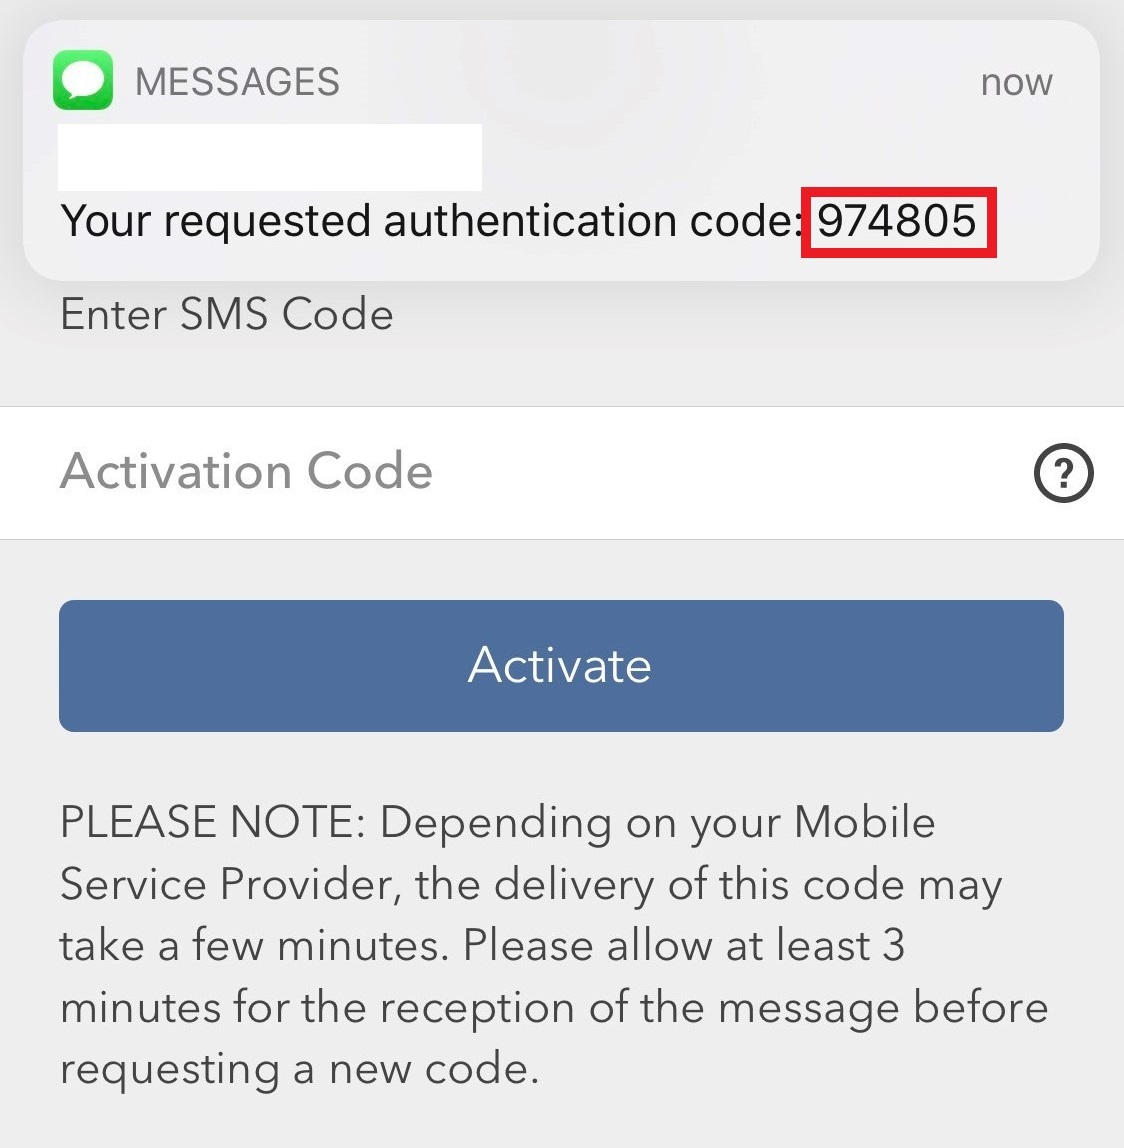
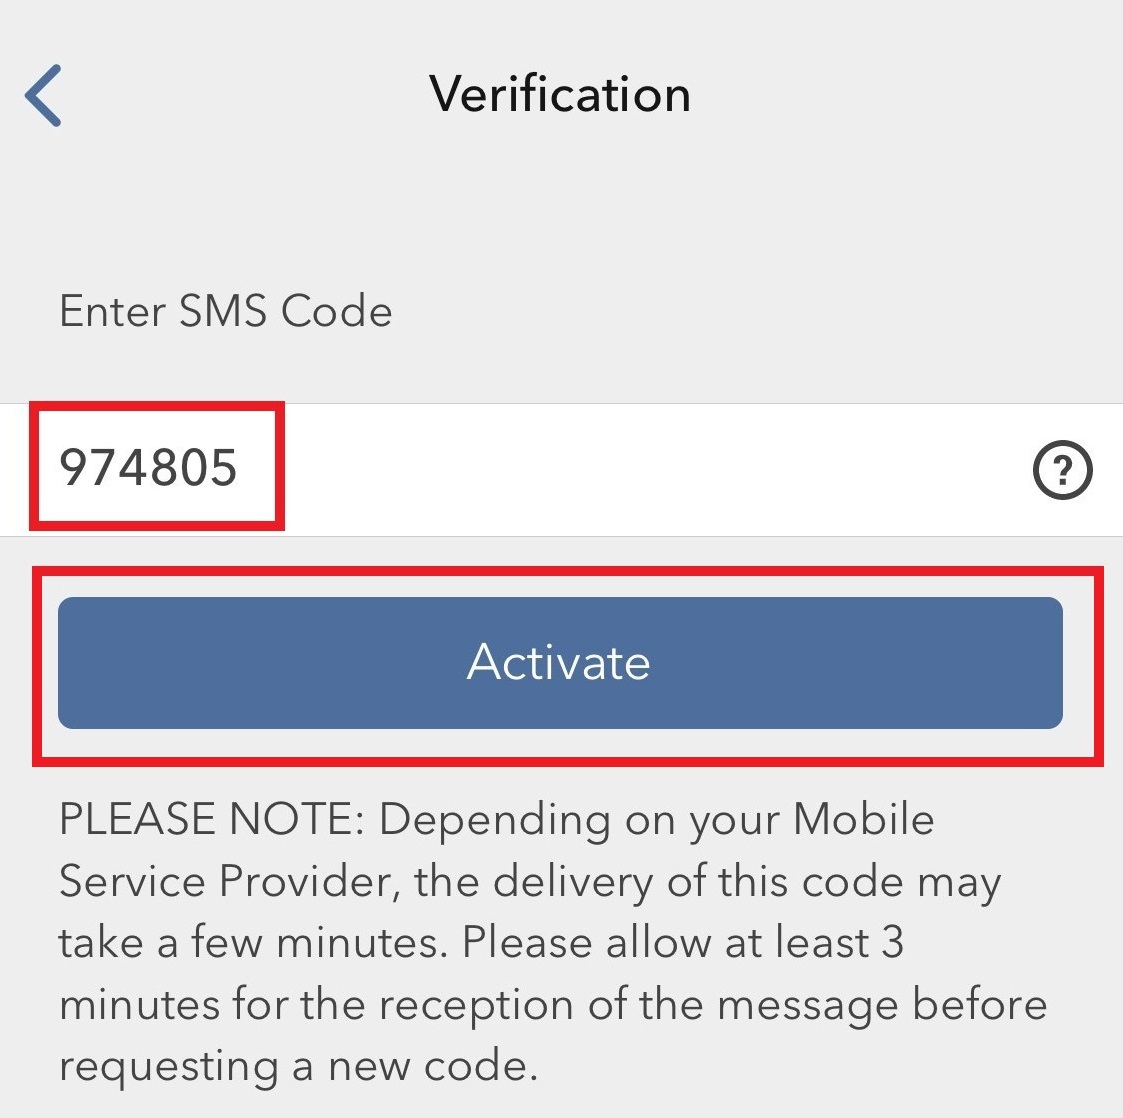
4. 验证码将通过短信发送到您账户登记的手机号码(图9)。将验证码输入到激活码框内,点击激活(图10)。
图 9. 图 10.
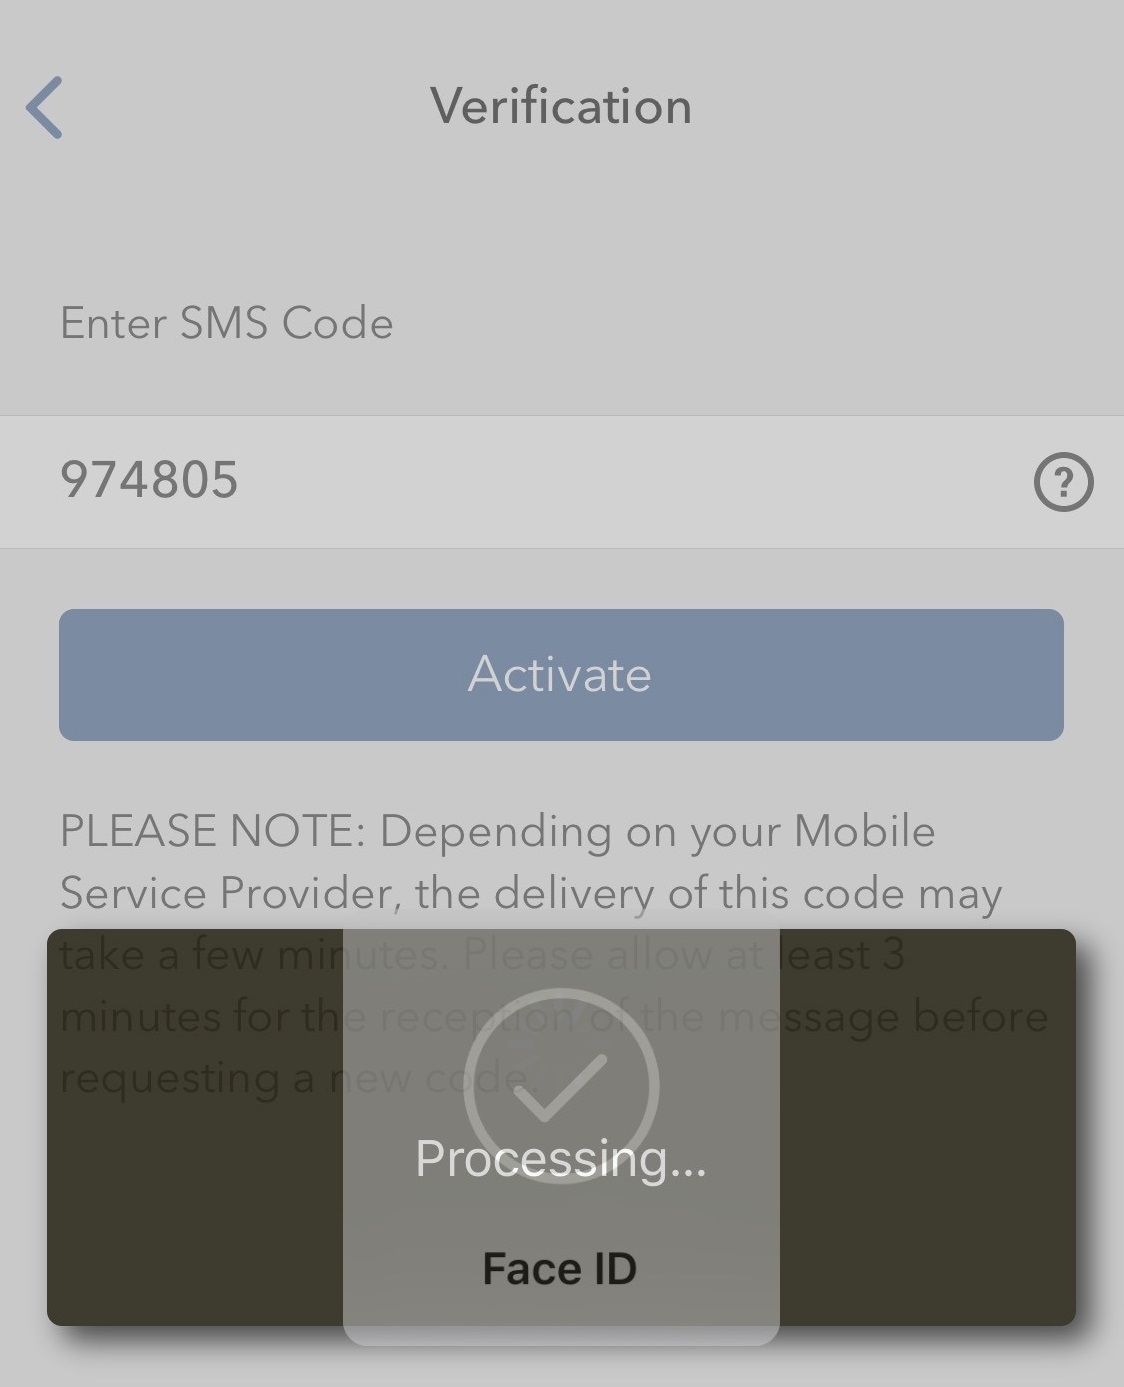
5. 取决于您手机的安全设置,系统会提示您使用锁屏密码、Touch ID或Face ID(图11)。
图 11.
6. 如果激活成功,将显示确认界面。最后,点击完成来结束(图12)。
图 12.
.jpeg)