How to check and solve connectivity issues affecting the Trader Workstation (TWS)
Background:
The Trader Workstation (TWS) software needs to connect to our gateways and market data servers in order to work properly. Connectivity issues affecting your local network or your Internet Service Provider network may negatively affect the TWS functionality. In this article we will indicate how to test your connectivity using an automated connectivity test web page.
How to test the connectivity using the automated "IB Connectivity Test" web page?
1) Launch the Firefox browser and open this link with that browser: http://www.interactivebrokers.com/cgi-bin/conn_test.pl
Note: due to browser specific constraints, the above connectivity test link will only produce consistent results on the Mozilla Firefox browser. If you do not have Firefox, you can download and install it form here.
2) Please wait until all the tests have been completed and results have been displayed. If you see "Success" as outcome for all tests, your connectivity to IB Servers is reliable at the present moment. No additional connectivity troubleshooting or configuration should be needed.
3) If you see "Fail" as outcome for one or more test/s, please click on the link "Fail" itself in order to display the "IB Network Troubleshooting Guide". That section will help you conduct some manual tests to identify the cause of the failure.
Note for Corporative environments and Proxy server users: the automated "Connectivity Test" page may return misleading results in case your machine is accessing the Internet through a Proxy server. This usually happens if you are connected to a company network. If this is your case, we kindly ask you to contact your Network Administrator or your IT Team and ask them to perform a manual connectivity tests towards the destination servers indicated in the table on the top of the IB automated "Connectivity Test" web page itself. The manual connectivity test should be conducted using destination TCP ports 4000 and 4001. Should they prefer to have the server list in another format or should they need to set up the firewall / IP Management rules, you can forward them this page.
Добро пожаловать Interactive Brokers
Overview:
Теперь когда Ваш счет одобрен и профинансирован, Вы можете приступить к торговле. Нижеприведенная информация поможет Вам
как новому клиенту Interactive Brokers.
- Ваши деньги
- Настройте свой счет для торговли
- Как торговать
- Торгуйте по всему миру
- Пять вспомогательных инструментов при торговле в IB
1. Ваши деньги
Общая информация о депозитах и выводе средств. Все операции производятся через Ваш защищенный Личный кабинет ("Управление счетом")
Депозиты
Сначала Вам следует создать уведомление о депозите, перейдя в Управление счетом > Финансирование > Перевод средств > Тип транзакции: "Депозит" (Как создать уведомление о депозите). Следующий шаг - запросить у своего банка безналичный перевод (wire) с использованием реквизитов, указанных в Вашем уведомлении о депозите.
Вывод средств
Создайте инструкцию на вывод, перейдя в Управление счетом > Финансирование > Перевод средств > Тип транзакции: "Изъятие средств" (Как создать инструкцию на вывод средств)
Если сумма в инструкции превысит лимиты изъятия, то вывод средств будет считаться исключительным и потребует сопоставления имеющихся у IB данных с информацией владельца банковского счета-получателя. Если банковский счет уже был использован ранее для депозита, то вывод будет осуществлен; в ином случае Вы будете должны связаться со службой поддержки и представить необходимые документы.
Диагностика ошибок
Депозит: Банк отправил деньги, но они не были зачислены на мой счет в IB. Возможные причины:
а) Перевод средств занимает 1-4 рабочих дня
б) Отсутствует уведомление о депозите. Вам следует создать его в "Управлении счетом" и отправить тикет в службу поддержки
в) Отсутствуют необходимые данные. Ваше имя или номер счета в IB не включены в детали перевода. Вам нужно связаться со своим банком и сообщить о требующихся поправках
г) Для ACH-переводов, инициированных IB, действует ограничение суммой 100 тыс. USD каждые 7 рабочих дней. Если Вы открыли счет "Маржевый портфель", начальный депозит которого составляет 110 тыс., то для сокращения времени ожидания перед началом торговли Вам подойдет безналичный wire-перевод. В случае выбора ACH у Вас два возможных выхода: ждать почти 2 недели или временно изменить тип счета на "RegT".
Вывод: Я запросил вывод средств, но они не были зачислены на мой банковский счет. Возможные причины:
а) Перевод средств занимает 1-4 рабочих дня
б) Запрос отклонен. Максимальная сумма вывода превышена. Проверьте свободный остаток на своем счете. Имейте в виду, что, согласно регулятивным требованиям, на депозиты распространяется 3-дневный период удержания, прежде чем они снова смогут быть изъяты.
в) Ваш банк вернул средства. Причиной тому может быть несовпадение имени, связанного с отправляющим и получающим банковскими счетами.
2. Настройте свой счет для торговли
Разница между денежным и маржевым счетом: если Вы выбрали заявку FastTrack, то по умолчанию тип Вашего счета - денежный с разрешением на акции США. Если Вы хотите торговать с маржей и кредитным плечом, то прочтите как сменить тип счета на "Маржевый RegT"
Торговые разрешения
Для возможности торговать определенным классом активов в какой-либо стране Вам необходимо получить разрешение на него в Вашем "Управлении счетом". Обращаем внимание, что торговые разрешения бесплатны. Вас могут попросить подписать уведомления местных надзорных органов о риске. Как запросить торговые разрешения
Рыночные данные
Если Вы нуждаетесь в "живых" рыночных данных по конкретному продукту/бирже, то Вам следует подписаться на соответствующий информационный пакет, оплата за который взимается биржей. Как подписаться на рыночные данные
Программа-ассистент поможет Вам выбрать подходящий пакет данных. Посмотрите видео о том, как это работает.
Клиентам также предлагаются бесплатные запаздывающие рыночные данные, активируемые кнопкой "Бесплатные данные с задержкой" в строке тикера без подписки.
Счета консультантов
Прочтите руководство "Начало работы консультантом". В нем Вы узнаете, как создать дополнительных пользователей на Вашем счете консультанта, дать им права и многое другое.
3. Как торговать
Университет трейдинга - это основное место, которое научит Вас пользоваться нашими платформами. В нем Вы найдете вебинары (транслируемые в прямом эфире и записанные на 10 языках), обзоры и документацию наших программ.
Trader Workstation (TWS)
Трейдеры, нуждающиеся в более комплексной платформе, могут воспользоваться нашей программой Trader Workstation (TWS), которая повысит Вашу скорость торговли и ее эффективность при помощи простого в использовании табличного интерфейса, поддержки более 60-ти типов ордеров, специализированных торговых инструментов и мониторинга состояния и активности счета в реальном времени. Испытайте два варианта
Mosaic TWS: интуитивный интерфейс, быстрый доступ к торговле, простое управление ордерами, списки наблюдения, графики или
Классический TWS: расширенное управление ордерами для трейдеров, которым нужны продвинутые инструменты и алгоритмы.
Описание и общая информация / Краткое руководство / Руководство пользователя
Интерактивные обзоры: Основы TWS / Настройка TWS / Mosaic TWS
Как разместить сделку: Классический TWS (видео) / Mosaiс (видео)
Торговые инструменты: Описание и общая информация / Руководство
Требования: Как установить Java в Windows / Как установить Java на MAC / Порты 4000 и 4001 должны быть открыты
Войти в TWS / Скачать TWS
WebTrader
Трейдеры, предпочитающие простой и незагроможденный интерфейс, могут использовать WebTrader на базе HTML, который упрощает просмотр рыночных данных, отправку ордеров и отслеживание состояния счета и сделок. Доступ к WebTrader возможен через любой браузер
Краткое руководство / Руководство пользователя WebTrader
Введение: WebTrader (видео)
Как разместить сделку: WebTrader (видео)
Войти в WebTrader
MobileTrader
Наши мобильные приложения позволяют трейдерам торговать со своих счетов в IB на ходу. mobileTWS для iOS и mobileTWS для BlackBerry были специально разработаны для этих популярных моделей телефонов, в то время как стандартный MobileTrader поддерживает большинство остальных смартфонов.
Описание и общая информация
Типы ордеров Список и описание доступных типов ордеров / Видео / Обзор / Руководство
Тренировочная торговля (Paper Trading) Описание и общая информация / Как открыть тренировочный счет
Создав тренировочную учетную запись, Вы сможете просматривать рыночные данные со своего настоящего счета: Управление счетом > Параметры > Настройки > Тренировочная торговля
4. Торгуйте по всему миру
Счета IB - мультивалютные. На Вашем счете может храниться несколько валют одновременно, что позволит Вам торговать различными продуктами по всему миру с единого счета.
Базовая валюта
В Вашей базовой валюте будут составляться отчеты и рассчитываться маржинальные требования. Она устанавливается при открытии счета и может быть в любой момент изменена Вами в "Управлении счетом".
Мы не производим автоматическую конверсию валют в Вашу базовую
Пользователь должен осуществлять конверсию валют вручную. В данном видео объясняется, как это сделать.
Есть два варианта для открытия позиции в валюте, отсутствующей на Вашем счете:
а) Конверсия валют.
б) Маржинальный IB (недоступно для денежных счетов).
См. урок о механизме зарубежной сделке.
5. Пять вспомогательный инструментов при торговле в IB
1. Поиск контрактов
Здесь Вы сможете найти все наши продукты, символы и их характеристики.
2. База знаний IB
"База знаний" - это хранилище словарных терминов, советов по диагностике и руководств, предназначенных помочь клиентам IB в управлении их счетов. Просто введите интересующую Вас тему в строку поиска, и Вы найдете ответ.
3. Управление счетом
В то время, как наши платформы открывают двери на рынки, "Управление счетом" дает Вам доступ к Вашему счету IB. Используйте "Управление счетом" для выполнения таких задач, как депозит или вывод средств, просмотр выписок, настройка подписок на рыночные данные/новости, изменение торговых разрешений и проверка или корректировка Вашей личной информации.
Войти в "Управление счетом" / Краткое руководство / Руководство пользователя
4. Система безопасного входа
Чтобы обеспечить Вас наивысшим уровнем онлайн-безопасности, Interactive Brokers разработали "Систему безопасного входа". Она основывается на принципе двухфакторной аутентификации (SLS) Вашей личности в момент входа и требует двух типов идентификаторов: 1) выбранный Вами (комбинация Вашего пароля и имени пользователя); и 2) доступный только Вам (генерирование случайного одноразового кода Вашим устройством безопасности). Поскольку для входа в счет будет необходимо не только знать имя пользователя/пароль, но и физически обладать устройством безопасности, участие в "Системе безопасного входа" исключит возможность несанкционированного доступа.
Как активировать Ваше устройство защиты / Как запросить карту кодов безопасности / Как возвратить устройство защиты
Если Вы забыли свой пароль или потеряли карту кодов, пожалуйста, немедленно обратитесь к нам за помощью.
5. Выписки и отчеты
Наши легко читаемые и настраиваемые выписки и отчеты охватывают все аспекты Вашего счета в Interactive Brokers. Как посмотреть отчет по операциям
IBKR Mobile Companion App for Apple Watch
Overview:
Interactive Brokers takes our intuitive and ergonomic mobile trading platform to the next level by providing you a companion app for the Apple Watch.
Background:
The companion app is designed to display information when a user has logged in to the IBKR Mobile app on their iPhone. It will work in both the Live Trading and Read Only Modes but does not support active trading. This companion app is only available for informational purpose only.
Table of contents
What does the app do?
At 'glance view' the app will display the following information; Amount of FYI Notification, Account Number, Daily P&L, Net Liquidation Value, Number of Open Orders, Number of Trades Executed, Excess Liquidity and number of Positions you currently own. It will also display the time when it has fetched the information from your iPhone.
Example:
.jpg)
Requirements
- Must have iPhone 5s or greater, using iOS 11 or later.
- Must have the IBKR Mobile app installed on your iPhone (version 11 or greater)
- Must have your Apple Watch paired to your iPhone (refer to: Set up your Apple Watch for directions)
- Must have watchOS 5 running on your Apple Watch.
Important: The Apple Watch applications are only 'companion' apps. This means they are not installed directly on the watch itself, but rather are a function of an application already installed on your iPhone.
How is the app installed?
1. Install the latest version of the IBKR Mobile app on your iPhone.
2. Pair your Apple Watch to your phone.
3. Launch the Watch app on your phone.
4. Scroll down on the main screen until you see your list of apps, locate the IBKR Mobile app and Tap on it.
.jpg)
5. Enable Show App on Apple Watch by swiping the slider to the right (green).
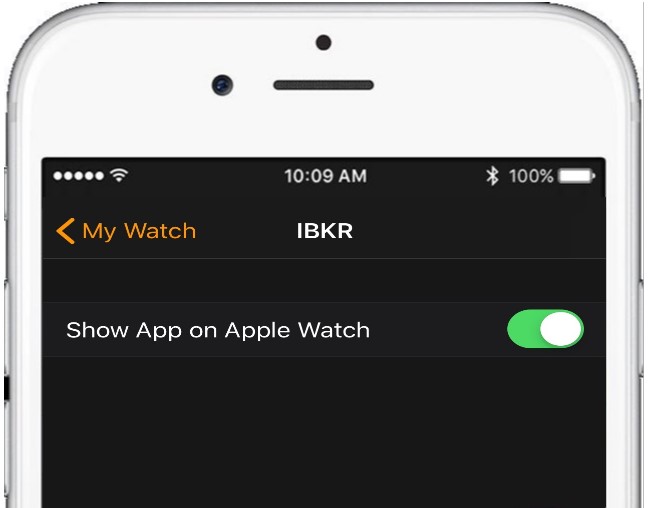
6. After the top slider is set to green, you will see a text informing you that the app is being installed. At this stage the phone is sending the application to your watch per Bluetooth. This might take a short moment (approximately 30-60 seconds.) Once completed the companion app has been installed.
Note: Once enabled it will take 24 hours before P&L shows up on the watch after activation.
How do I confirm the app is installed?
On your Apple Watch click on the crown to access your Home Screen, you should now see an icon for the IBKR Mobile App.

How to start multiple TWS sessions on a Mac
Background:
By default macOS does not allow the user to run multiple sessions of the same application. The following workaround can overcome this limitation in case you need to run the Trader Workstation for more than one user.
-
In case running different versions of the TWS is suitable to your needs, please follow the instructions on Procedure 1
-
In case you need multiple sessions of the same TWS version, please follow the instructions on Procedure 2
Procedure 1
1) Open the web page ibkr.com
2) Navigate to the menu Technology > TWS Software.
3) First download and install one of the auto-updating TWS versions (TWS LATEST or TWS according to your preference).
4) Once you have completed the installation, download and install one of the offline versions (OFFLINE TWS LATEST or OFFLINE TWS according to your preference).
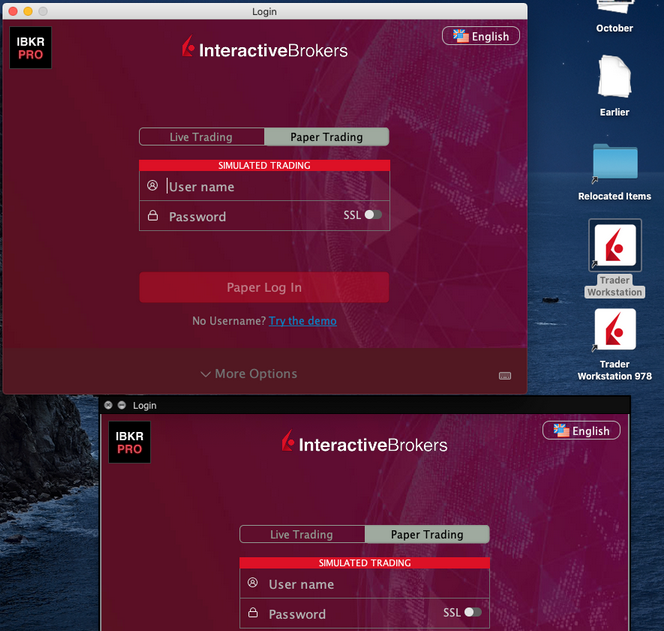
5) You will then see on your Desktop two different Trader Workstation icons. You can use the first shortcut to start the first TWS session and the second one to start the additional one (see Figure 1.). Note: the link containing the version number in the name is the OFFLINE version. This will be a version that needs periodical manual updates.
Figure 1.
Procedure 2
1) Launch the first session of the Trader Workstation using the TWS icon present on your Desktop. If you still do not have any Trader Workstation icon, please go to the web page ibkr.com and click on the menu Technology > TWS Software. Then download and install one of the TWS versions displayed.
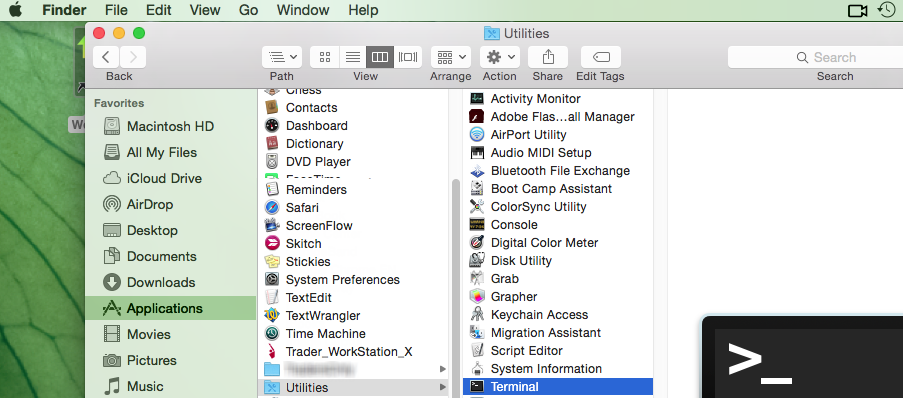
2) Open the Finder and click on Applications on the left side menu. Then select Utilities and then launch Terminal (see Figure 2.).
Figure 2.
3) The Terminal will appear on the screen and will point to the home folder of your current macOS user. Then enter the commands listed below (see Figure 3.) on your Terminal. After each one, press ENTER on your keyboard.
cd Applications
cd Trader\ Workstation
open -n Trader\ Workstation.app
Figure 3.

4) The login window for your second TWS session will then appear on your Desktop. You can now close the Terminal.
Note: the procedure above presumes that the TWS executable is located in the following path: users/yourusername/home/Applications/Trader Workstation/Trader Workstation.app
If at the time you installed the TWS, you selected to install it for all the users of your system, then the TWS executable will be located here:
/Applications/Trader Workstation/Trader Workstation.app
and therefore you would need to issue the following commands in the Terminal:
cd /Applications
open -n Trader\ Workstation.app
How to overcome the warning message "The signature of the file is corrupt or invalid"
Overview:
This article describes how to overcome the warning message which you might receive when you download the Trader Workstation or IB Gateway installation packages.
Background:
Since a Microsoft update has modified the signature validation mechanisms, the Trader Workstation and IB Gateway installation packages might be reported as having an invalid or corrupt signature, although their signature is indeed intact and absolutely valid.
If you are using Microsoft Edge as browser please follow all the steps below. If you are using any other browser start directly from point 3.
1. As soon as the installation package has been completely downloaded, you will notice on the bar at the bottom of your browser frame the warning message "The signature of the file tws-... is corrupt or invalid". Please click on the button View Downloads to open the DOWNLOADS panel. ![]()
2. Right click on the filename and select Run anyway.
.png)
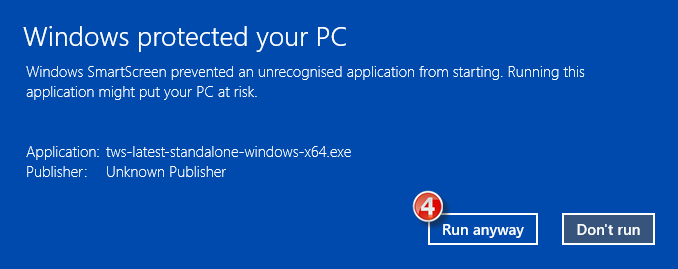
3. Once the installer has been launched, the SmartScreen filter will display an additional warning message. Click on the link More Info.
(1).png)
4. Now click the button Run Anyway to allow the file execution. The installation will then start.
How to install Java on a Linux computer
Overview:
This article will walk you through the process of installing the official Oracle Java platform on your Linux machine.
Background:
There are many Linux distributions available and many of them come with one or more Java platform/s pre-installed. In the vast majority of the cases the Java platform which comes pre-installed on a Linux machine is not the official Oracle Java, but another one such as OpenJKD or IBM Java.
The Trader Workstation has been developed on the official Oracle Java platform and shows the most stable behavior and the best performances when run by the official Oracle Java process. Therefore we recommend to all the Linux users, who want to run the Trader Workstation, to install the official Oracle Java platform and set it as the preferred Java environment to be used by the operating system.
For the purpose of this guide, we will divide the Linux distributions nowadays available into three big families:
- APT based Linux distributions (Ubuntu, Mint) - those distributions use the Advanced Packaging Tool to fetch and install software packages in a semi-automatic way, resolving and taking care of dependencies.
- RPM based Linux distributions (Suse, OpenSUSE, Red Hat, CentOS, Fedora, Oracle Linux) - those distributions allow the installation of software packages (.rpm files), which contain the binary files to be installed on the system and an integrated dependency checker script. The .rpm packages allow a simplified and smooth installation of software without requiring a deep knowledge of the system.
- Other Linux distributions - those distributions may or may not use a specific package manager but all of them allow the installation of software using the source code package (.tar.gz) through a series of command to be issued on the Terminal.
How to install the official Oracle Java on APT based Linux distributions
The most simple way to install Java on Ubuntu or Mint is using the webupd8 repository. This method will install the latest version of JDK 8 and the JRE 8 browser plugin. The supported versions are: Ubuntu 15.04, 14.10, 14.04, 12.04 - Linux Mint 17.1, 17, 13
For details, please refer to: http://www.webupd8.org/2012/09/install-oracle-java-8-in-ubuntu-via-ppa.html
a. On your Linux machine, open the "Terminal". If you need help with accessing and using the Terminal, please refer to: https://help.ubuntu.com/community/UsingTheTerminal
b. Become root, by typing su on the Terminal and entering the super user password. Instead of becoming root, you can choose to use the sudo feature (which gives your user the root privileges for a single command). If you want to use sudo, just add sudo before each one of the commands you will enter in the Terminal. You will be requested to enter the sudo password.
c. Add the webupd8 repository by tiping add-apt-repository ppa:webupd8team/java Follow the instructions on the screen. You should be asked to press [ENTER] to continue. Once done, the repository will be added.
d. Type the command apt-get update
e. Enter the command: apt-get install oracle-java8-installer The process will download and install automatically the required packages along with their dependencies. Once the command has completed, the Oracle Java platform will be ready to be used.
Should you prefer to have control of all the phases of the installation, instead of relying on the APT facility, please refer to the instructions on this page: http://www.wikihow.com/Install-Oracle-Java-JRE-on-Ubuntu-Linux
How to install the official Oracle Java on RPM based Linux distributions
a. On your Linux machine, open the "Terminal". If you need help with accessing and using the Terminal, please refer to: https://help.ubuntu.com/community/UsingTheTerminal
b. Become root, by typing su on the Terminal and entering the super user password. Instead of becoming root, you can choose to use the sudo feature (which gives your user the root privileges for single commands). If you want to use sudo, just add sudo before each one of the commands you will enter in the Terminal. You will be requested to enter the sudo password.
c. Create the folder /usr/java by issuing the command mkdir /usr/java. If the directory already exists you will see a message indicating that. In this case you can proceed directly to point d.
d. Go to the page https://www.java.com/en/download/linux_manual.jsp
e. If you have a 32 bit system, download the file "Linux RPM" . If you have a 64 bit system, download the file "Linux64 RPM". In either case, please instruct your browser to save the file in the folder /usr/java or move the file to that foder once it has been downloaded.
f. Go back to the Terminal and move to the /usr/java folder by typing cd /usr/java
g. List the content of the folder by typing the command ls -la You should see the file you downloaded. It will be called jre-XuYY-linux-ARCH.rpm (where X is the Java family, YY the update number and ARCH will be i586 for 32 bit installer and x64 for 64 bit installer)
h. Launch this command to perform the installation: rpm -ivh jre-XuYY-linux-ARCH.rpm Obviously you need to use the real file name, for example jre-8u65-linux-x64.rpm
Once the installation has been performed, the Oracle Java should be ready to be used. Usually a system restart is not required on Linux machines. In case you see warning or error message/s during the installation, please check their content and search the Internet for possible solutions. Most of the time the warning/error messages maight refer to missing dependencies (this means that another package needs to be installed before you can install Java) or to unsufficient privileges (this means that you are launching the command with a regular user instead of "root"). If you cannot find the proper course of actions to overcome the issue, please refer to the support documentation or forums for your current Linux distribution.
How to install the official Oracle Java on other Linux distributions
If your Linux distribution does not support RPM or APT package managers, the installation of Oracle Java can be performed manually in this way:
a. On your Linux machine, open the "Terminal".
b. Become root, by typing su on the Terminal and entering the super user password. Instead of becoming root, you can choose to use the sudo feature (which gives your user the root privileges for single commands). If you want to use sudo, just add sudo before each one of the commands you will enter in the Terminal. You will be then required to enter the sudo password.
c. Create the folder /usr/java by issuing the command mkdir /usr/java. If the directory already exists you will see a message indicating that. In this case you can proceed directly to point d.
d. Go to the page https://www.java.com/en/download/linux_manual.jsp
e. If you have a 32 bit system, download the file "Linux" . If you have a 64 bit system, download the file "Linux x64". In either case, please instruct your browser to save the file in the folder /usr/java or move the file to that foder once it has been downloaded.
f. Go back to the Terminal and move to the /usr/java folder by typing cd /usr/java
g. List the content of the folder by typing the command ls -la You should see the file you downloaded. It will be called jre-XuYY-linux-ARCH.tar.gz (where X is the Java family, YY the update number and ARCH will be i586 for 32 bit installer and x64 for 64 bit installer)
h. Launch this command to perform the installation: tar zxvf jre-XuYY-linux-ARCH.tar.gz Obviously you need to use the real file name, for example jre-8u65-linux-x64.tar.gz
i. Once done, enter command ls -la You will see the folder /usr/java/jre1.X.0_YY (where X is the Java family, YY the update number)
l. The Java executables are now present in the folder /usr/java/jre1.X.0_YY/bin
m. Now check which is the symbolic link used by the system to access the java executables by entering the commands:
which java - you will receive an output similar to this: /usr/bin/java From now on we will refer to this path as javasympath.
which javac - you will receive an output similar to this: /usr/bin/java From now on we will refer to this path as javacsympath.
which javaws - you will receive an output similar to this: /usr/bin/java From now on we will refer to this path as javawssympath.
Unless your are launching the java applications using the full path (for example /usr/java/jre1.X.0_YY/bin/java ...), you would need to tell your system which java executables should be used when a generic java command is issued. In order to to this, you can either update your alternatives files (if your system supports them) or the symbolic links. Here below you can see the instructions, according to your system:
- If your system uses the alternatives files:
n. Issue the following commands, paying attention to make the necessary substitutions .
update-alternatives --install javasympath java /usr/java/jre1.X.0_YY/bin/java 1
update-alternatives --install javacsympath javac /usr/java/jre1.X.0_YY/bin/javac 1
update-alternatives --install javawssympath javaws /usr/java/jre1.X.0_YY/bin/javaws 1
- If your system does not use the alternatives files:
n. Issue the following commands, paying attention to make the necessary substitutions .
ln -sf /usr/java/jre1.X.0_YY/bin/java javasympath
ln -sf /usr/java/jre1.X.0_YY/bin/javac javacsympath
ln -sf /usr/java/jre1.X.0_YY/bin/javaws javawssympath
How to fix the error: "Library dbcapi.dll cannot be loaded"
Background:
TWS users may receive the following error message upon configuring TWS to use the eSignal data feed:
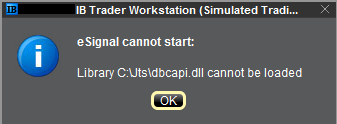
This error may appear for the following reasons:
Issue A - You are not using the 32 bit version of TWS and/or eSignal:
The 32-bit versions of both TWS and eSignal have to be installed for the integration to work. In the section below you will find the instructions for installing the 32-bit TWS. Should you need assistance with the installation of the 32-bit eSignal, we suggest you to contact the eSignal customer support.
Issue B - There is an incompatibility with the file C:\Jts\dbcapi.dll:
To use 32-bit eSignal version 12, an incompatibility with the C:\Jts\dbcapi.dll file must be fixed. This involves copying a file from the eSignal installation and renaming it to dbcapi.dll.
Note: On certain systems you will need to apply the fixes for both issue A and B. If you applied the fix for issue A (or if you are already sure you are using the 32 bit version of both platforms) and you are still receiving the error message, then please apply as well the fix for issue B.
Instructions to resolve issue A
Installing 32-bit TWS
Please open the page http://www.ibkr.com in your browser and perform the steps below:
1) Click on the Log In button at the top right corner of the page.
2) Click on Download Trader Workstation: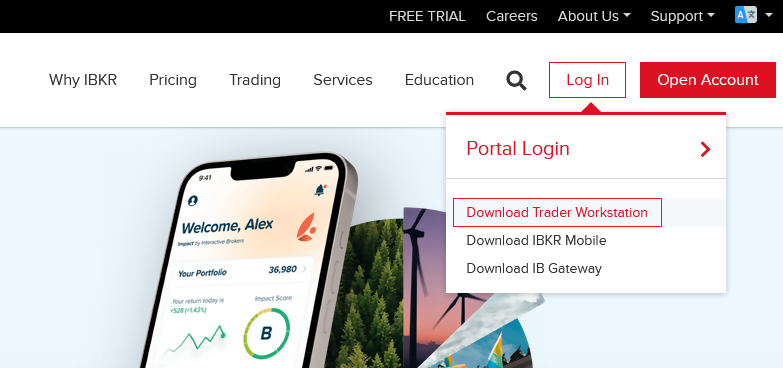
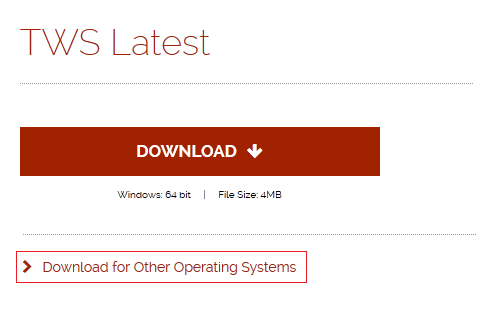
3) Click on the red button TWS Latest:
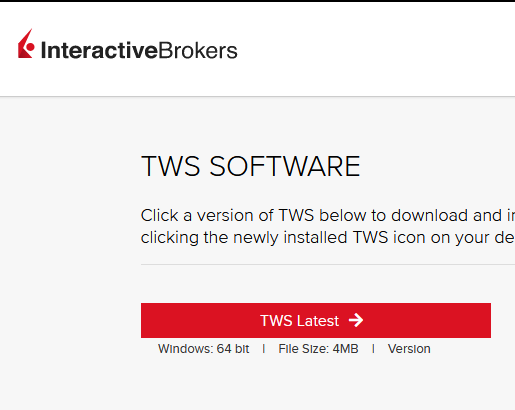
4) On the next page, click on the link Download for Other Operating Systems:
5) Click on the item Windows 32-bit:
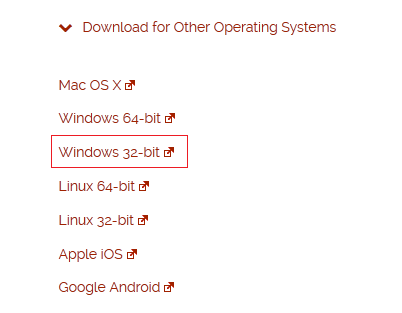
6) Make sure that the description under the DOWNLOAD button has changed to "Windows: 32 bit". Click now on DOWNLOAD:

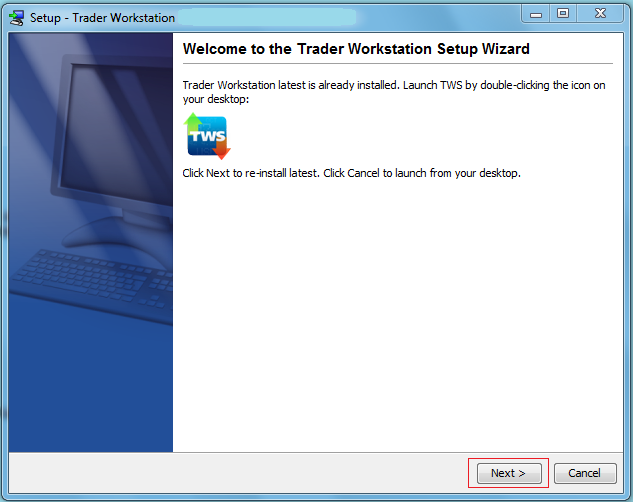
7) Launch the downloaded file. The Trader Workstation installation will start. At this point, you may see the warning message "Trader Workstation latest is already installed...". Ignore this warning and click on the button Next > to continue the installation:
8) Your "Trader Workstation" Desktop icon will be automatically updated. You can now launch the 32-bit Trader Workstation by a double click on that icon.
If you have launched the 32-bit TWS and the 32 bit version of eSignal but you still receive the same error message, please follow as well the instructions below.
Instructions to resolve issue B
Replacing dbcapi.dll for compatibility between 32-bit TWS and 32-bit eSignal 12
To correct an incompatibility with the dbcapi.dll file, we will replace that file with another version of it taken from the eSignal installation folder. Please follow the steps below to perform the substitution:
1) Navigate to C:\Jts and rename the file dbcapi.dll to dbcapi_old.dll
2) Navigate to the directory where 32-bit eSignal 12 is installed (most commonly C:\Program Files (x86)\Common Files\Interactive Data\DM).
3) Copy dbcapi_vc8.dll from that directory into the C:\Jts directory.
4) Move to the C:\Jts directory.
5) Right click on the dbcapi_vc8.dll file (now in the C:\Jts directory) and select rename. Type dbcapi.dll as the new filename.
.jpg)
6) TWS is now ready to accept the eSignal data feed.
How to install the TWS API Components on Mac / Unix
NOTE: If you have already agreed to the API License Agreement please start at Step 3 below.
Instructions
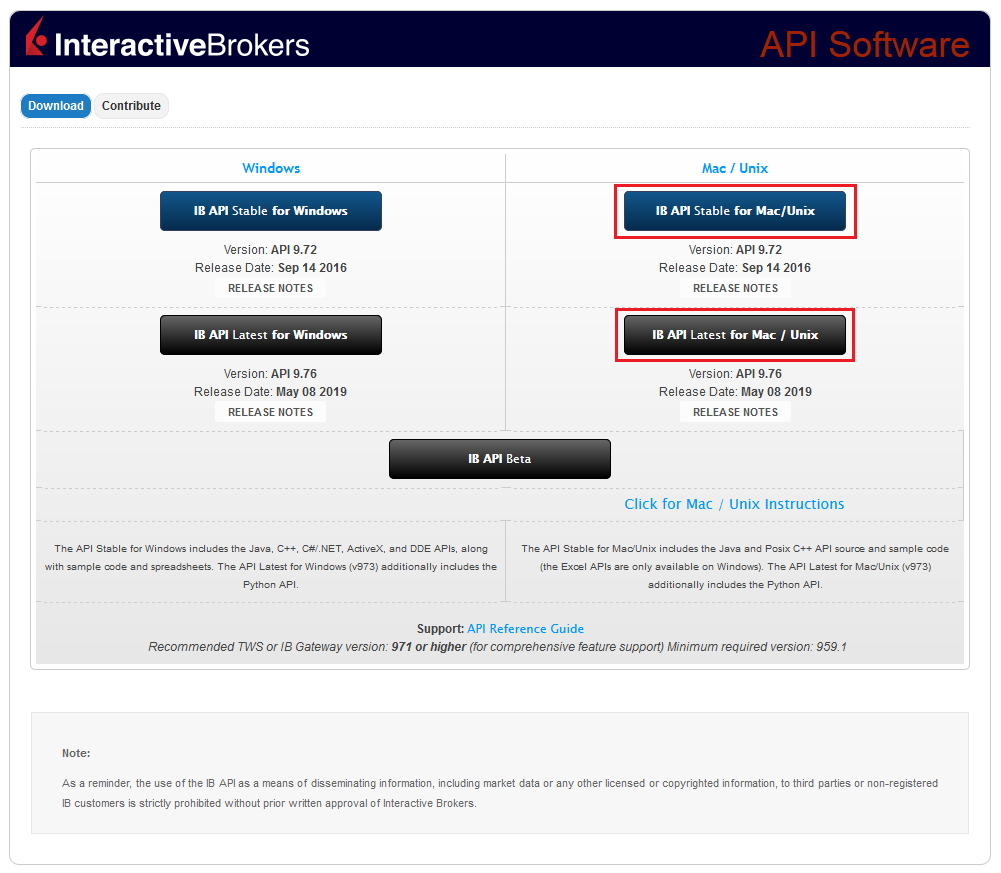
- Click directly on the button below to access the API software download page

- This will direct you to Interactive Brokers API License Agreement, please review it
- Once you have clicked "I Agree", refer to the Mac / Unix section to download the API Software version of your preference
- This will download twsapi_macunix.n.m.zip to your computer
(where n and m are the major and minor version numbers respectively) - Open Terminal (Ctrl+Alt+T on most distributions)
(On Mac press Command+Space to launch Spotlight, then type terminal and press Return) -
Navigate to the directory where the installer has been downloaded (normally it should be the Download folder within your home folder) and confirm the file is present
$ cd ~/Downloads
$ ls
- Unzip the contents the installer into your home folder with the following command (if prompted, enter your password):
$ sudo unzip twsapi_macunix.n.m.zip -d $HOME/

- To access the sample and source files, navigate to the IBJts directory and confirm the subfolders samples and source are present
$ cd ~/IBJts
$ ls

Legacy Instructions - API Version ≤ 9.71
Note: IB only offers API Version 9.72+. In the event you already have an existing legacy version and need to install it, please refer to the directions below:
- locate the file twsapi_macunix.n.m.jar on your computer
(where n and m are the major and minor version numbers respectively.) - Open Terminal (Ctrl+Alt+T on most distributions)
(On Mac press Command+Space to launch Spotlight, then type terminal and press Return) - Navigate to the directory where the .jar file has been located (normally it should be the Download folder within your home folder) and confirm it is present
$ cd ~/Downloads
$ ls - Extract the contents of the .jar file into your home folder
$ jar xf twsapi_macunix.n.m.jar -d $ HOME/ - To access the sample and source files, navigate to the IBJts directory and confirm the subfolders samples and source are present
$ cd ~/IBJts
$ ls
How to install MobileTWS on BlackBerry OS10
Background:
Currently, Interactive Brokers does not offer a native IBKR Mobile app for the Blackberry 10 Operating System. Due to a recent partnership between Amazon and Blackberry, clients who own a Blackberry device running Blackberry 10 OS can install the Android version of the IBKR Mobile app directly from the Amazon Store.
Blackberry 10 OS Devices:
- Q5, Z3, Leap, Classic, Passport, Q10, Z10, Z30, P'9982, P'9983
*Please notice that these devices have limited hardware capabilities and this could negatively affect the performance of the IBKR Mobile app.
Installation
You can download the IBKR Mobile app on your Blackberry phone directly from the Amazon Appstore.
How to install IBKR Mobile from the Amazon App Store:
- On your Blackberry phone open the Amazon App Store
 app.
app. -
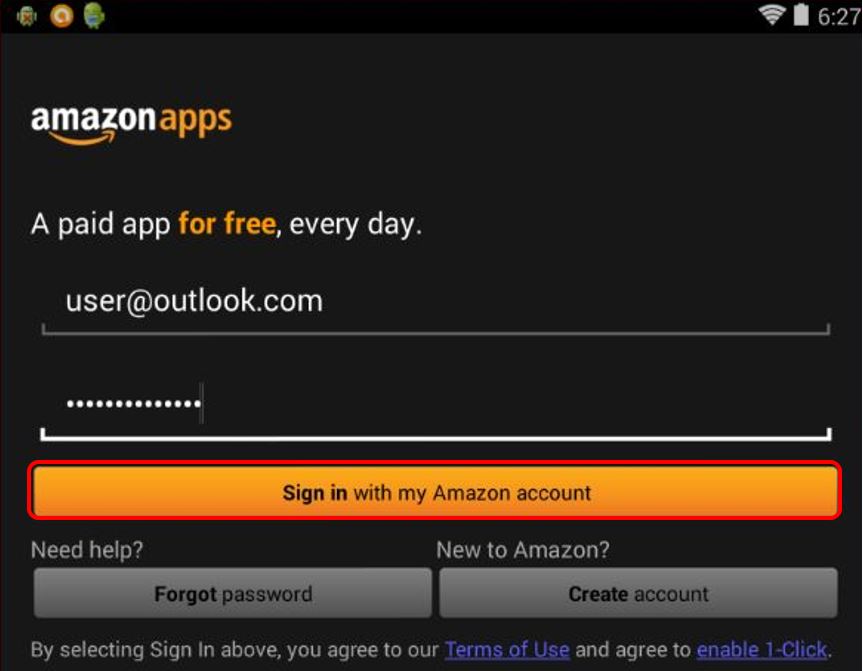
Enter your Amazon e-mail and password, and tap Sign in.
(If you don't have an Amazon account, tap Create a new Amazon account.)
-
Tap on the search bar at the top, type IBKR Mobile then tap Search.

-
Tap on IBKR Mobile from the search results and install.

5. Once installed, tap on the IBKR Mobile app from one of your home screens to launch it

Welcome to Interactive Brokers
Overview:
Now that your account is funded and approved you can start trading. The information below will help you getting
started as a new customer of Interactive Brokers.
- Your Money
- Configure your account to trade
- How to trade
- Trade all over the World
- Five points to enrich your IB experience
1. Your Money
Deposits & Withdrawals General Info. All transactions are administered through your secure Account Management
Deposits
First, you create a deposit notification through your Account Management > Funding > Fund Transfers > Transaction Type: “Deposit” How to create a deposit notification. The second step is to instruct your Bank to do the wire transfer with the bank details provided in your Deposit Notification.
Withdrawals
Create a withdrawal instruction via your secure Account Management > Funding > Fund Transfers > Transaction Type: "Withdrawals" How to create a withdrawal instruction
If you instruct a withdrawal over the Withdrawal limits, it will be considered an exceptional withdrawal and we will therefore need to match bank account holder and IB account. If destination bank account has been used for a deposit, withdrawal will be processed; otherwise, you must contact customer service and provide the documents needed.
Troubleshooting
Deposits: My bank sent the money but I do not see it credited into my IB account. Possible reasons:
a) A fund transfer takes 1-4 business days
b) A Deposit Notification is missing. You have to create it via your Account Management and send a ticket to Customer Service
c) Amending details are missing. Your name or IB account number is missing in the transfer details. You have to contact your bank and ask for the full amending details.
d) ACH initiated by IB is limited to 100k USD in a 7 business period. If you opened a Portfolio Margin account where the initial requirement is 110k, a wire deposit might be the better deposit option to reduce wait time for your first trade. If selecting ACH a wait time of almost 2 weeks or a temporary downgrade to RegT can be possible solutions.
Withdrawals: I have requested a withdrawal but I do not see the money credited to my bank account. Possible reasons:
a) A fund transfer takes 1-4 business days
b) Rejected. Over the max it can be withdrawn. Please check your account cash balance. Note that for regulatory requirements, when the funds are deposited, there is a 3 day holding period before they can be withdrawn.
c) Your bank returned the funds. Probably because receiving bank account and remitting bank account names do not match.
2. Configure your account to trade
Difference between Cash and Margin accounts: If you have chosen the FastTrack application, by default your account type is a cash account with US stock permission. If you would like to get leverage and trade on margin, here how to upgrade to a RegT Margin account
Trading Permissions
In order to be able to trade a particular asset class in a particular country, you need to get the trading permission for it via your Account Management. Please note that trading permissions are free. You might however be asked to sign risk
disclosures required by local regulatory authorities. How to Request Trading Permissions
Market Data
If you want to have market data in real-time for a particular product/exchange, you need to subscribe to a market data package charged by the exchange. How to subscribe to Market data
The Market data assistant will help you choose the right package. Please watch this Video explaining how it works.
Customers have the option to receive delayed market data for free by clicking the Free Delayed Data button from a non-subscribed ticker row.
Advisor Accounts
Have a look at the user guide getting started as advisors. Here you see how to create additional users to your advisor account and grant them access and much more.
3. How to trade
The Trader's University is the place to go when you want to learn how to use our Platforms. Here you will find our webinars, live and recorded in 10 languages and tours and documentation about our various Trading Platforms.
Trader Workstation (TWS)
Traders who require more sophisticated trading tools can use our market maker-designed Trader Workstation (TWS), which optimizes your trading speed and efficiency with an easy-to-use spreadsheet interface, support for more than 60 order types, task-specific trading tools for all trading styles, and real-time account balance and activity monitoring. Try the two models
TWS Mosaic: for intuitive usability, easy trading access, order management, watchlist, charts all in one window or
TWS Classic: the Advanced Order Management for traders who need more advanced tools and algos.
General Description and Information / Quick start guide / Usersguide
Interactive Tours: TWS Basics / TWS configuration / TWS Mosaic
How to place a trade: Video Classic TWS / Video Mosaic
Trading tools: General Description and Information / Users guide
Requirements: How to install Java for Windows / How to install Java for MAC / Port 4000 and 4001 needs to be open
Login TWS / Download TWS
WebTrader
Traders who prefer a clean and simple interface can use our HTML-based WebTrader, which makes it easy to view market data, submit orders, and monitor your account and executions. Use the latest WebTrader from every browser
Quick Start Guide / WebTrader User's Guide
Introduction: Video WebTrader
How to place a Trade: Video WebTrader
Login WebTrader
MobileTrader
Our mobile solutions allow you to trade your IB account on the go. The mobileTWS for iOS and the mobileTWS for BlackBerry are custom-designed for these popular models, while the generic MobileTrader supports most other Smart phones.
General Description and Information
Order Types Order Types available and Description / Videos / Tour / Users guide
Paper Trading General Description and Information / How to get a Paper Trading Account
Once your paper account is created, you can share the market data of your real account with your paper trading account: Account Management > Manage Account > Settings > Paper trading
4. Trade all over the World
IB accounts are multi-currency accounts. Your account can hold different currencies at the same time, this allows you to trade multiple products around the world from a single account.
Base Currency
Your base currency determines the currency of translation for your statements and the currency used for determining margin requirements. Base currency is determined when you open an account. Customers may change their base currency at any time through Account Management.
We do not automatically convert currencies into your Base currency
Currency conversions must be done manually by the customer. In this video you can learn how to do a currency conversion.
In order to open a position denominated in a currency that you do not have in your account, you have two possibilities:
A) Currency conversion.
B) IB Margin Loan. (Not available for Cash Accounts)
Please see this course explaining the mechanics of a foreign transaction.
5. Five points to enrich your IB experience
1. Contract Search
Here you will find all our products, symbols and specifications.
2. IB Knowledge Base
The Knowledge Base is a repository of glossary terms, how-to articles, troubleshooting tips and guidelines designed to assist IB customers with the management of their IB accounts. Just enter in the search button what you are looking for and you will get the answer.
3. Account Management
As our trading platforms give you access to the markets, the Account Management grants you access to your IB account. Use Account Management to manage account-related tasks such as depositing or withdrawing funds, viewing your statements, modifying market data and news subscriptions, changing your trading permissions, and verifying or changing your personal information.
Log In Account Management / AM Quick Start Guide / AM Users Guide
4. Secure Login System
To provide you with the highest level of online security, Interactive Brokers has implemented a Secure Login System (SLS) through which access to your account is subject to two-factor authentication. Two-factor authentication serves to confirm your identity at the point of login using two security factors: 1) Something you know (your username and password combination); and 2) Something you have (an IB issued security device which generates a random, single-use security code). As both knowledge of your username/password and physical possession of the security device are required to login to your account, participation in the Secure Login System virtually eliminates the possibility of anyone other than you accessing your account.
How to Activate your Security Device / How to Obtain a Security Code Card / How to return Security device
In case you forgot your password or lost your security code card, please call us for immediate assistance.
5. Statements and Reports
Easy to view and customize, our statements and reports cover all aspects of your Interactive Brokers account. How to view an Activity Statement