How to set up sFTP for using Certificate Authentication on Linux
These instructions apply to users who are receiving their statements via sFTP. If you elected to receive your statements via sFTP, you would first need to generate an RSA Key pair.
There are many Linux distributions and there are multiple methods to access the IBKR sFTP server. sFTP clients such as Filezilla can be used. In this article we explain how to realize the connection to the IBKR FTP server using Ubuntu Linux and Filezilla.
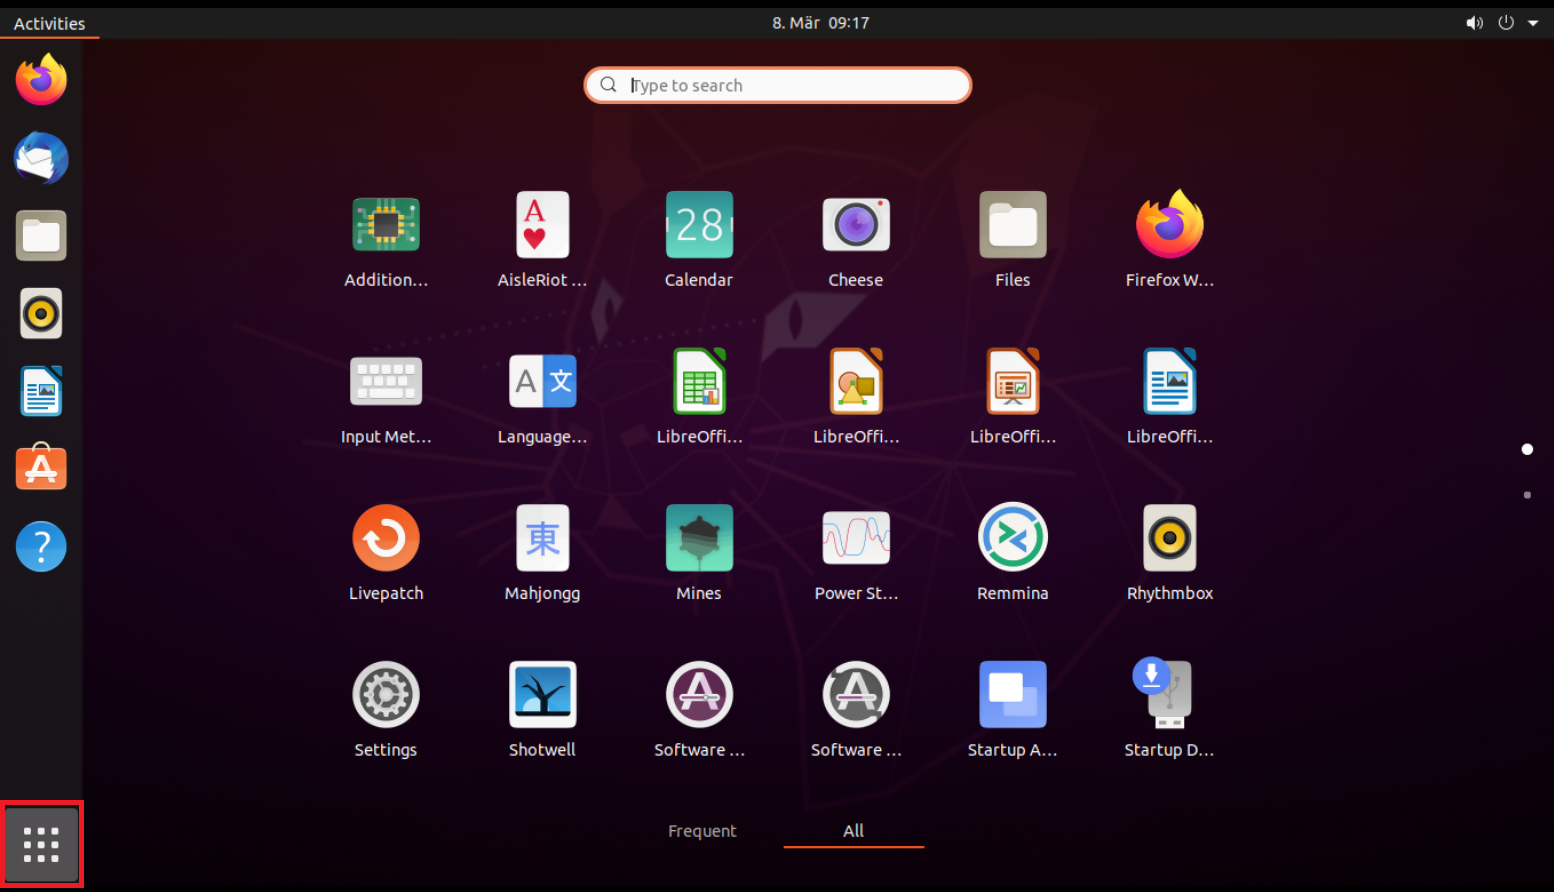
1. On your Linux machine, click on the Applications icon in the bottom left corner of you screen.
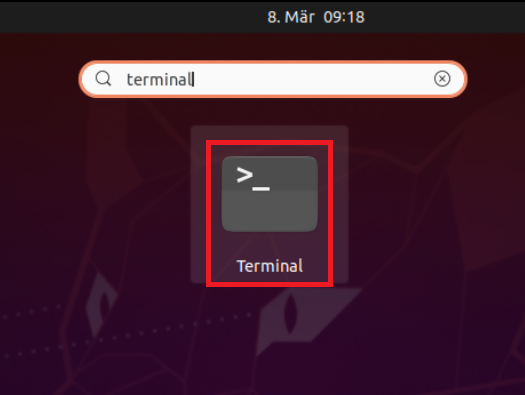
2. In the search box, type terminal and then click on the Terminal icon in the search results.
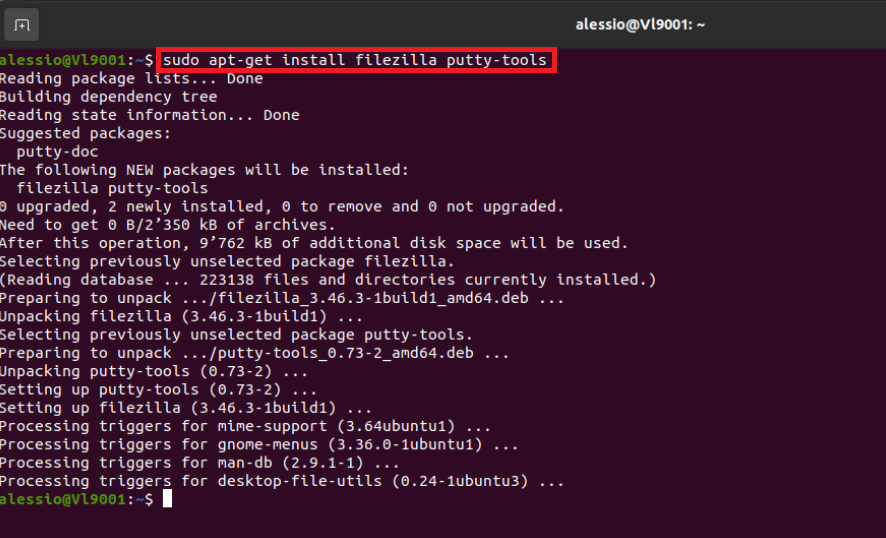
3. In the Terminal window, type sudo apt-get install filezilla putty-tools in order to install the required software. Enter your sudo password when requested.
4. Once the software installation is complete, type puttygen -t rsa -b 2048 -o privatekey.ppk in order to generate the RSA Key pair.
You will be asked to enter a passphrase and type it again to confirm.
PLEASE NOTE: Keeping a secure copy of this password is essential. Any loss of this password will require the whole process to be repeated.

5. Type puttygen -L privatekey.ppk -o public.key in order to export the public part of the Key pair to the file public.key

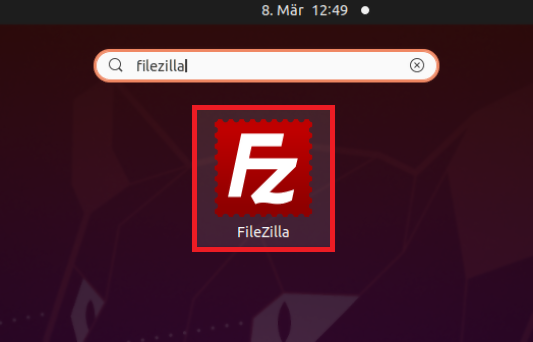
7. In the search box, type FileZilla and then click on the FileZilla icon in the search results.
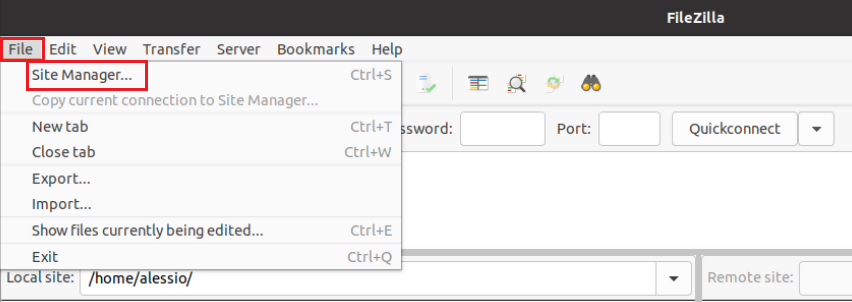
8. Click on the FileZilla top menu File -> Site Manager...
9. In the Site Manager window, click on the button New site to create a new connection.
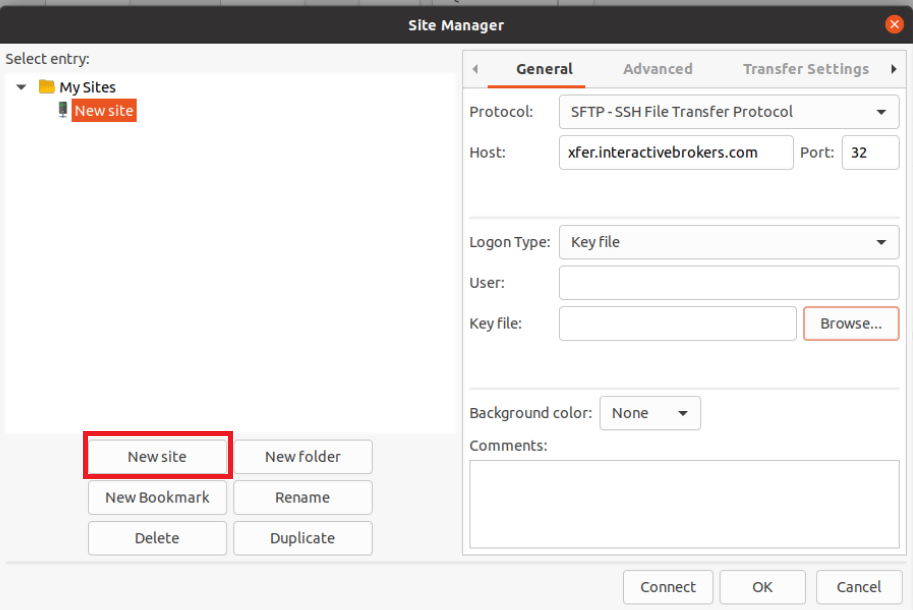
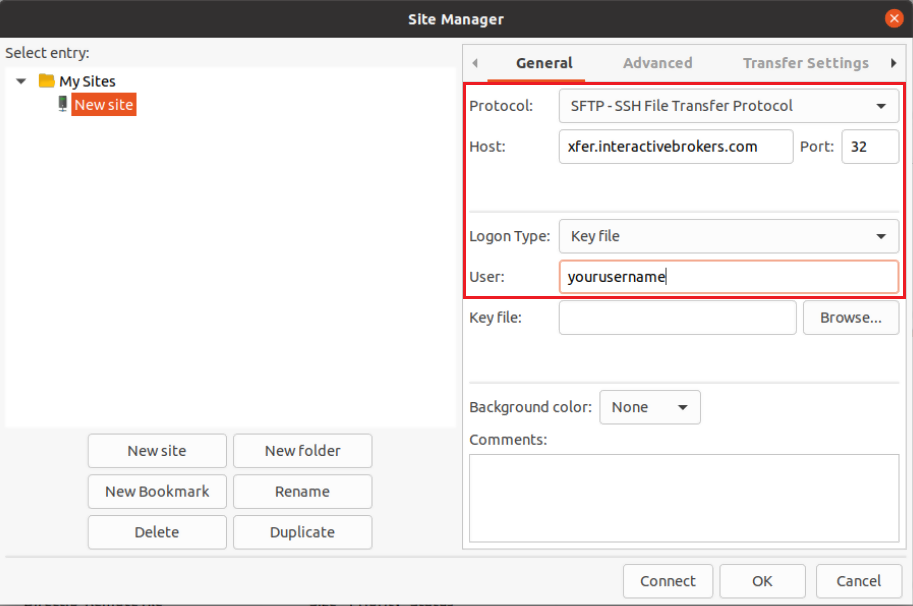
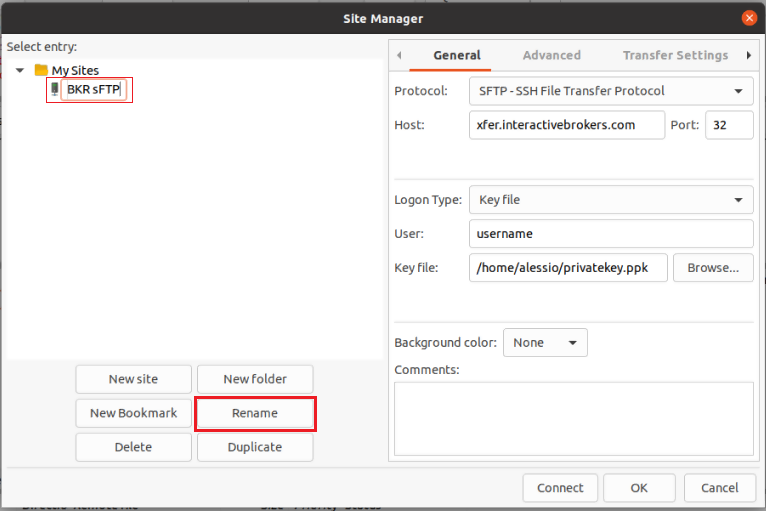
10. In the right panel (called General):
- Select SFTP - SSH File Transfer Protocol as Protocol
- Enter xfer.interactivebrokers.com in the Host field
- Enter 32 in the Port field
- Select Key file as Logon Type
- Enter the username provided to you by Interactive Brokers in the User field
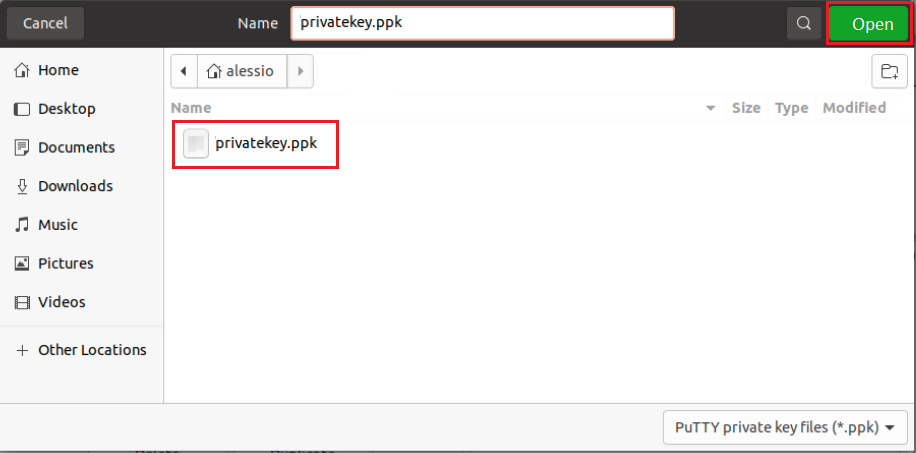
11. Click on Browse next to the Key file field.
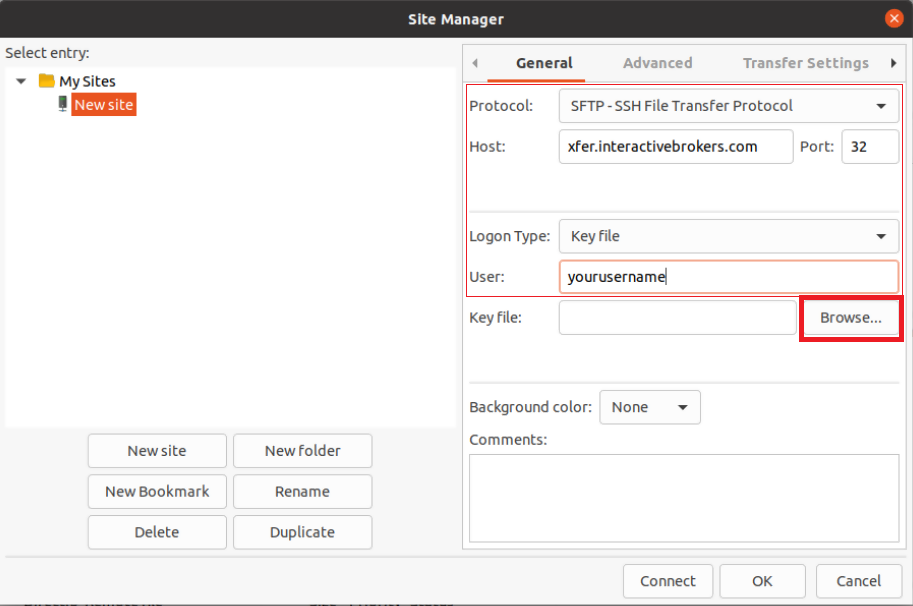
12. Move to the folder where your Key pair was created (normally your user folder: /users/yourusername/). Select the file privatekey.ppk and click on the Open button. This will set it as the Key file in your connection parameters.
13. Click on Rename and select a name of your preference for this connection (e.g. IBKR sFTP). Press Enter to confirm the name.
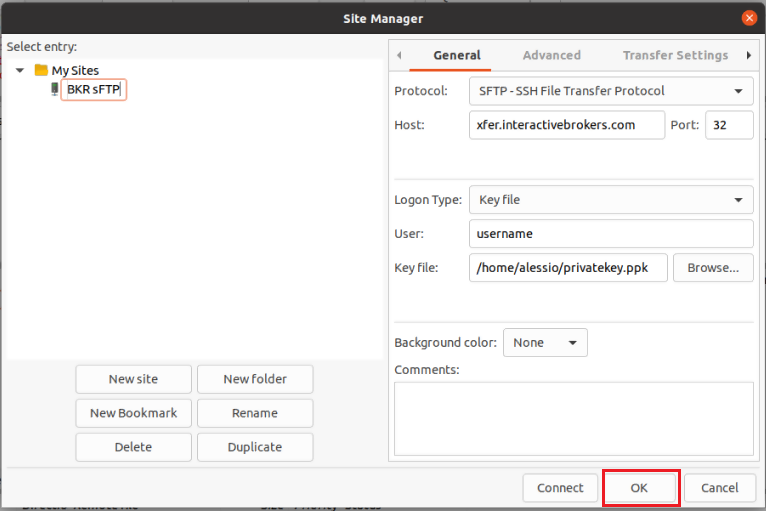
14. Click on OK to save your connection parameters.
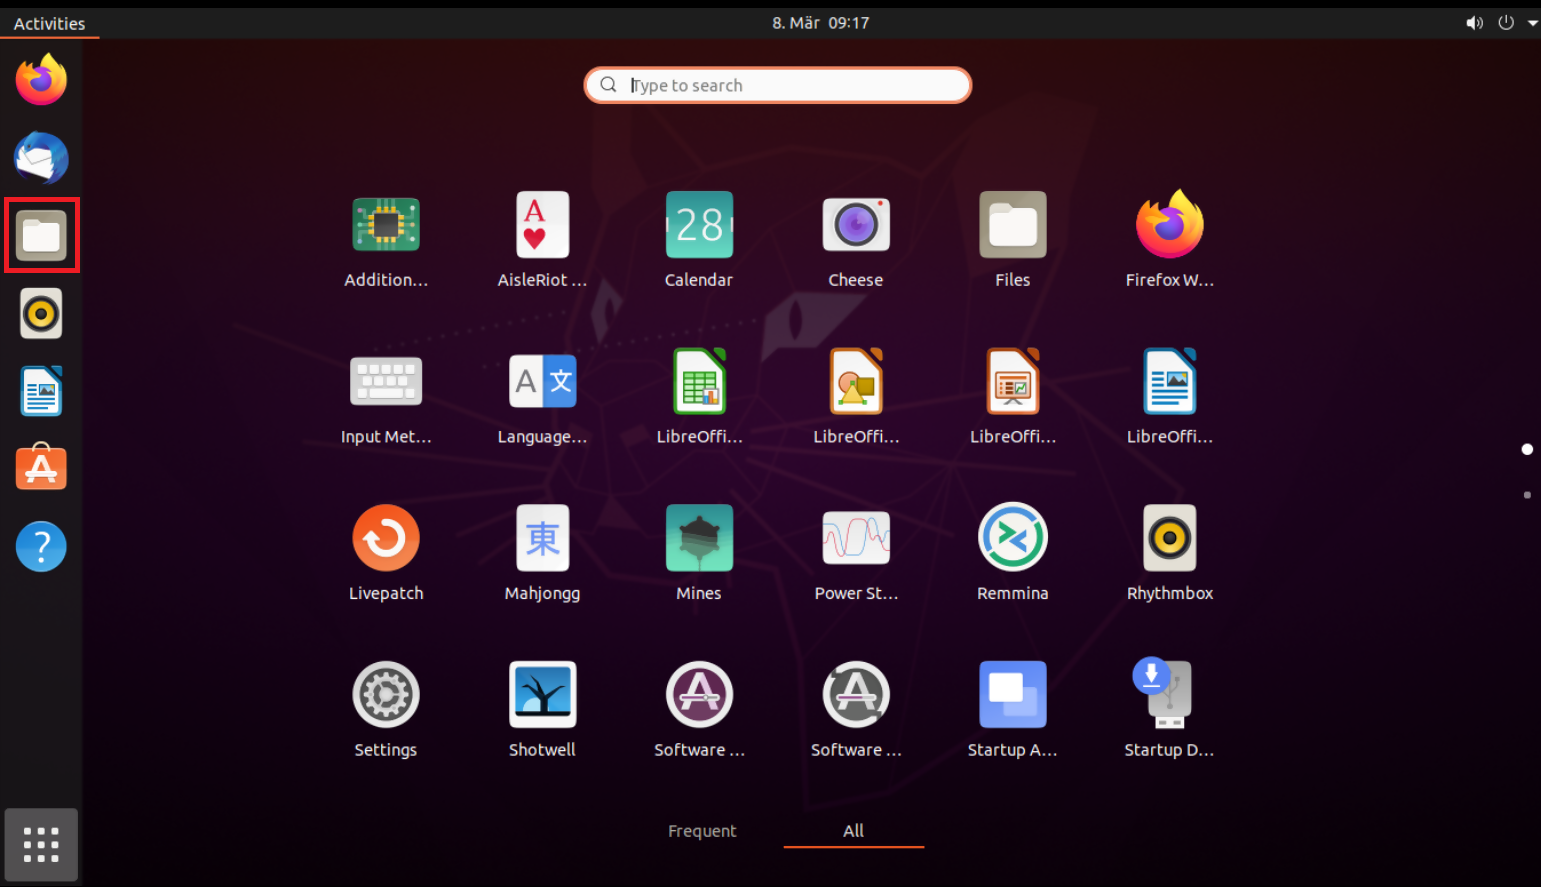
15. Click on the folder icon on the left hand toolbar of your Desktop. This will launch the File application.
16. Move to the folder where you saved your Key pair (normally your user folder: /users/yourusername/). Right click on the file public.key and select Send to...
The file will be attached to an empty email. Send the email to the Reporting Integration Team, as per IBKB3842.
Important Note: do NOT send us your private key. Send us only your public one
Once IBKR has configured the parameters for your connection on our servers, you will be notified. After that, you will be able to access your sFTP repository by using the Site connection you have created in FileZilla. In case you have not yet set up a Site connection, please follow the steps from 6. to 14. which are a prerequisite to the below steps:
1. Click on the Applications icon in the bottom left corner of you screen.

2. In the search box, type FileZilla and then click on the FileZilla icon in the search results.
3. On the FileZilla top toolbar, click the down arrow icon and select the Site connection you previously created (e.g. IBKR sFTP)

4. FileZilla will now establish a connection to our sFTP Server and show the files present in your repository.
Common issues and solutions
A. The Login Credentials Provided are Incorrect
-
Ensure the correct login details are being used to connect to the sFTP server. The username and password you are entering should match the ones you have received from the Reporting Integration Team.
-
Confirm you have configured your sFTP Client to use the Private Key file for the logon authentication (see steps 9. and 10. of the above procedure.)
B. Server Refused Our Key
-
Try accessing the sFTP server using a different Client (CyberDuck, ect.)
-
Ensure the Private Key file being used to Authenticate the server login attempt is related to the Public Key you originally sent to the Reporting Integration Team.
-
Should the above checks be unable to resolve the issue, please generate a new RSA Public/Private Key pair and send only the Public part to the Reporting Integration Team, as per IBKB3842.
C. Connection Timed Out
-
In case you have an antivirus or a security software installed on your machine, make sure it is not blocking the FTP connection attempt. Normally, security software allows to set up exceptions for specific connections in order to whitelist them.
-
Verify that the public IP Address of the machine running the sFTP client, is the same you have originally provided to the Reporting Integration Team for being whitelisted. You can discover your public IP Address by searching the Internet for “what is my IP”. If your current IP Address is not the same you provided to us, please send it to our Reporting Integration Team for being whitelisted.
-
Ask your network administrator/s to confirm that your firewall allows both incoming and outgoing traffic from/to xfer.interactivebrokers.com on port TCP 32.
-
Should the above steps be unable to resolve the issue, please generate a new RSA Public/Private Key pair and send only the new Public part to our Reporting Integration Team, as per IBKB3842.
References
KB3968 - Generate a key pair using GPG for Windows
KB4205 - Generate a key pair using GPG Suite on macOS
KB4108 - Decrypt your Reports using GPG for Windows
KB4210 - Decrypting Reports using your PGP Key pair on macOS
KB4407 - Generate RSA Key Pair on Windows
KB3968 - Generate a key pair using GPG for Windows
KB4205 - Generate a key pair using GPG Suite on macOS
KB4108 - Decrypt your Reports using GPG for Windows
KB4210 - Decrypting Reports using your PGP Key pair on macOS
KB4407 - Generate RSA Key Pair on Windows
KB4578 - How to Access your Reports using FTP on Windows
KB4580 - How to Access your Reports using FTP on MacOS
KB4409 - How to set up sFTP for using Certificate Authentication on Windows
KB4410 - How to set up sFTP for using Certificate Authentication on macOS
KB4411 - How to backup your public/private Key pair
KB4323 - How to transfer your public/private key pair from one computer to another
KB4410 - How to set up sFTP for using Certificate Authentication on macOS
KB4411 - How to backup your public/private Key pair
KB4323 - How to transfer your public/private key pair from one computer to another
Generate RSA Key Pair on Windows
These instructions apply to users who are receiving their statements via sFTP. If you elected to receive your statements via sFTP, you would first need to generate an RSA Key pair.
To generate an RSA Key pair:
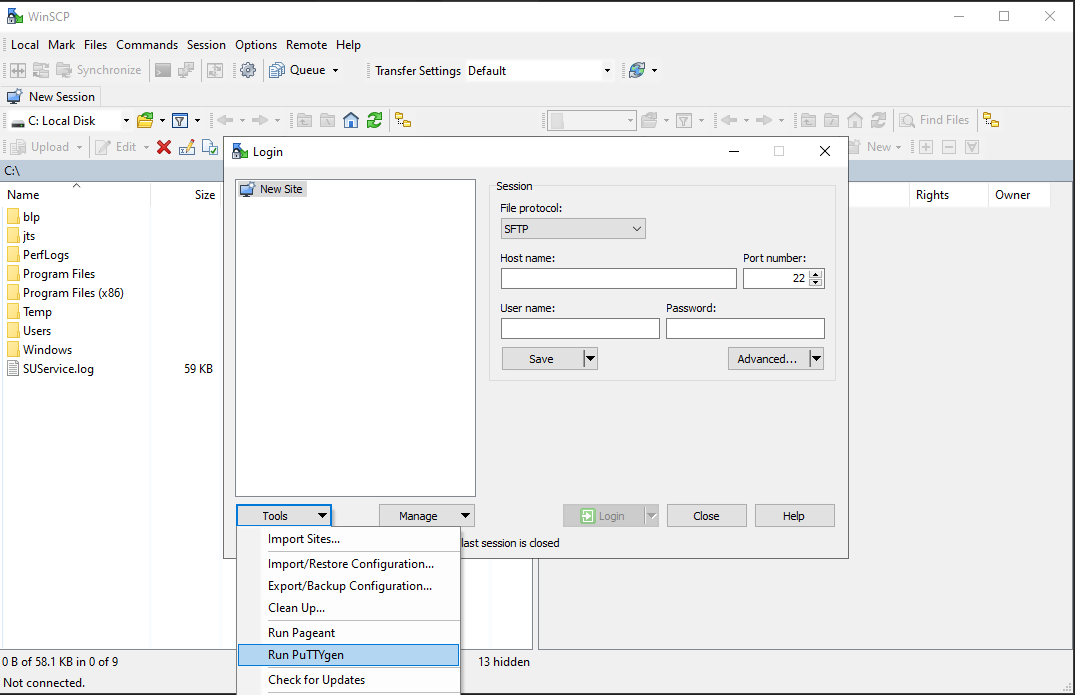
1. Download WinSCP.
2. Run the installer and make sure to check PuTTYgen (key generator) as one of the components to install.
3. Start WinSCP and from the button Tools select Run PuTTYgen.
2. Run the installer and make sure to check PuTTYgen (key generator) as one of the components to install.
3. Start WinSCP and from the button Tools select Run PuTTYgen.
4. Once the tool PuTTYgen has been launched, click Generate. Select RSA as Type of key to generate, 2048 as Number of bits in generated key and click on the button Generate.
5. Click "Save private key" and give the file a name (like private). Leave the extension as .ppk ('ale.ppk', in the picture below is an example filename).
Important Note: do NOT save your public key yet. Save only your private one.
.png)
6. Open WinSCP, create a new connection and:
- Select SFTP as File protocol.
- Enter xfer.interactivebrokers.com in the Host name field.
- Enter 32 in the Port number field.
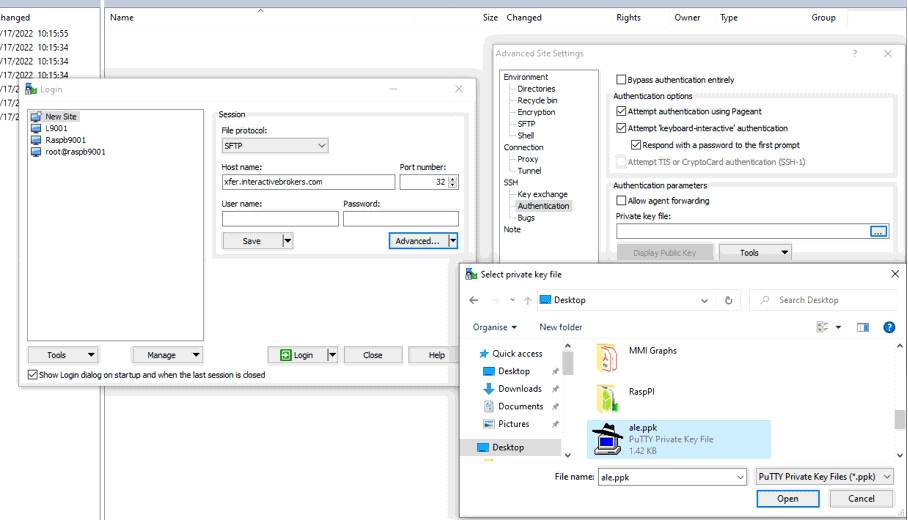
7. Click on the button Advanced.
8. In the Advanced Site Settings screen, left side menu, expand SSH and select Authentication. Click on the button ... at the end of the field Private Key file and open the private key you previously saved at point 5):
8. In the Advanced Site Settings screen, left side menu, expand SSH and select Authentication. Click on the button ... at the end of the field Private Key file and open the private key you previously saved at point 5):
9. Click on the button Display public key:
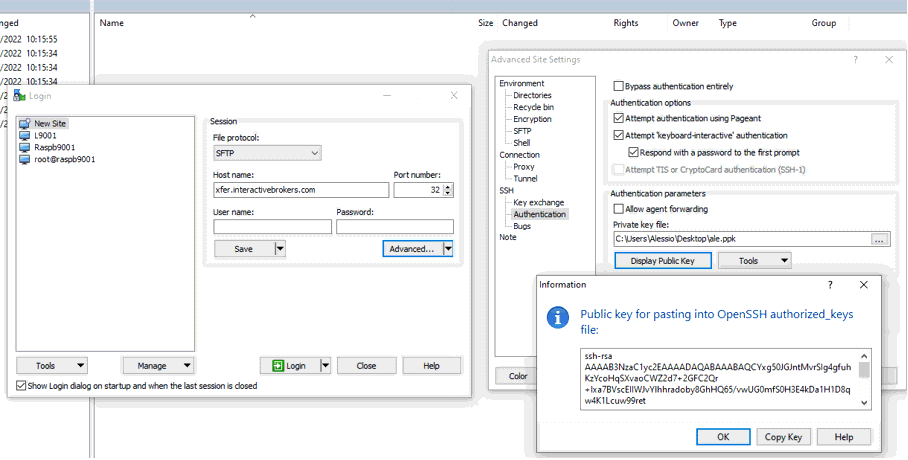
10. Click on the button Copy Key.
11. Open Notepad, press CTRL+V to paste the key string (which is one string of characters without spaces) and then save the file with the name public.key in a folder of your preference:
11. Open Notepad, press CTRL+V to paste the key string (which is one string of characters without spaces) and then save the file with the name public.key in a folder of your preference:

12. Send the file you saved at the previous step to us via Message Center ticket or email as per instructions on IBKB3842
14. Once the IBKR Sales Engineering Team has configured the parameters for your connection on our servers, you will be able to access your SFTP repository by using the connection you have created.
Related articles
KB3842 - Using GPG/RSA encryption keys to guarantee the privacy and security of your Reports
KB3968 - Generate a key pair using GPG for Windows
KB4205 - Generate a key pair using GPG Suite on macOS
KB4108 - Decrypt your Reports using GPG for Windows
KB4210 - Decrypting Reports using your PGP Key pair on macOS
KB4578 - How to Access your Reports using FTP on Windows
KB4580 - How to Access your Reports using FTP on MacOS
Decrypting Reports Using Your PGP Key Pair on macOS
Note: This tutorial assumes you received reports via email or via FTP that were encrypted with the public key you sent to IBKR . If you need guidance to set up the encrypted statement delivery, please refer to this article, which is a prerequisite to the instructions below.
1. Open Finder
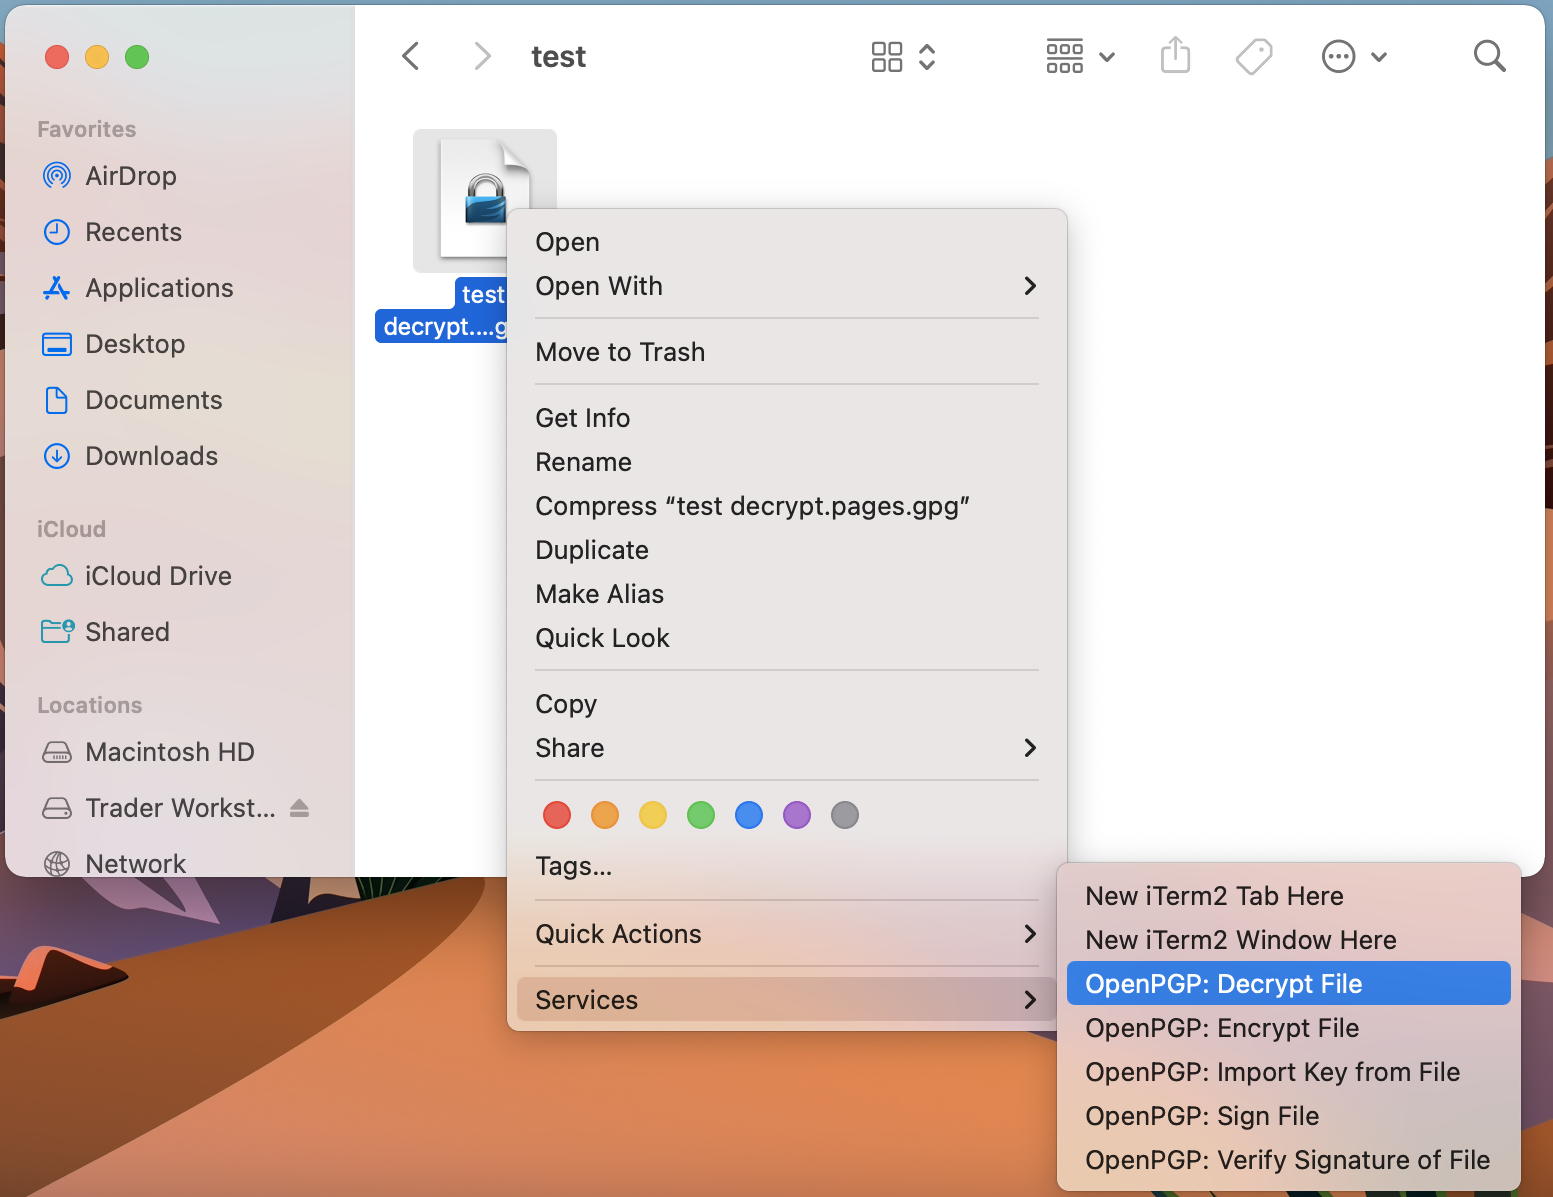
2. Right click on the .gpg file you want to decrypt
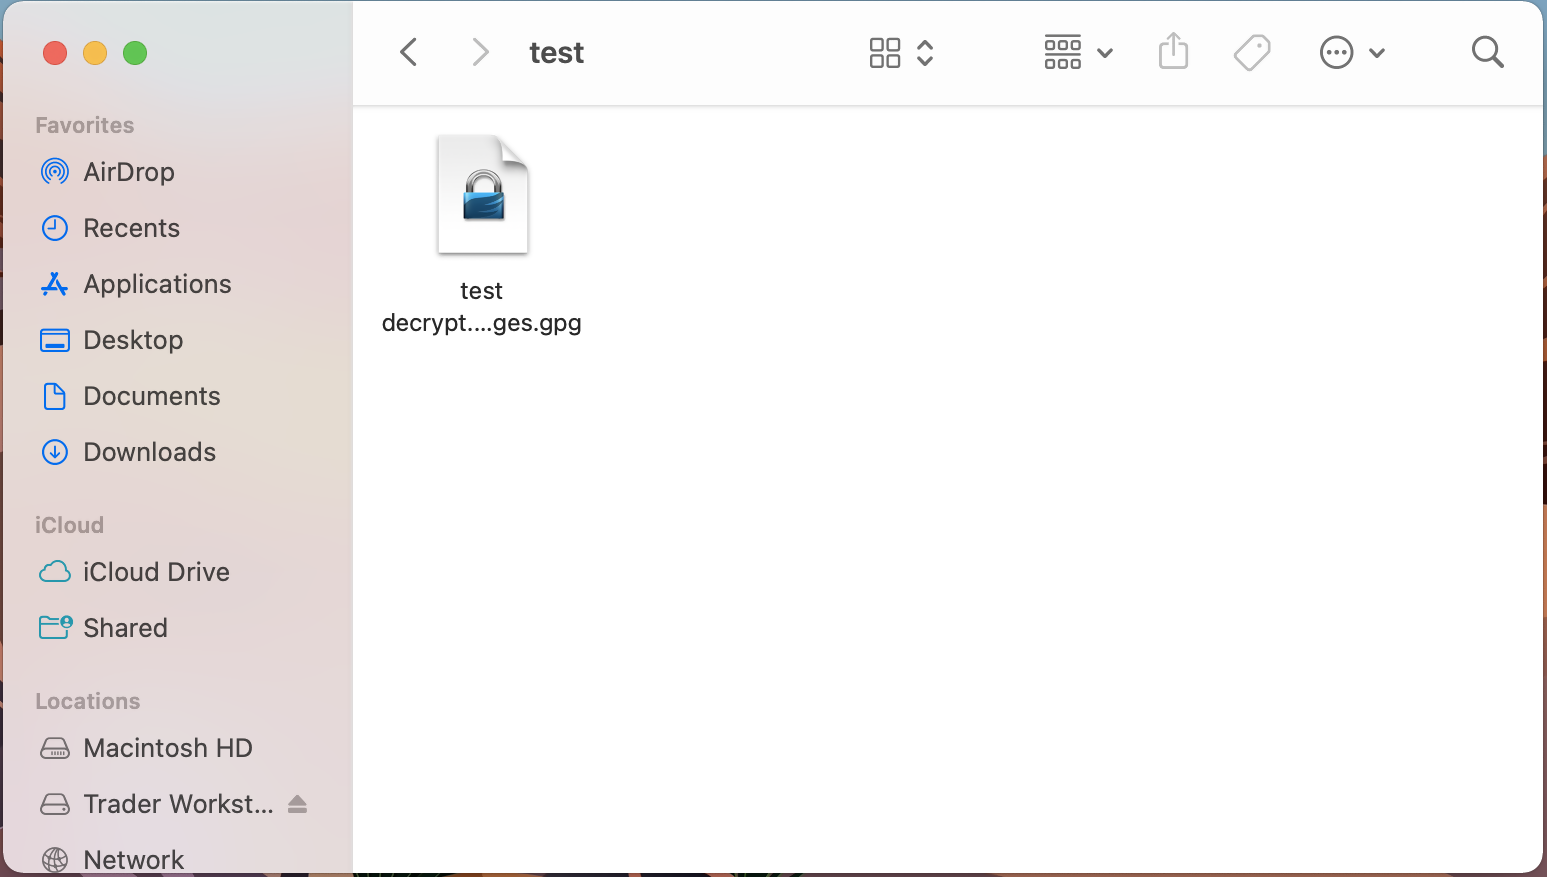
3. Select Services > OpenPGP: Decrypt File
Common Issues/Questions
- Decryption failed with error 'No Secret Key'
This is commonly caused when the wrong encryption key is used to decrypt the file. If decryption is being done on a computer other than the original computer used to create the public/private keys, the keys would have to be transferred from the original computer to the new computer.
If the above does not help, then a new public/private key pair needs to be created and sent to us.
Related articles
KB3842 - Using GPG/RSA encryption keys to guarantee the privacy and security of your Reports
KB3968 - Generate a key pair using GPG for Windows
KB4205 - Generate a key pair using GPG Suite on macOS
KB4108 - Decrypt your Reports using GPG for Windows
KB4407 - Generate RSA Key Pair on Windows
KB4578 - How to Access your Reports using FTP on Windows
KB4580 - How to Access your Reports using FTP on MacOS
Generate a Key Pair Using GPG Suite on macOS
If you elected to receive your statements in an encrypted form, you would first need to generate an RSA Key pair. To generate an RSA Key:
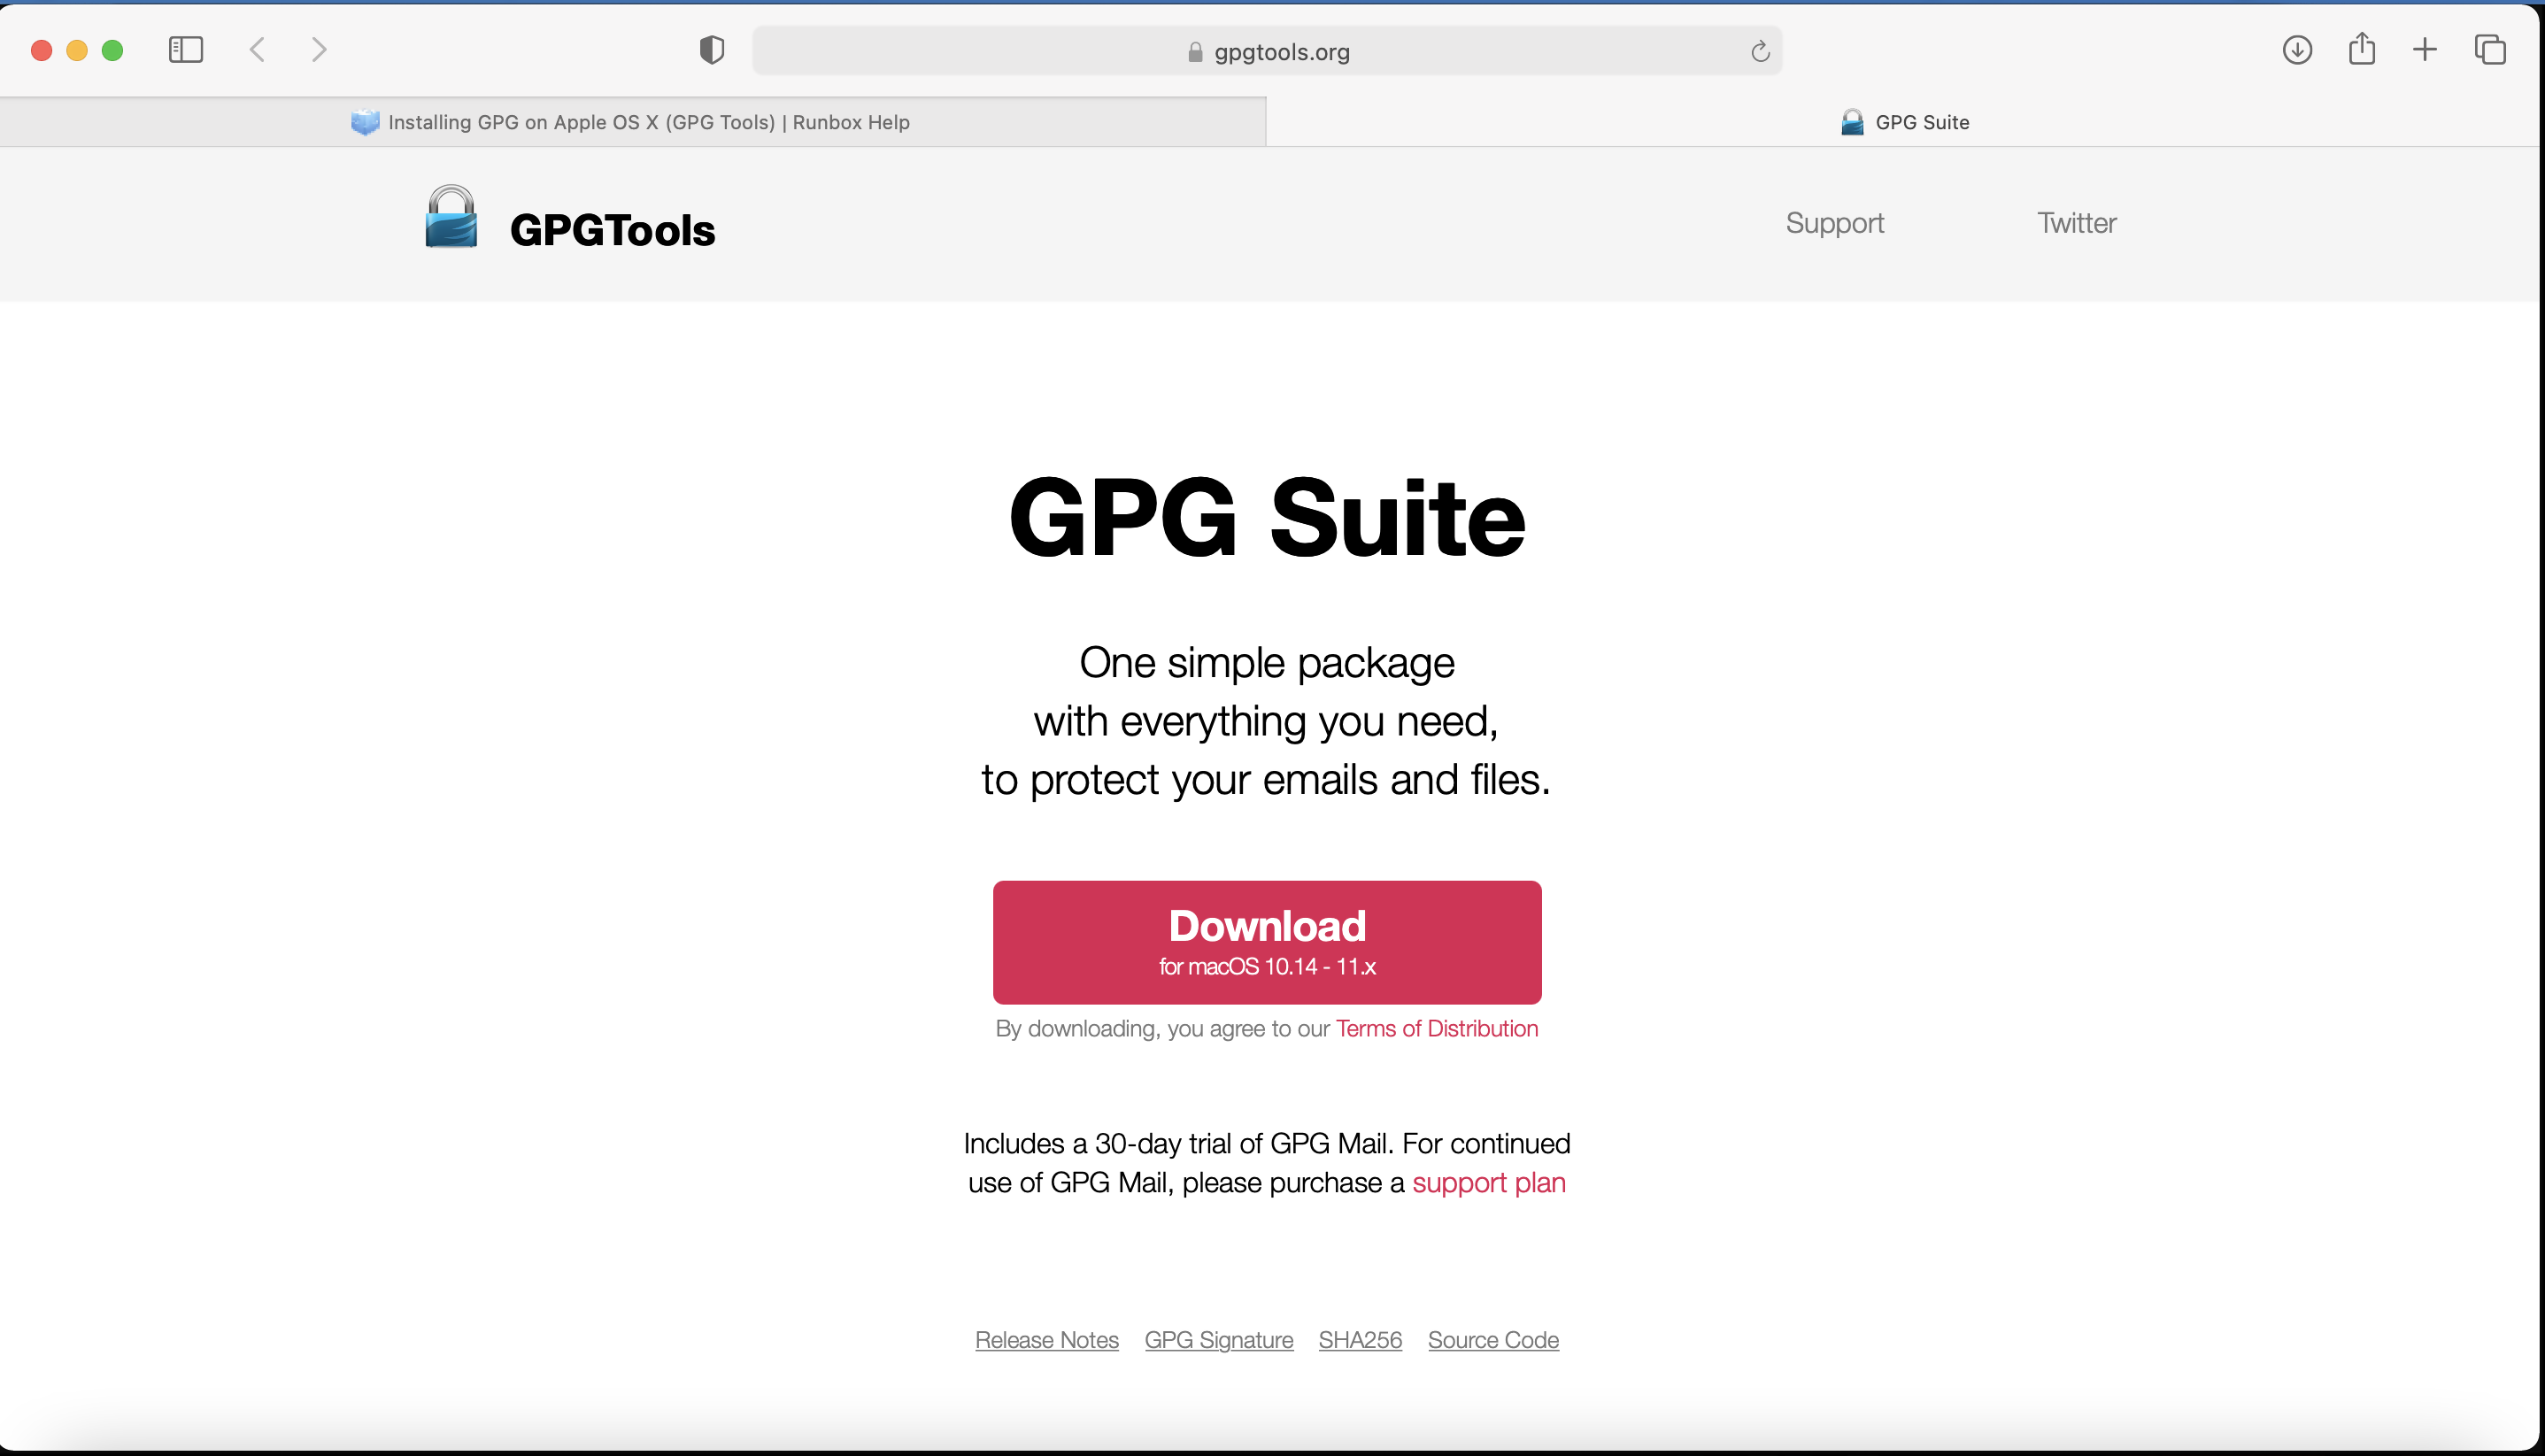
1. Download the GPG Suite for macOS
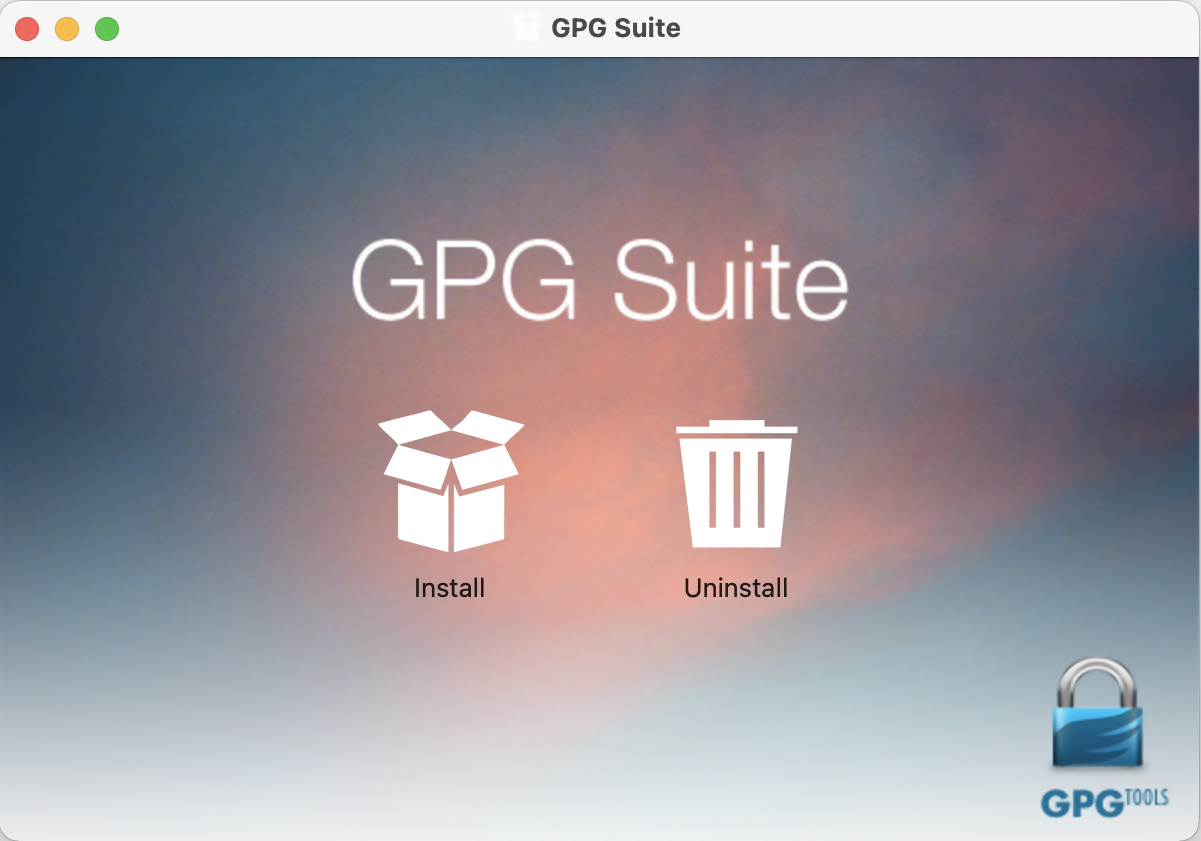
2. Double click on the downloaded installation file:

3. Click on Install
4. Click Continue
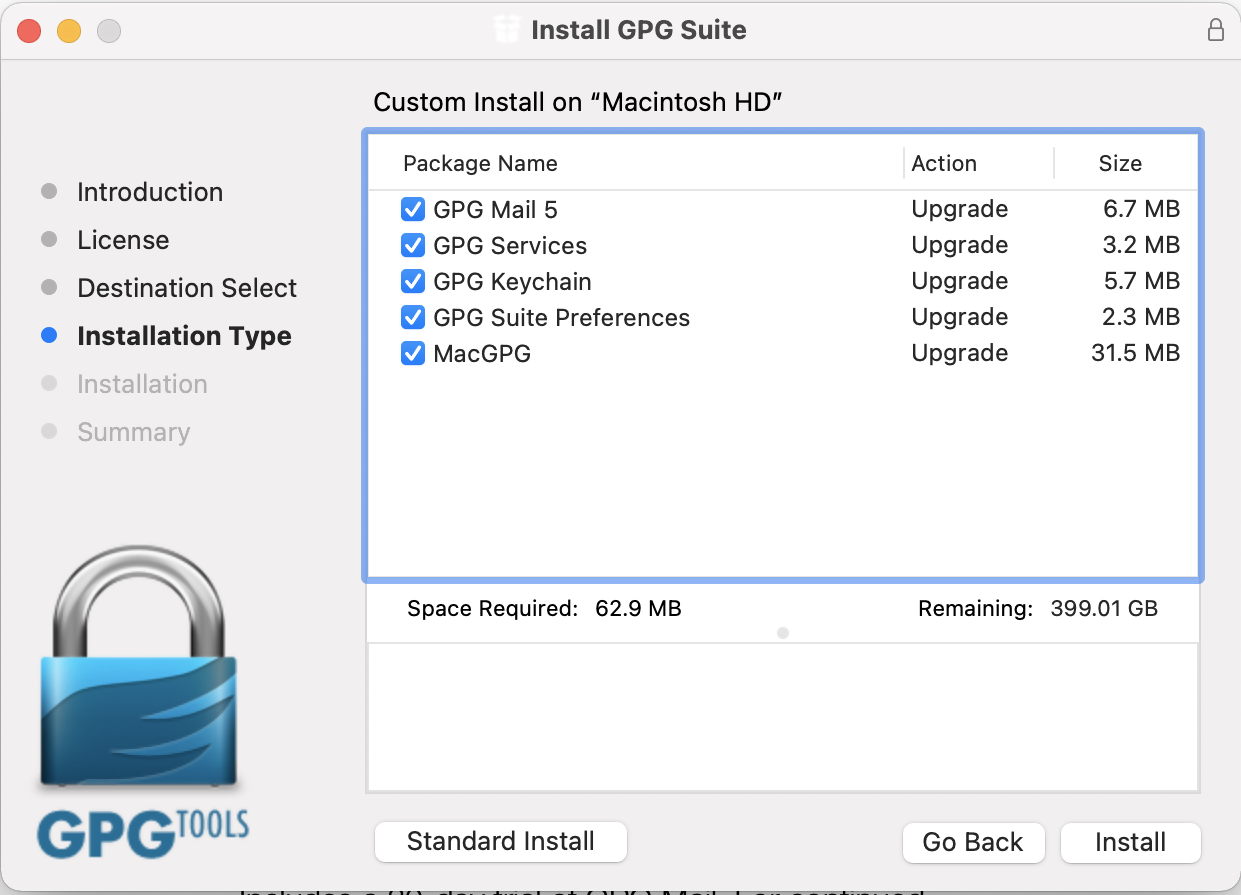
5. Click on Install

6. Click Install
Note: By default the installation includes an add-on for Apple Mail called GPG Mail. If you don't use Apple Mail and do not need this add-on, you can de-select it during this step.
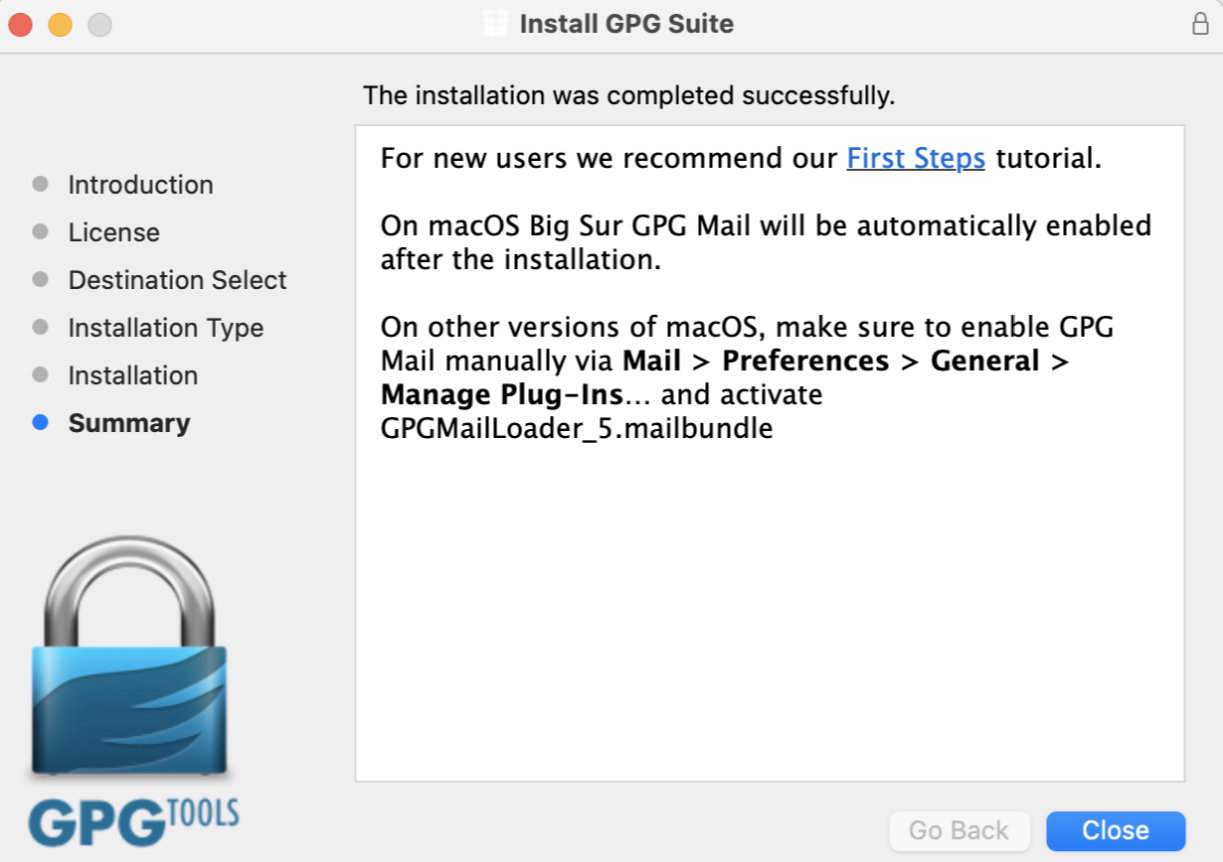
7. Click on Close:
8. Launch GPGTools. The Create new key pair dialog box should automatically open. Input your Full Name, your Email and choose a Password. PLEASE NOTE: Keeping a secure copy of this password is essential. Any loss of this password will require the whole process to be repeated.
9. Expand Advanced options and make sure that:
- The "Key type" drop-down is set to "RSA and RSA (default)"
- "Length" is set to "2048"
- The checkbox "Key will expire on" must remain NOT active
Important Note: Please be absolutely certain to set "Key type" to "RSA and RSA (default)" otherwise the key will be unusable.
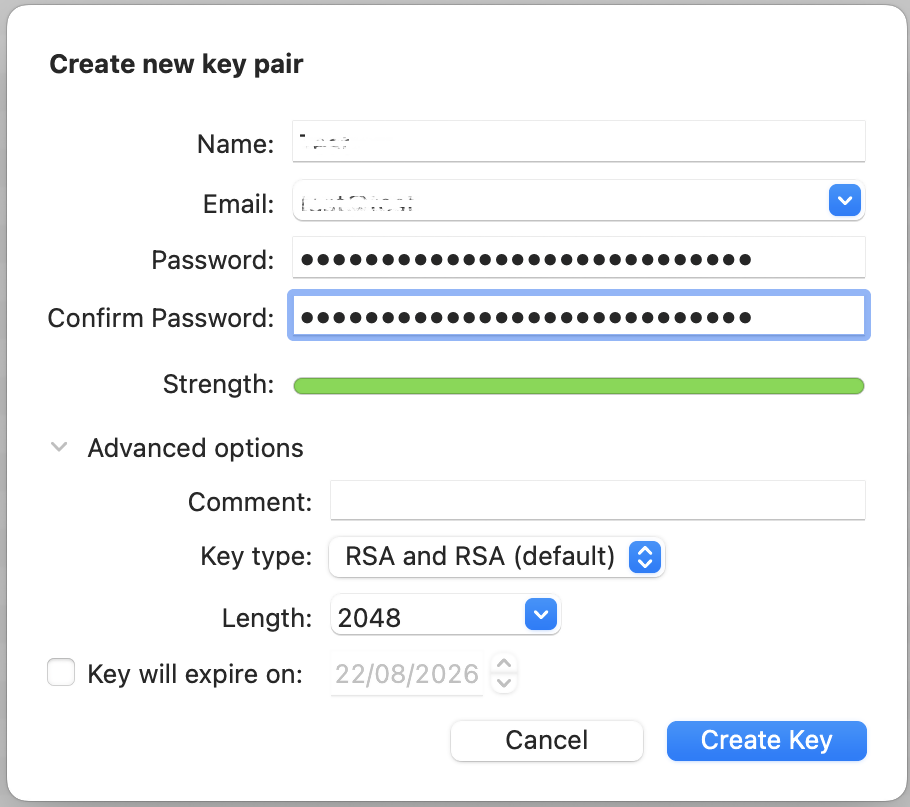
10. Click on the button Create Key
.png)
11. Once the key pair is created it will be listed in your Key ring. Right click on it and select Export...
.png)
12. Choose a location to save the key pair in the Where field and make sure the checkbox Include secret key in exported file is deactivated. Click on Save.
.png)
13. You will receive a prompt indicating that the key pair was created successfully. Click on No, Thanks! to prevent uploading the public key to the PGP servers
.png)
14. Open Finder and go to the location you selected for saving the public key (at point 12).
15. Send the public key file to us via Message Center ticket or email as per instructions on IBKB3842.
Related articles
KB3842 - Using GPG/RSA encryption keys to guarantee the privacy and security of your Reports
KB3968 - Generate a key pair using GPG for Windows
KB4108 - Decrypt your Reports using GPG for Windows
KB4210 - Decrypting Reports using your PGP Key pair on macOS
KB4407 - Generate RSA Key Pair on Windows
KB4578 - How to Access your Reports using FTP on Windows
KB4580 - How to Access your Reports using FTP on MacOSKB4409 - How to set up sFTP for using Certificate Authentication on Windows
KB4410 - How to set up sFTP for using Certificate Authentication on macOS
KB4411 - How to backup your public/private Key pair
KB4323 - How to transfer your public/private key pair from one computer to another
Generate a Key Pair Using GPG for Windows
To generate a key pair using GPG for Windows:
1. Download the GPG Installer for Windows.
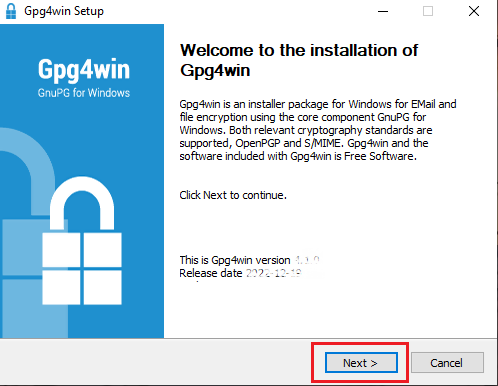
2. Run the installer and click Next >.
3. Make sure that the component Kleopatra is selected as one of the sub components to include in the installation and click Next >.
.png)
4. The default installation folder will be displayed. Click Install.
.png)
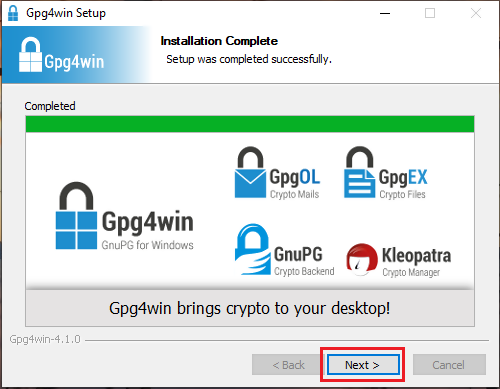
5. Once the installation has completed, click Next >.
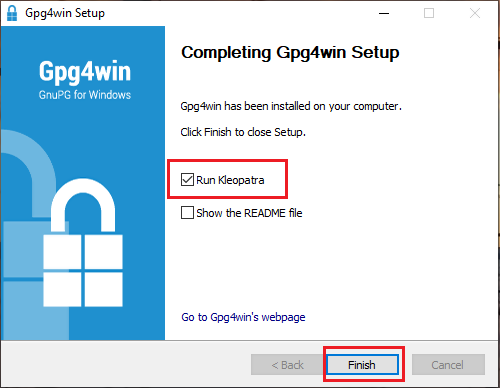
6. Make sure the checkbox Run Kleopatra is active and click Finish.
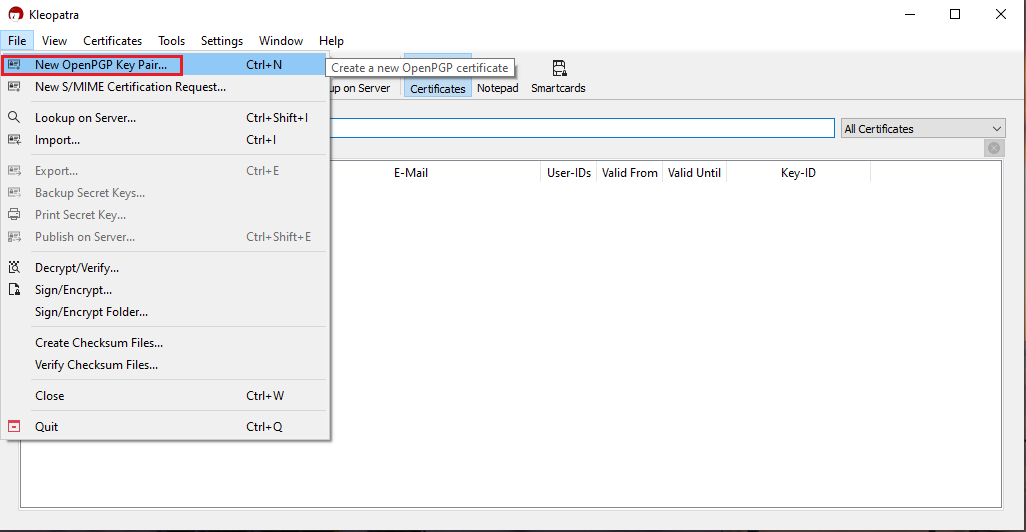
7. Kleopatra will now open. Click the top menu File and select New OpenPGP Key Pair...
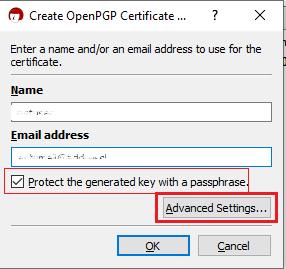
8. Enter your full Name and your Email address. Make sure the checkbox Protect the generated key with a passphrase is active. Click Advanced Settings...
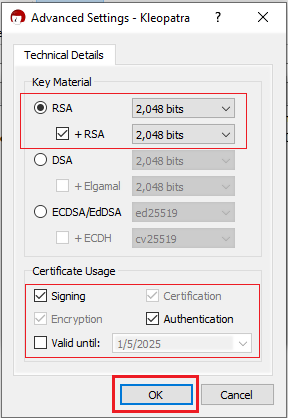
9. Enter the following Key parameters:
- Select RSA + RSA as Key type
- Select 2,048 bits and 2,048 bits as Key lengths
- Activate the checkboxes: Encryption, Certification, Signing and Authentication. The first two should be already active by default
- Deactivate the option Valid until
Once all the parameters have been set exactly as in the image below, click OK.
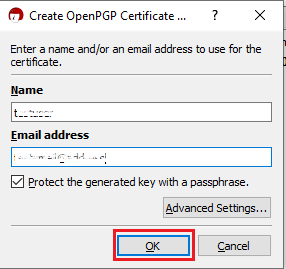
10. You will return to the Create OpenPGP Certificate window. Click OK.
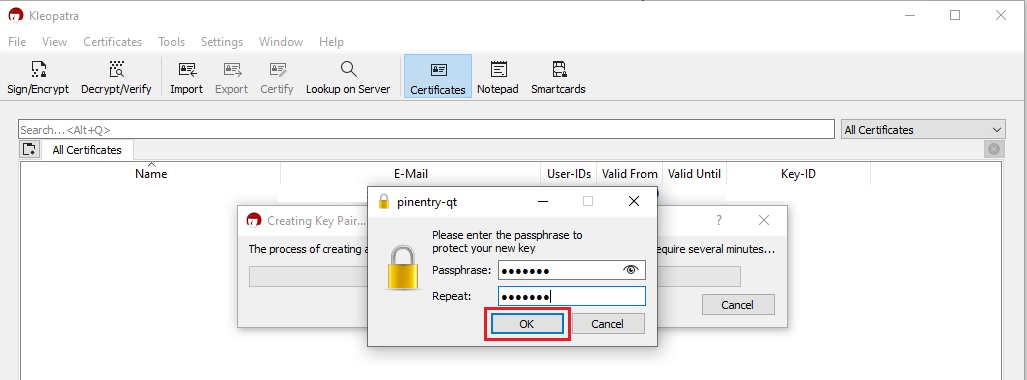
11. You will be asked to enter a passphrase and type it again in the field Repeat: to confirm you made no typing errors. Once done, click OK. PLEASE NOTE: Keeping a secure copy of this password is essential. Any loss of this password will require the whole process to be repeated.
12. A pop-up will confirm the Key Pair has been successfully created. Click OK.
.png)
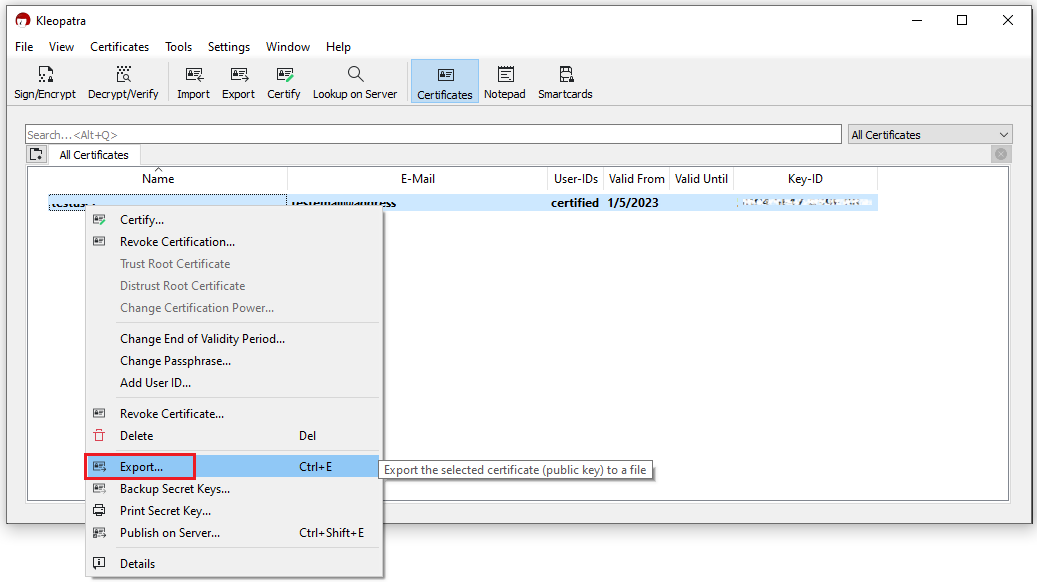
13. in the All Certificates panel, right-click on the newly created certificate and select Export...
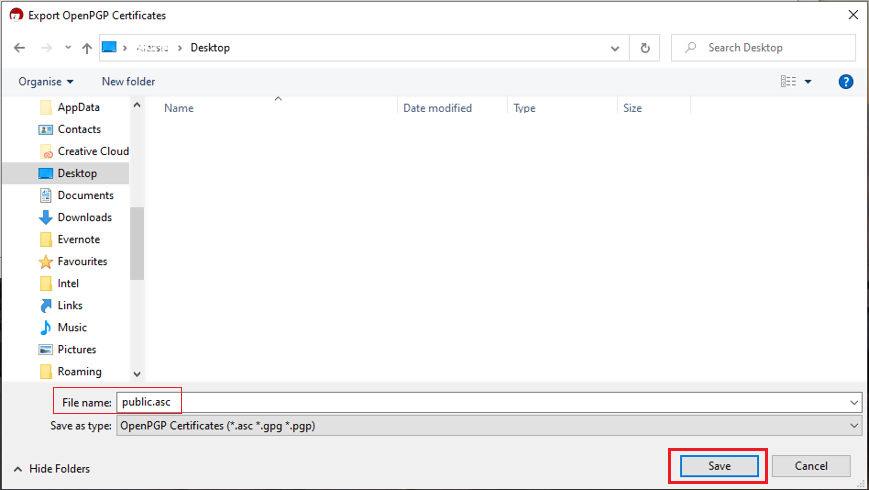
14. Navigate to the directory where you want to save your the public portion of your key (e.g. Desktop). Choose a name such as publickey.asc and click Save.
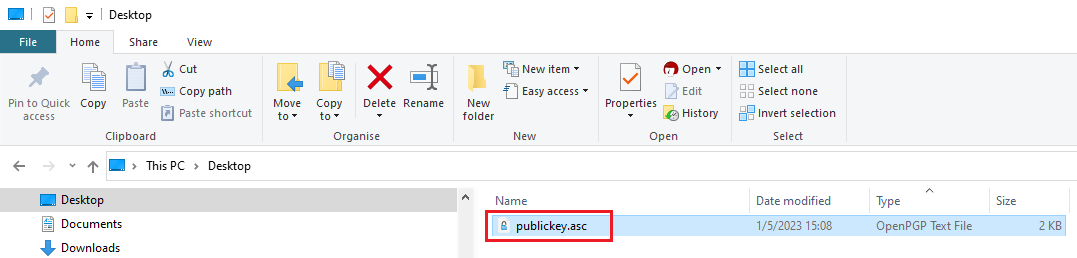
15. Open the Windows File Explorer and navigate to the directory where you saved the key. You will find the public.asc file ready to be sent to us via Message Center ticket or email as per instructions in IBKB3842:
16. Although this is not strictly needed, we strongly recommend you to perform a backup of your Key Pair, following the steps in KB4411. This backup copy of the certificates can be imported again in Kleopatra in case the original set becomes corrupted or accidentally deleted.
References
KB3842 - Using GPG/RSA encryption keys to guarantee the privacy and security of your Reports
KB4205 - Generate a key pair using GPG Suite on macOS
KB4108 - Decrypt your Reports using GPG for Windows
KB4210 - Decrypting Reports using your PGP Key pair on macOS
KB4407 - Generate RSA Key Pair on Windows
KB4578 - How to Access your Reports using FTP on Windows
KB4580 - How to Access your Reports using FTP on MacOSKB4409 - How to set up sFTP for using Certificate Authentication on Windows
KB4410 - How to set up sFTP for using Certificate Authentication on macOS
KB4411 - How to backup your public/private Key pair
KB4323 - How to transfer your public/private key pair from one computer to another
Using GPG/RSA Encryption Keys to Guarantee the Privacy and Security of Your Reports
Background:
In order to ensure the privacy and security of your Reports and Statements, IBKR offers the following file delivery options:
A. sFTP (Secure FTP) - Recommended solution
- We can send you Reports using the sFTP (Secure FTP) protocol on non-standard TCP port 32.
- sFTP is a network protocol that utilizes SSH (Secure Shell) for the transfer, management, and access of files through an encrypted data stream.
- Key based authentication is required. You will authenticate against our sFTP server through a unique RSA - 2048-bit public/private key pair, generated directly by you. We will use only your public key as authentication method for our sFTP server. Since the two keys are mathematically linked, only the private key holder (you) will be able to access the data.
- PGP encryption1 is optional.
B. Email with PGP (Pretty Good Privacy) Encryption
- We can encrypt your Reports using PGP (Pretty Good Privacy) certificates and send you those reports via email.
- PGP encryption1 is optional but recommended. If you opt to receive your Reports via email without encryption, any account sensitive data will be masked.
C. Plain FTP with PGP (Pretty Good Privacy) Encryption
- We can send you Reports using the regular FTP protocol on standard TCP port 21.
- PGP encryption1 is required. We can encrypt your Reports using PGP (Pretty Good Privacy) certificates.
Note 1: PGP encryption is based on a private/public key pair, which is unique and generated directly by you. We will use only your public key to encrypt your Reports. Since the two keys are mathematically linked, only the private key holder (you) will be able to decrypt the files.
To start the process, please select one of the options below according to the way you wish to access your Reports:
A. I Want to Receive my Reports via Secure FTP (sFTP)
When electing to receive your Reports through the IBKR hosted sFTP, please follow the steps below:
1) Install a FTP application. There are many free FTP application suites that can be used, like FileZilla or WinSCP.
2) Generate a public/private RSA key pair. Please follow the procedure below according to the Operating System you use:
3) Open a Web Ticket (via Client Portal -> Help -> Support Center) as follows:
-
Write "Attn. Reporting Integration Team" in the subject.
-
Write a short request for a IBKR hosted plain FTP in the message body
-
Write the IP Address(es) your connection will originate from in the message body
-
Paste the content (the alphanumeric string) of your RSA public key file in the message body
Alternatively, you can provide these same elements listed above via email to the Reporting Integration Team. Include the last 4 digits of your IBKR Account number in the email subject.
Note: We will not accept your public key if you have included as well your private key. Please be sure to send us only the public part of the key pair.
4) IBKR will notify you within 1-2 business days, once your sFTP site has been set up.
5) Set your RSA key pair as authentication method for your sFTP client. Please follow the procedure below according to the Operating System you use:
B. I Want to Receive my Reports via Email with PGP Encryption
When electing to receive emails that contain encrypted data from IBKR, please follow the steps below:
1) Generate a PGP key pair in order to decrypt the files. Please follow the procedure below according to the Operating System you use:
2) Open a Web Ticket (via Client Portal -> Help -> Support Center) as follows:
-
Write "Attn. Reporting Integration Team" in the subject
-
Paste the content (the alphanumeric string) of your PGP public key file in the message body
Alternatively, you can send an email to the Reporting Integration Team. Include the last 4 digits of your IBKR Account number in the email subject and attach your PGP public key.
Note: We will not accept your public key if you have included as well your private key. Please be sure to send us only the public part of the key pair.
3) IBKR will notify you once your public key was imported on our systems. You will then enable the encryption for email file delivery from your Client Portal.
4) Use your key pair to decrypt the emails with the encrypted attachment/s. Please follow the procedure below according to the Operating System you use:
C. I Want to Receive my Reports via FTP with PGP Encryption
When electing to receive your Reports through the IBKR hosted sFTP, please follow the steps below:
1) Generate a PGP key pair in order to decrypt the files. Please follow the procedure below according to the Operating System you use:
2) Open a Web Ticket (via Client Portal -> Help -> Support Center) as follows:
-
Write "Attn. Reporting Integration Team" in the subject
-
Write a short request for a IBKR hosted plain FTP in the message body
-
Paste the content (the alphanumeric string) of your PGP public key file in the message body
Alternatively, you can provide these same elements listed above via email to the Reporting Integration Team. Include the last 4 digits of your IBKR Account number in the email subject.
Note: We will not accept your public key if you have included as well your private key. Please be sure to send us only the public part of the key pair.
3) IBKR will notify you once your public key has been imported on our systems. You will then enable the encryption for FTP file delivery from your Client Portal.
4) Access our FTP site and use your PGP key pair to decrypt the files you receive. Please follow the procedure below according to the Operating System you use:
Additional procedures
- How to back up your public/private key pair
- How to transfer your public/private key pair from one computer to another
References
KB3968 - Generate a key pair using GPG for Windows
KB4205 - Generate a key pair using GPG Suite on macOS
KB4108 - Decrypt your Reports using GPG for Windows
KB4210 - Decrypting Reports using your PGP Key pair on macOS
KB4407 - Generate RSA Key Pair on Windows
KB3968 - Generate a key pair using GPG for Windows
KB4205 - Generate a key pair using GPG Suite on macOS
KB4108 - Decrypt your Reports using GPG for Windows
KB4210 - Decrypting Reports using your PGP Key pair on macOS
KB4407 - Generate RSA Key Pair on Windows
KB4819 - How to set up sFTP for using Certificate Authentication on Linux
KB4578 - How to Access your Reports using FTP on Windows
KB4580 - How to Access your Reports using FTP on MacOS
KB4409 - How to set up sFTP for using Certificate Authentication on Windows
KB4410 - How to set up sFTP for using Certificate Authentication on macOS
KB4411 - How to backup your public/private Key pair
KB4323 - How to transfer your public/private key pair from one computer to another
KB4410 - How to set up sFTP for using Certificate Authentication on macOS
KB4411 - How to backup your public/private Key pair
KB4323 - How to transfer your public/private key pair from one computer to another
Create a Custom Statement with Lot Details
Overview:
You can create a statement with Lot Details through the Custom Statements screen in Client Portal/Account Management.
New Client Portal
1. Click Reports > Statements.
The Statements screen will populate.
2. In the Custom Statements panel, click the + icon.
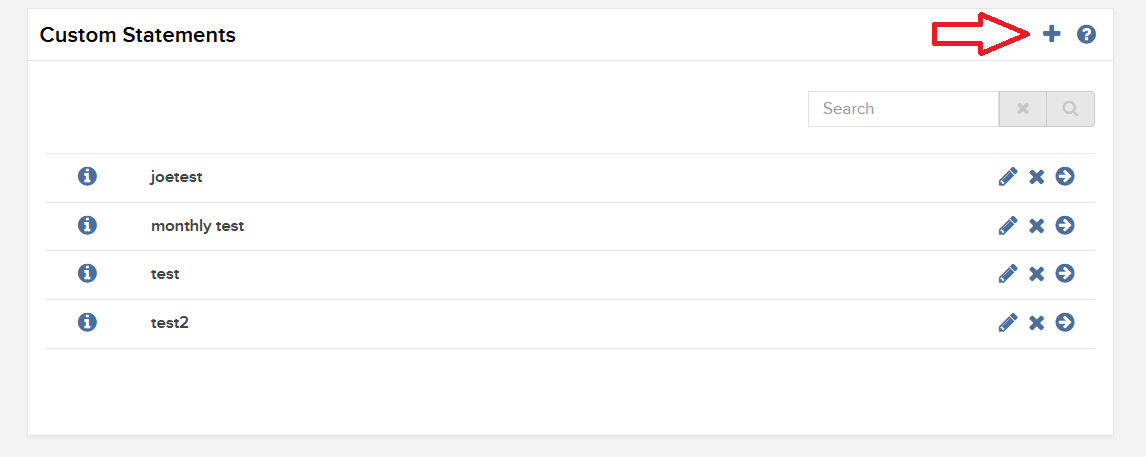
The Activity Statement Template screen will populate.
3. Click the + icon to create a new statement template.
.jpg)
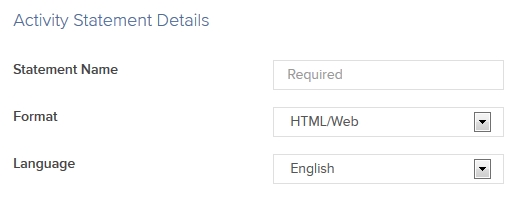
4. In Activity Statement Details, enter a name for your custom statement, and select an output format and language. It will ask you to select a time Period as well, but this can be modified when you run the statement.
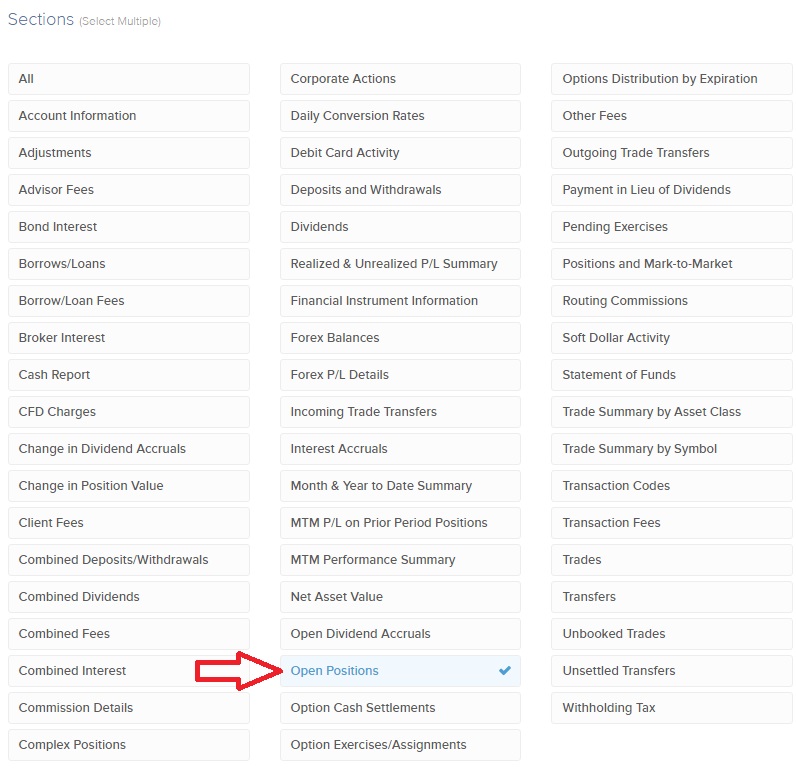
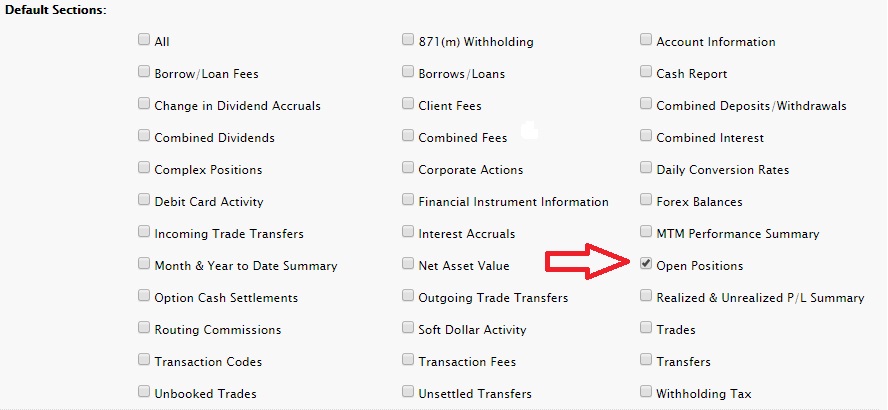
5. In Sections, click each section that you want to appear in your custom statement. Selected sections will appear with a check mark. The Open Positions section is where Lot Details will be located, so be sure to choose this option.
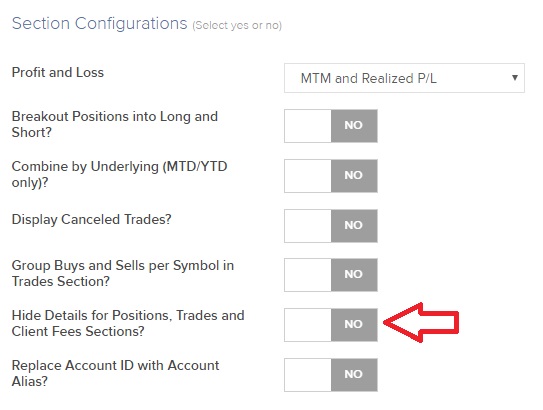
6. In Section Configurations, please select which options you wish to turn on in your custom statement. In order to ensure Lot Details are on the statement, select “NO’ for “Hide Details for Positions, Trades, and Client Fees Sections?”.
7. Click CONTINUE.
8. Review your statement template and click Create.
You can now run your new custom statement from the Run a Statement panel on the Statements screen.
Classic Account Management
1. Click Reports > Activity > Statements.
The Statements screen will populate.
2. Click on the blue “Customize Statements” header.
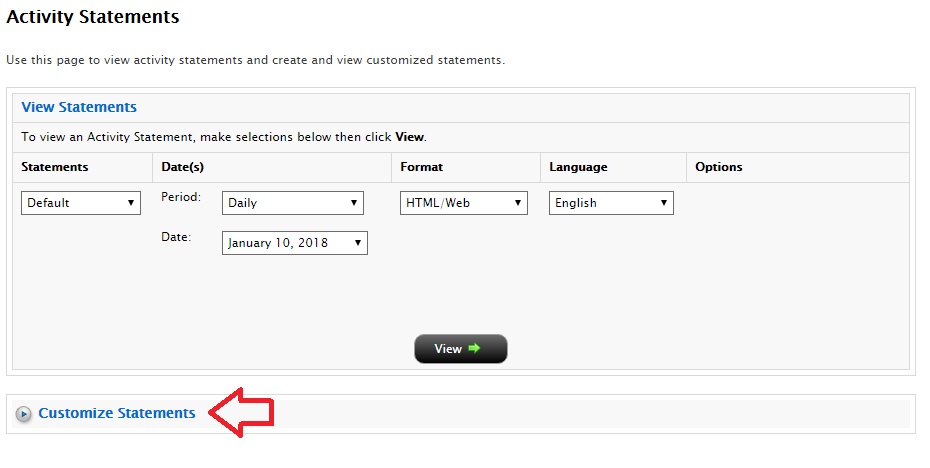
The Customize Statements section will expand/populate.
3. Select “Create New” from the first drop down menu, and enter a name for your custom statement in the “Statement Name” field.

4. In Default Sections, click each section that you want to appear in your custom statement. Selected sections will appear with a check mark. The Open Positions section is where Lot Details will be located, so be sure to choose this option.
5. In Section Configurations, please select which options you wish to turn on in your custom statement. In order to ensure Lot Details are on the statement, UNCHECK THE BOX for “Hide Details for Positions, Trades, and Client Fees sections”.

6. Select your Profit and Loss Type, Statement Type (should be Activity Statement), Account number(s), Activity Period, Format, and Language from the drop down menus. While the system does ask you for a preferred Activity Period, this can be modified when you run the statement.
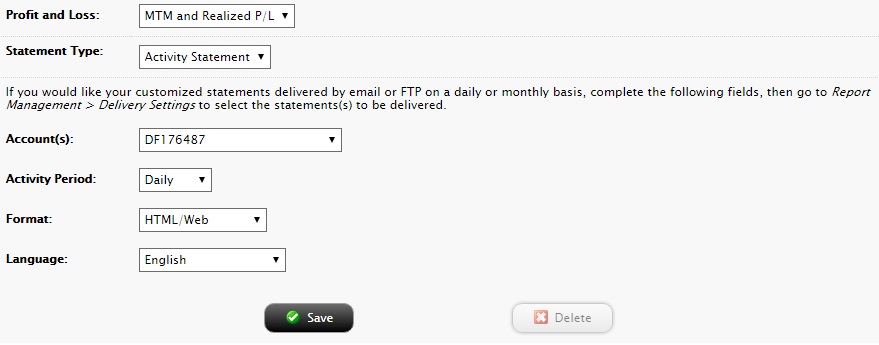
7. Click Save.
You can now run your new custom statement from View Statements panel on the Statements screen by selecting your new custom statement from the “Statements” drop down menu.
How to update the US Social Security Number (SSN) or Individual Taxpayer Identification Number (ITIN) on your account
Background:
If you have been informed or believe that your account profile contains an incorrect US SSN/ITIN, you may simply log into your Account Management to update this information. Depending on your taxpayer status, you can update your US SSN/ITIN by modifying one of the following documents:
1) IRS Form W9 (if you are a US tax resident and/or US citizen holding a US SSN/ITIN)
2) IRS Form W-8BEN (if you are a Non-US tax resident holding a US SSN/ITIN)
Please note, if your SSN/ITIN has already been verified with the IRS you will be unable to update the information. If however the IRS has not yet verified the ID, you will have the ability to update through Account Management.
How to Modify Your W9/W8
1) To submit this information change request, first login to Account Management
2) Click on the Settings section followed by Account Settings
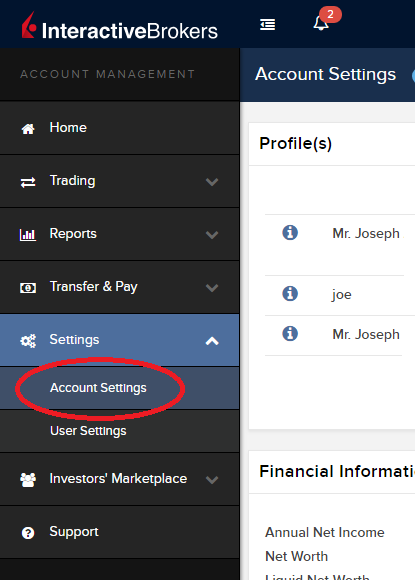
3) Find the Profile(s) section. Locate the User you wish to update and click on the Info button (the "i" icon) to the left of the User's name
.png)
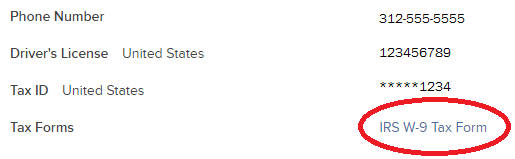
4) Scroll down to the bottom where you will see the words Tax Forms. Next to it will be a link with the current tax form we have for the account. Click on this tax form to open it
5) Review the form. If your US SSN/ITIN is incorrect, click on the UPDATE button at the bottom of the page
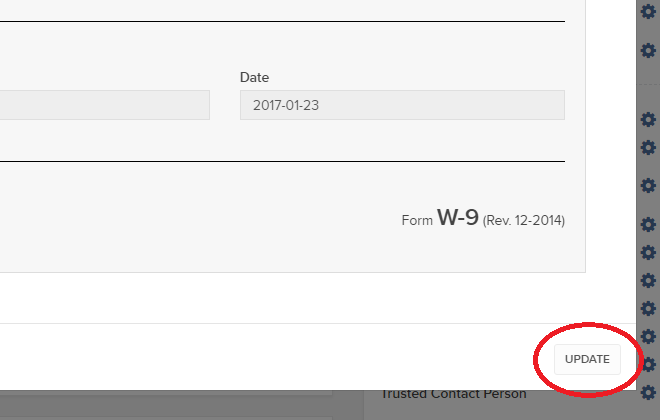
6) Make the requisite changes and click the CONTINUE button to submit your request.

7) If supporting documentation is required to approve your information change request, you will receive a message. Otherwise, your information change request should be approved within 24-48 hours.
Common Reporting Standard (CRS)
The Common Reporting Standard (CRS), referred to as the Standard for Automatic Exchange of Financial Account Information (AEOI), calls on countries to obtain information from their financial institutions and exchange that information with other countries automatically on an annual basis. The CRS sets out the financial account information to be exchanged, the financial institutions required to report, the different types of accounts and taxpayers covered, as well as common due diligence procedures to be followed by financial institutions. For more information about CRS, please visit the OECD website.
Interactive Brokers entities comply with the requirements of CRS as implemented in the jurisdictions where they are located, and report account information to the applicable government authorities. Clients reported by Interactive Brokers under CRS will receive a CRS Client Report in the Client Portal shortly after the reporting deadlines specified below. The CRS Client Report provides an overview of the information that was reported by Interactive Brokers.
- What information is reported under CRS:
- Account number
- Name
- Address
- Tax ID Number
- Tax residency country
- Date of birth
- Year-end account balance
- Gross proceeds (all sales)
- Interest income
- Dividend income
- Other income
- When and where is the information reported:
- Interactive Brokers Australia Pty. Ltd. reports to the Australian Taxation Office (ATO) by July 31.
- Interactive Brokers Canada Inc. reports to the Canada Revenue Agency (CRA) by May 1.
- Interactive Brokers Central Europe Zrt. reports to the National Tax and Customs Administration of Hungary (NAV) by June 30.
- Interactive Brokers Hong Kong Limited reports to the Inland Revenue Department of Hong Kong SAR (IRD) by May 31.
- Interactive Brokers India Pvt. Ltd. reports to the Reserve Bank of India/Central Board of Direct Taxes (RBI/CBDT) by May 31.
- Interactive Brokers Ireland Limited reports to the Office of the Revenue Commissioners of Ireland by June 30.
- Interactive Brokers Securities Japan Inc. reports to the National Tax Agency of Japan (NTA) by April 30.
- Interactive Brokers Singapore Pte. Ltd. reports to the Inland Revenue Authority of Singapore (IRAS) by May 31.
- Interactive Brokers U.K. Limited reports to Her Majesty's Revenue and Customs of the United Kingdom (HMRC) by May 31.
- Additional Notes:
- Information relating to clients of Introducing Brokers is not reported by Interactive Brokers. Introducing Brokers are responsible for their own reporting under CRS.
- Accounts held by Interactive Brokers LLC are not reported under CRS as the United States has not signed the CRS.
Market Data Non-Professional Questionnaire
Overview:
Insight into completing the new Non-Professional Questionnaire.
Background:
The NYSE and most US exchanges require vendors to positively confirm the market data status of each customer before allowing them to receive market data. Going forward, the Non-Professional Questionnaire will be used to identify and positively confirm the market data status of all customer subscribers. As per exchange requirements, without positively identifying customers as non-professional, the default market data status will be professional. The process will protect and maintain the correct market data status for all new subscribers. For a short guide on non-professional definitions, please see https://ibkr.info/article/2369.
Each question on the questionnaire must be answered in order to have a non-professional designation. As exchanges require positive confirmations of proof for non-professional designations, an incomplete or unclear Non-Professional Questionnaire will result in a Professional designation until the status can be confirmed.
If the status should change, please contact the helpdesk.
Explanation of questions:
1) Commercial & Business purposes
a) Do you receive financial information (including news or price data concerning securities, commodities and other financial instruments) for your business or any other commercial entity?
Explanation: Are you receiving and using the market data for use on behalf of a company or other organization aside from using the data on this account for personal use?
b) Are you conducting trading of any securities, commodities or forex for the benefit of a corporation, partnership, professional trust, professional investment club or other entity?
Explanation: Are you trading for yourself only or are you trading on behalf of an organization (Ltd, LLC, GmbH, Co., LLP, Corp.)?
c) Have you entered into any agreement to (a) share the profit of your trading activities or (b) receive compensation for your trading activities?
Explanation: Are you being compensated to trade or are you sharing profits from your trading activities with a third party entity or individual?
d) Are you receiving office space, and equipment or other benefits in exchange for your trading or work as a financial consultant to any person, firm or business entity?
Explanation: Are you being compensated in any way for your trading activity by a third party, not necessarily by being paid in currency.
2) Act in a capacity
a) Are you currently acting in any capacity as an investment adviser or broker dealer?
Explanation: Are you being compensated to manage third party assets or compensated to advise others on how to manage their assets?
b) Are you engaged as an asset manager for securities, commodities or forex?
Explanation: Are you being compensated to manage securities, commodities, or forex?
c) Are you currently using this financial information in a business capacity or for managing your employer’s or company’s assets?
Explanation: Are you using data at all for a commercial purposes specifically to manage your employer and/or company assets?
d) Are you using the capital of any other individual or entity in the conduct of your trading?
Explanation: Are there assets of any other entity in your account other than your own?
3) Distribute, republish or provide data to any other party
a) Are you distributing, redistributing, publishing, making available or otherwise providing any financial information from the service to any third party in any manner?
Explanation: Are you sending any data you receive from us to another party in any way, shape, or form?
4) Qualified professional securities / futures trader
a) Are you currently registered or qualified as a professional securities trader with any security agency, or with any commodities or futures contract market or investment adviser with any national or state exchange, regulatory authority, professional association or recognized professional body? i, ii
YES☐ NO☐
i) Examples of Regulatory bodies include, but are not limited to,
- US Securities and Exchange Commission (SEC)
- US Commodities Futures Trading Commission (CFTC)
- UK Financial Service Authority (FSA)
- Japanese Financial Service Agency (JFSA)
ii) Examples of Self-Regulatory Organization (SROs) include, but are not limited to:
- US NYSE
- US FINRA
- Swiss VQF