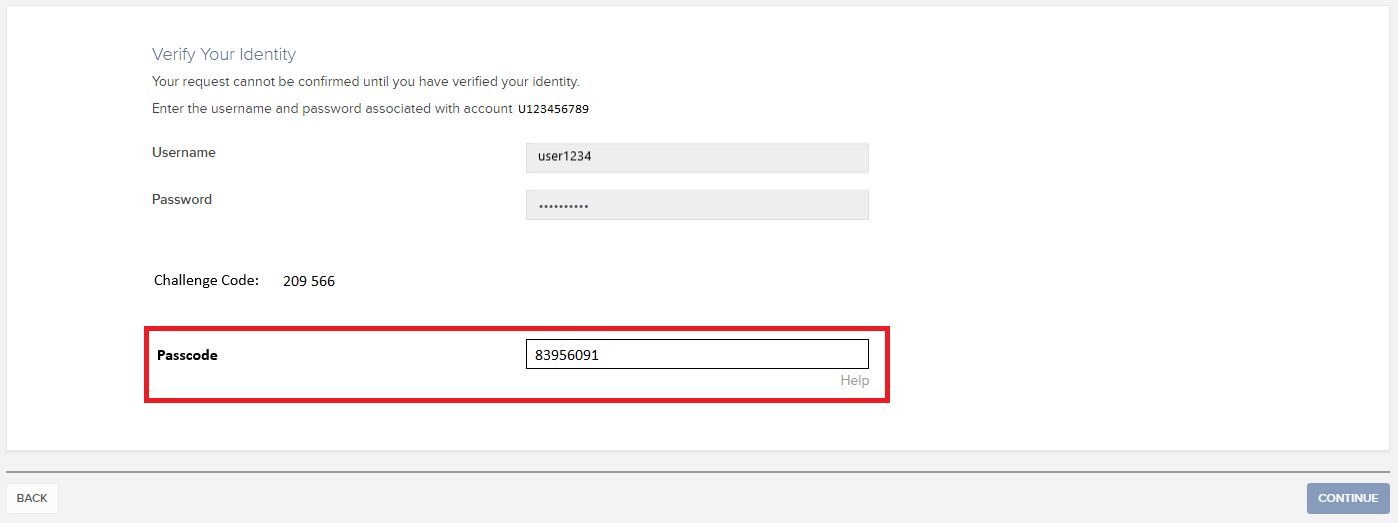
Come inviare documenti a IBKR grazie al tuo smartphone
Interactive Brokers ti consente di inviarci una copia di un documento anche se non hai al momento uno scanner. Puoi scattare una foto del documento richiesto semplicemente utilizzando il tuo smartphone.
Qui di seguito troverai le istruzioni su come scattare una foto e inviarla tramite e-mail a Interactive Brokers per i seguenti sistemi operativi su smartphone:
Se sai già come scattare e inviare foto tramite e-mail con il tuo smartphone, ti invitiamo a cliccare QUI – Dove inviare l’e-mail e cosa inserire nel campo oggetto.
iOS
1. Dal fondo dello schermo del tuo smartphone scorri verso l’alto e seleziona l’icona della fotocamera.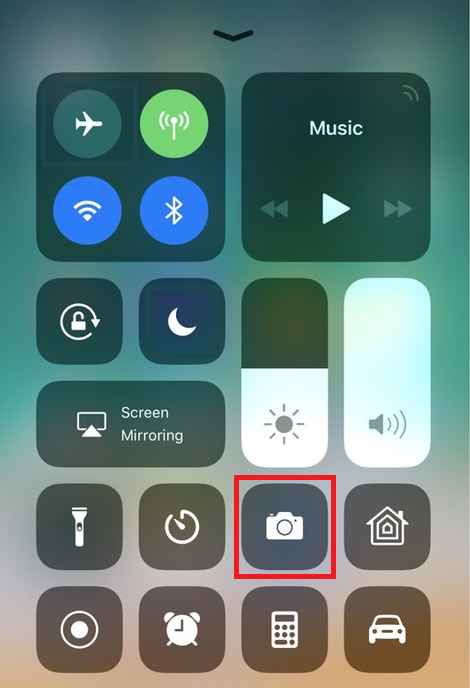
Se non hai l’icona della Fotocamera, tocca l’icona dell’app Fotocamera presente sulla schermata Home del tuo iPhone.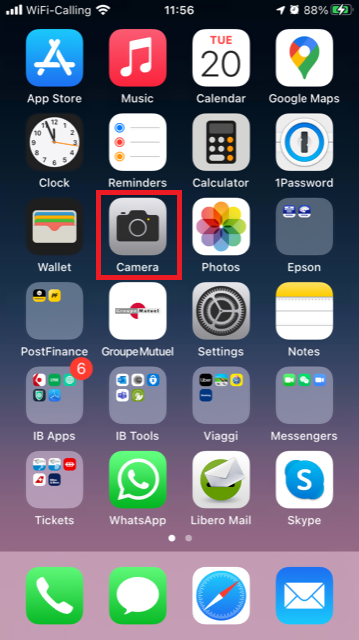
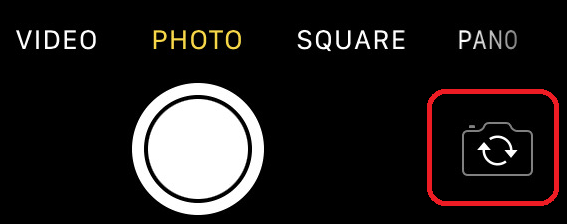
In genere il tuo telefono dovrebbe attivare la fotocamera posteriore. Se si attiva quella anteriore, ti basterà toccare il pulsante cerchiato in rosso nell’immagine qui sotto.
2. Disponi l’iPhone sopra il documento e inquadra una porzione o una pagina intera.

3. Assicurati che la luce sia uniforme e basti a illuminare il testo. Fai in modo che non ci siano ombre sul documento per via della tua posizione. Reggi lo smartphone in maniera decisa evitando scosse o tremolii. Tocca il pulsante dell’otturatore per scattare la foto.
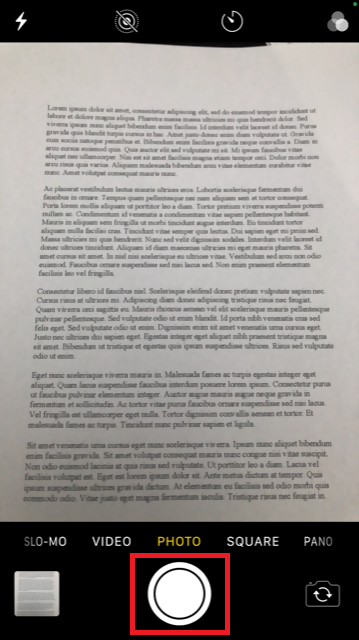
4. Tocca la miniatura della foto nell’angolo in basso a sinistra per visualizzare a schermo intero la foto che hai appena scattato.
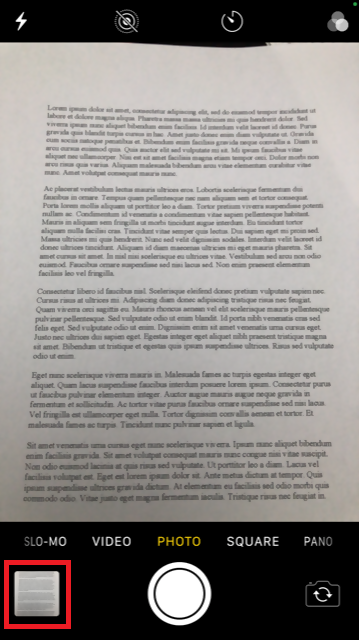
5. Assicurati che la foto sia chiara e che il documento sia leggibile. Puoi ingrandire la foto e vedere nel dettaglio l’immagine facendo scorrere le due dita come mostrato nell’immagine qui sotto.

Se la foto non è di buona qualità oppure non c'è abbastanza luce, ripeti i passaggi precedenti per scattare una foto migliore.
6. Tocca l’icona di condivisione nell’angolo in basso a sinistra dello schermo.
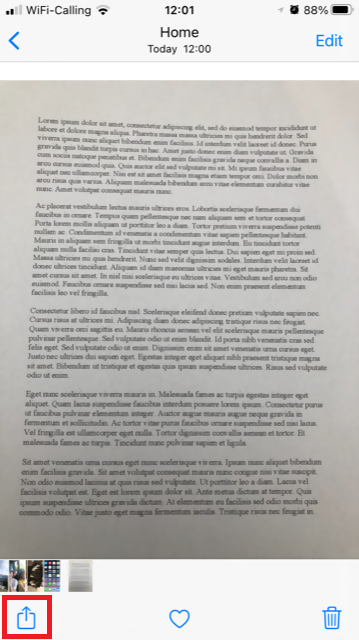
7. Tocca l’icona della posta elettronica.
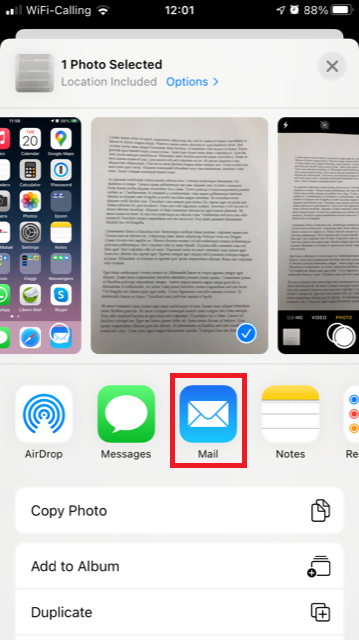
Nota bene: per inviare e-mail il tuo telefono deve essere configurato per questo scopo. Ti invitiamo a contattare il tuo e-mail provider se non hai familiarità con questa procedura.
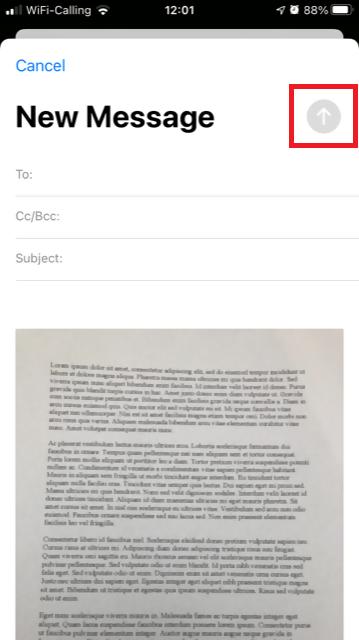
8. Ti invitiamo a leggere QUI per vedere come compilare i campi A: e Oggetto: della tua e-mail. Una volta completata l’e-mail, tocca l’icona della freccia in alto a destra per l’invio.
Android
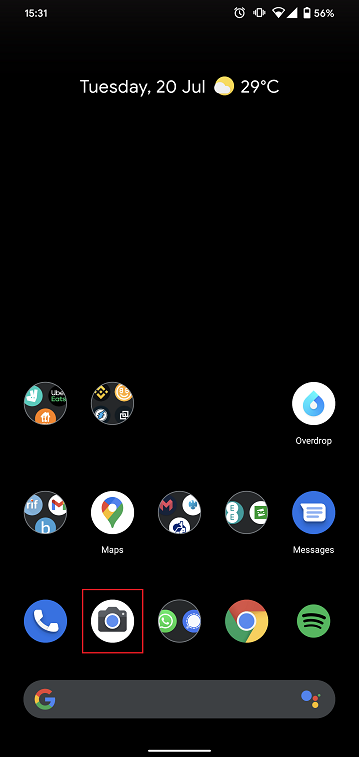
1. Apri la lista delle applicazioni e avvia l’app Fotocamera. In alternativa puoi accedervi dalla tua schermata Home. L’applicazione potrebbe avere un nome diverso a seconda del modello di telefono, della marca o delle impostazioni.
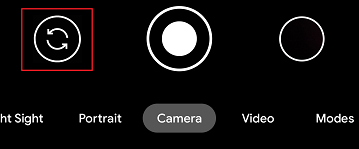
In genere il tuo telefono dovrebbe attivare la fotocamera posteriore. Se si attiva quella anteriore, ti basterà toccare il pulsante cerchiato in rosso nell’immagine qui sotto.
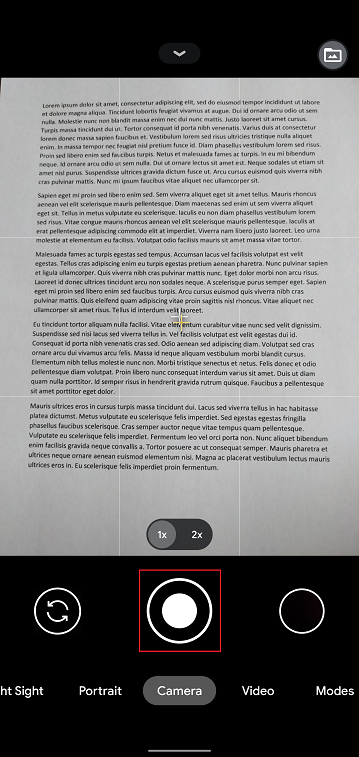
2. Disponi il tuo dispositivo Android sopra il documento e inquadra una porzione o una pagina intera.

3. Assicurati che la luce sia uniforme e basti a illuminare il testo. Fai in modo che non ci siano ombre sul documento per via della tua posizione. Reggi lo smartphone in maniera decisa evitando scosse o tremolii. Tocca il pulsante dell’otturatore per scattare la foto.
4. Assicurati che la foto sia chiara e che il documento sia leggibile. Puoi ingrandire la foto e vedere nel dettaglio l’immagine facendo scorrere le due dita come mostrato nell’immagine qui sotto.

Se la foto non è di buona qualità oppure la luce non basta, ripeti i passaggi precedenti per scattare una foto migliore.
5. Tocca l’icona del cerchio vuoto nell’angolo in basso a destra dello schermo.
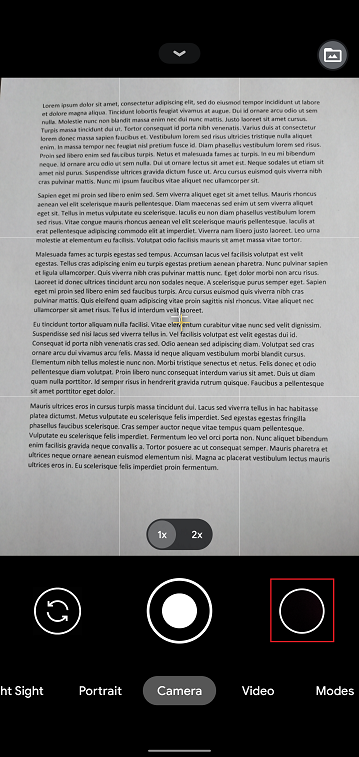
6. Tocca l’icona di condivisione nell’angolo in basso a sinistra dello schermo.
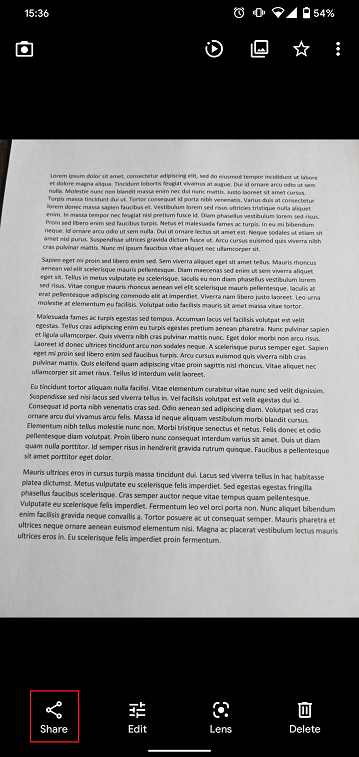
7. Nel menu di condivisione tocca l’icona del servizio e-mail impostato sul tuo telefono. Nell’esempio qui in basso viene selezionata Gmail, ma il nome potrebbe variare in base alle impostazioni del tuo smartphone.
.png)
Nota bene: per inviare e-mail il tuo telefono deve essere configurato per questo scopo. Ti invitiamo a contattare il tuo e-mail provider se non hai familiarità con questa procedura.
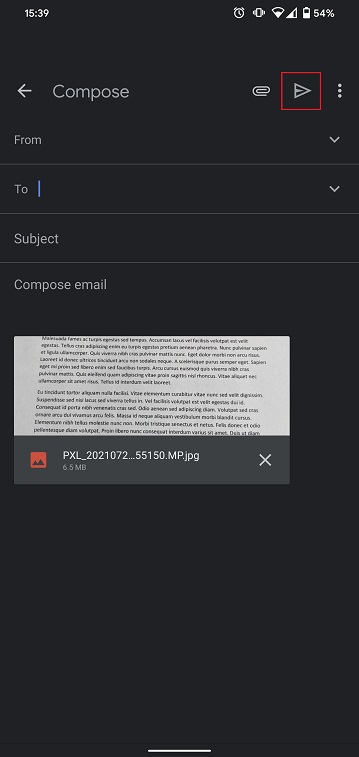
8. Ti invitiamo a leggere QUI per vedere come compilare i campi "A" e "Oggetto" della tua e-mail. Una volta completata l'e-mail, tocca l’icona della freccia in alto a destra per l’invio.
DOVE INVIARE L’E-MAIL E COSA INSERIRE NEL CAMPO OGGETTO
L’e-mail deve essere scritta rispettando le seguenti istruzioni:
1. Nel campo "A:" bisogna inserire quanto segue:
- newaccounts@interactivebrokers.com se hai la residenza in un Paese al di fuori del continente europeo
- newaccounts.uk@interactivebrokers.co.uk se hai la residenza in un Paese europeo
2. Il campo dell' Oggetto:deve contenere tutte le seguenti informazioni:
- Il tuo numero di conto (in genere nel formato Uxxxxxxx, dove a ogni x corrisponde un numero) oppure il tuo nome utente.
- Il motivo per il quale hai inviato il documento. Ti invitiamo a utilizzare i seguenti acronimi a seconda dei casi:
- PoRes per un documento comprovante il tuo indirizzo di residenza
- PID per un documento comprovante l’identità
Risoluzione dei problemi di accesso alla piattaforma di trading
Clicca sul link che descrive meglio la tua situazione:
a. Se stai utilizzando un codice temporaneo, ti ricordiamo che i caratteri alfanumerici distinguono fra maiuscole e minuscole. Il formato richiesto per inserire questo codice è quello maiuscolo
b. Se stai utilizzando una security card o un dispositivo elettronico, ti ricordiamo che non devono esserci spazi fra i caratteri inseriti
c. Le porte 4000/4001 vengono bloccate. Queste porte sono spesso bloccate per impedire le connessioni pubbliche (hotel, bar, etc.). Per consentire il funzionamento del protocollo TCP Inbound/Outbound queste porte devono essere aperte. Inoltre se hai un router collegato al tuo computer, queste porte devono essere aperte nelle impostazioni del router.*
*Clicca qui per controllare lo stato della tua connessione: IBKR Pagina dedicata al test della connettività.
How to verify your identity using your Secure Login Device
Some tasks in Client Portal will ask you to verify your identity by using the Challenge Code/Response String method in order to proceed further.
This article will guide you in completing these tasks with the following Secure Login Devices:
-----------------------------------------------------------------------------------------------------------------------------------------------------------
Verify your identity with IB Key (iOS)
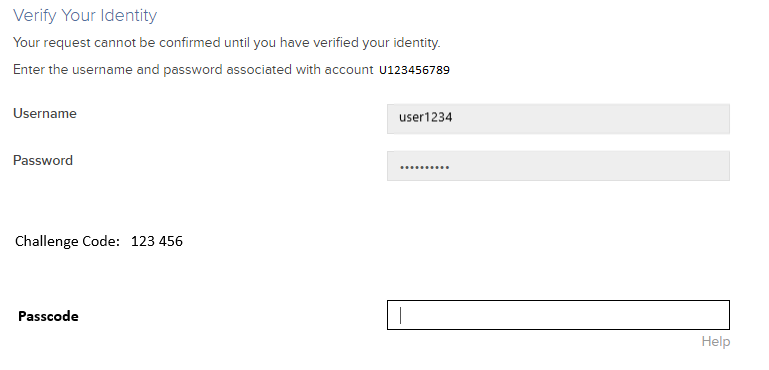
1. When you initiate a task that requires a verification, you will be prompted to enter Username and Password. Fill out the information and click on Continue (Figure 1).
Figure 1.
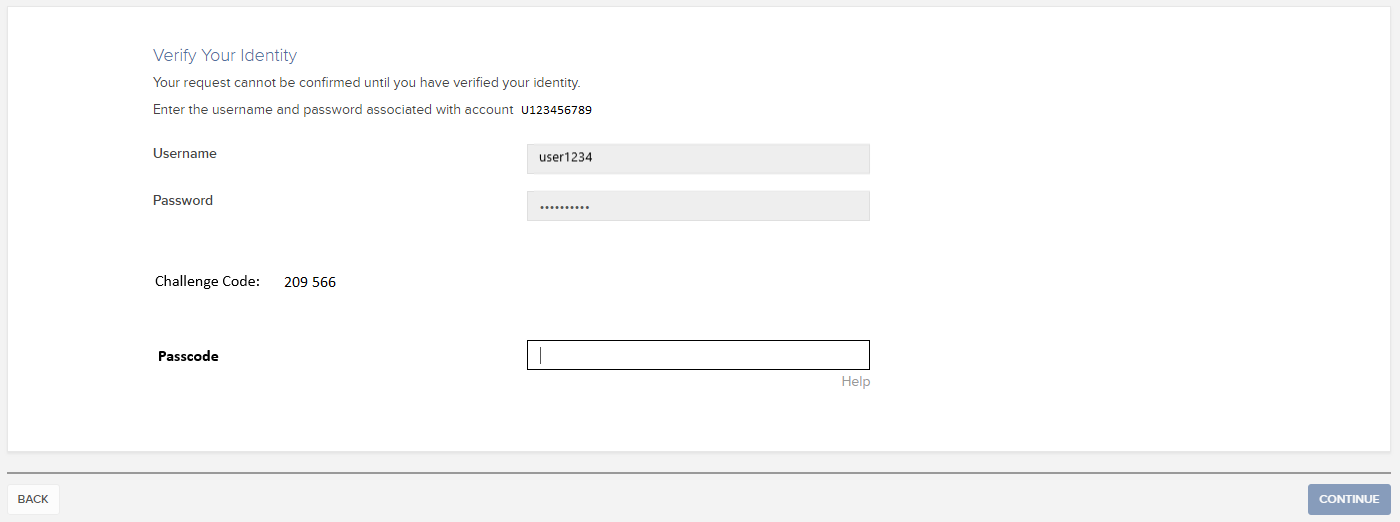
2. A Challenge Code will be displayed, along with a passcode field to enter a response (Figure 2). You will enter this Challenge Code onto your phone.
Figure 2.
3. Launch IBKR Mobile on your iOS smartphone, and...
3.a. If the app opens with the home screen (Figure 3), select Authenticate then proceed with step 4.
3.b. If the app opens with the login screen (Figure 4), tap Services on the top left (red arrow), select Authenticate (Figure 3) and proceed with step 4.
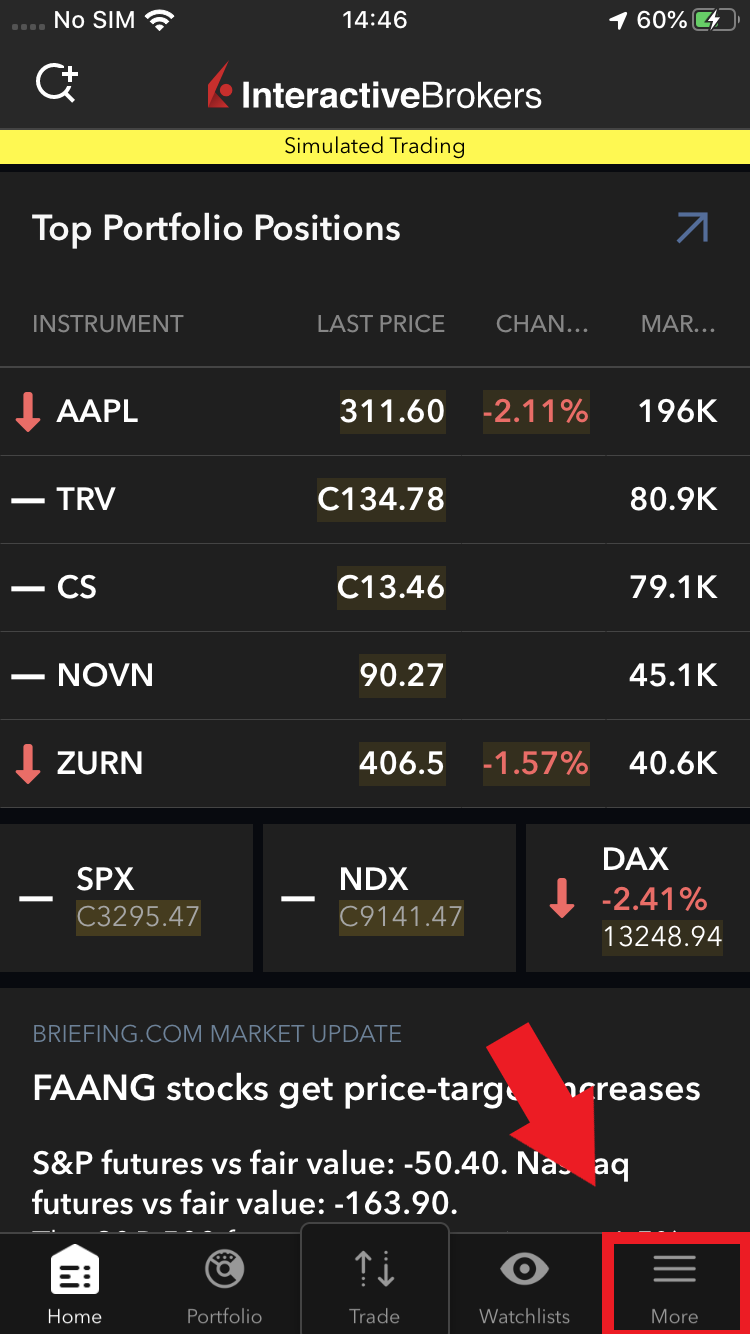
3.c. If the app opens with your Home Page, Portfolio, Watchlists, or similar (Figure 5), tap More on the bottom-right (red arrow). Then tap Two-Factor Authentication (Figure 6), tap Generate Code (Figure 7) and proceed with step 4.
Figure 3. Figure 4.
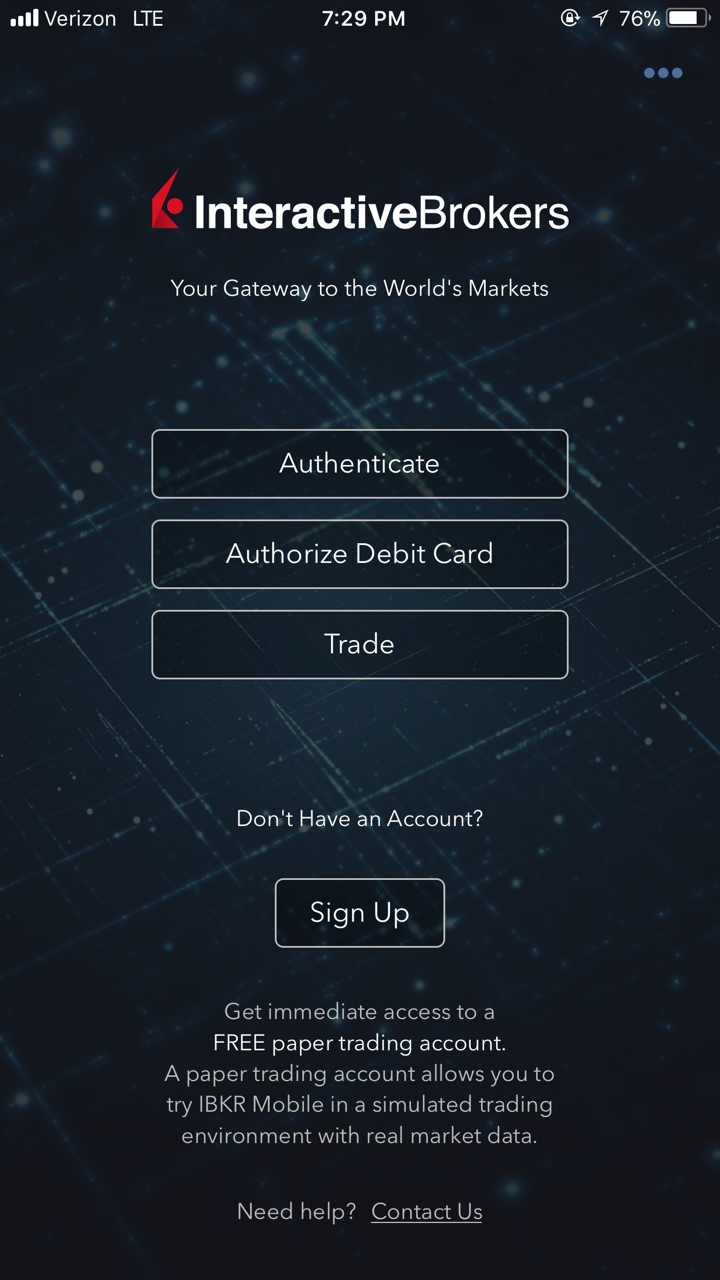
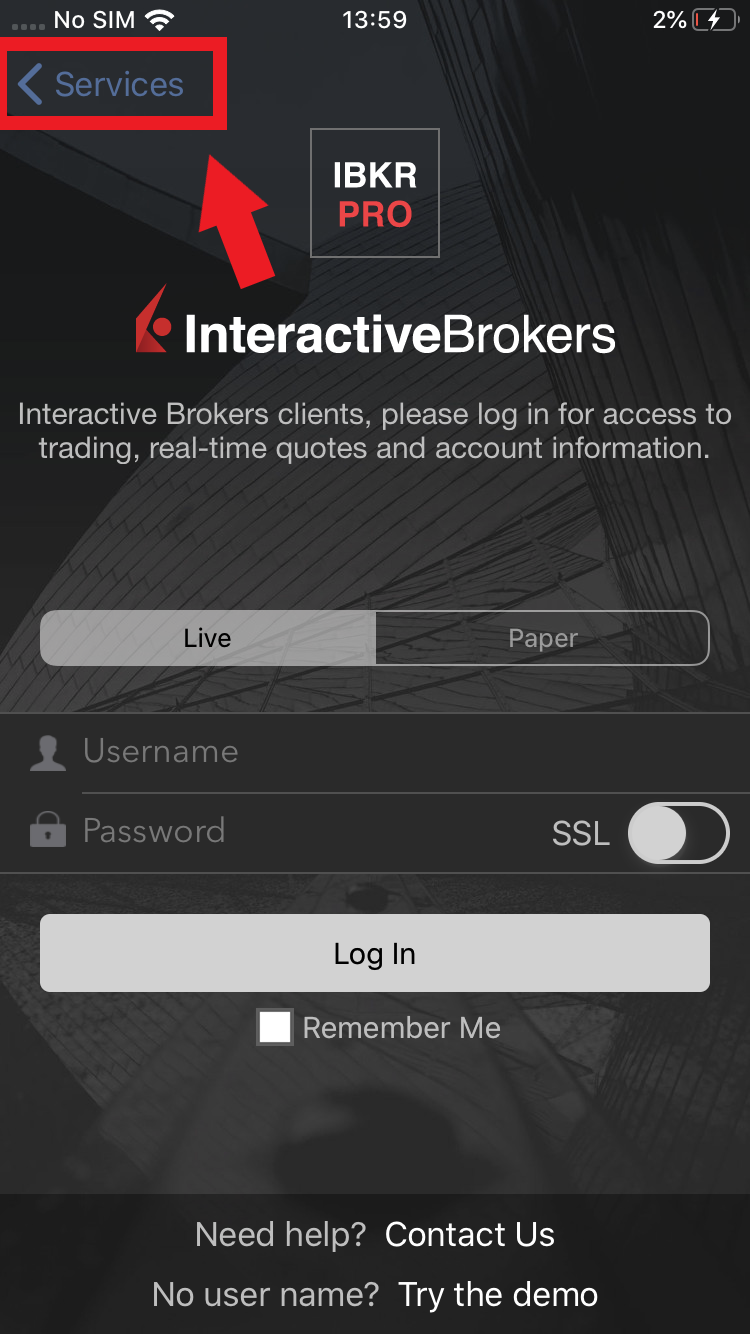
Figure 5. Figure 6. Figure 7.
.jpeg)
.jpeg)
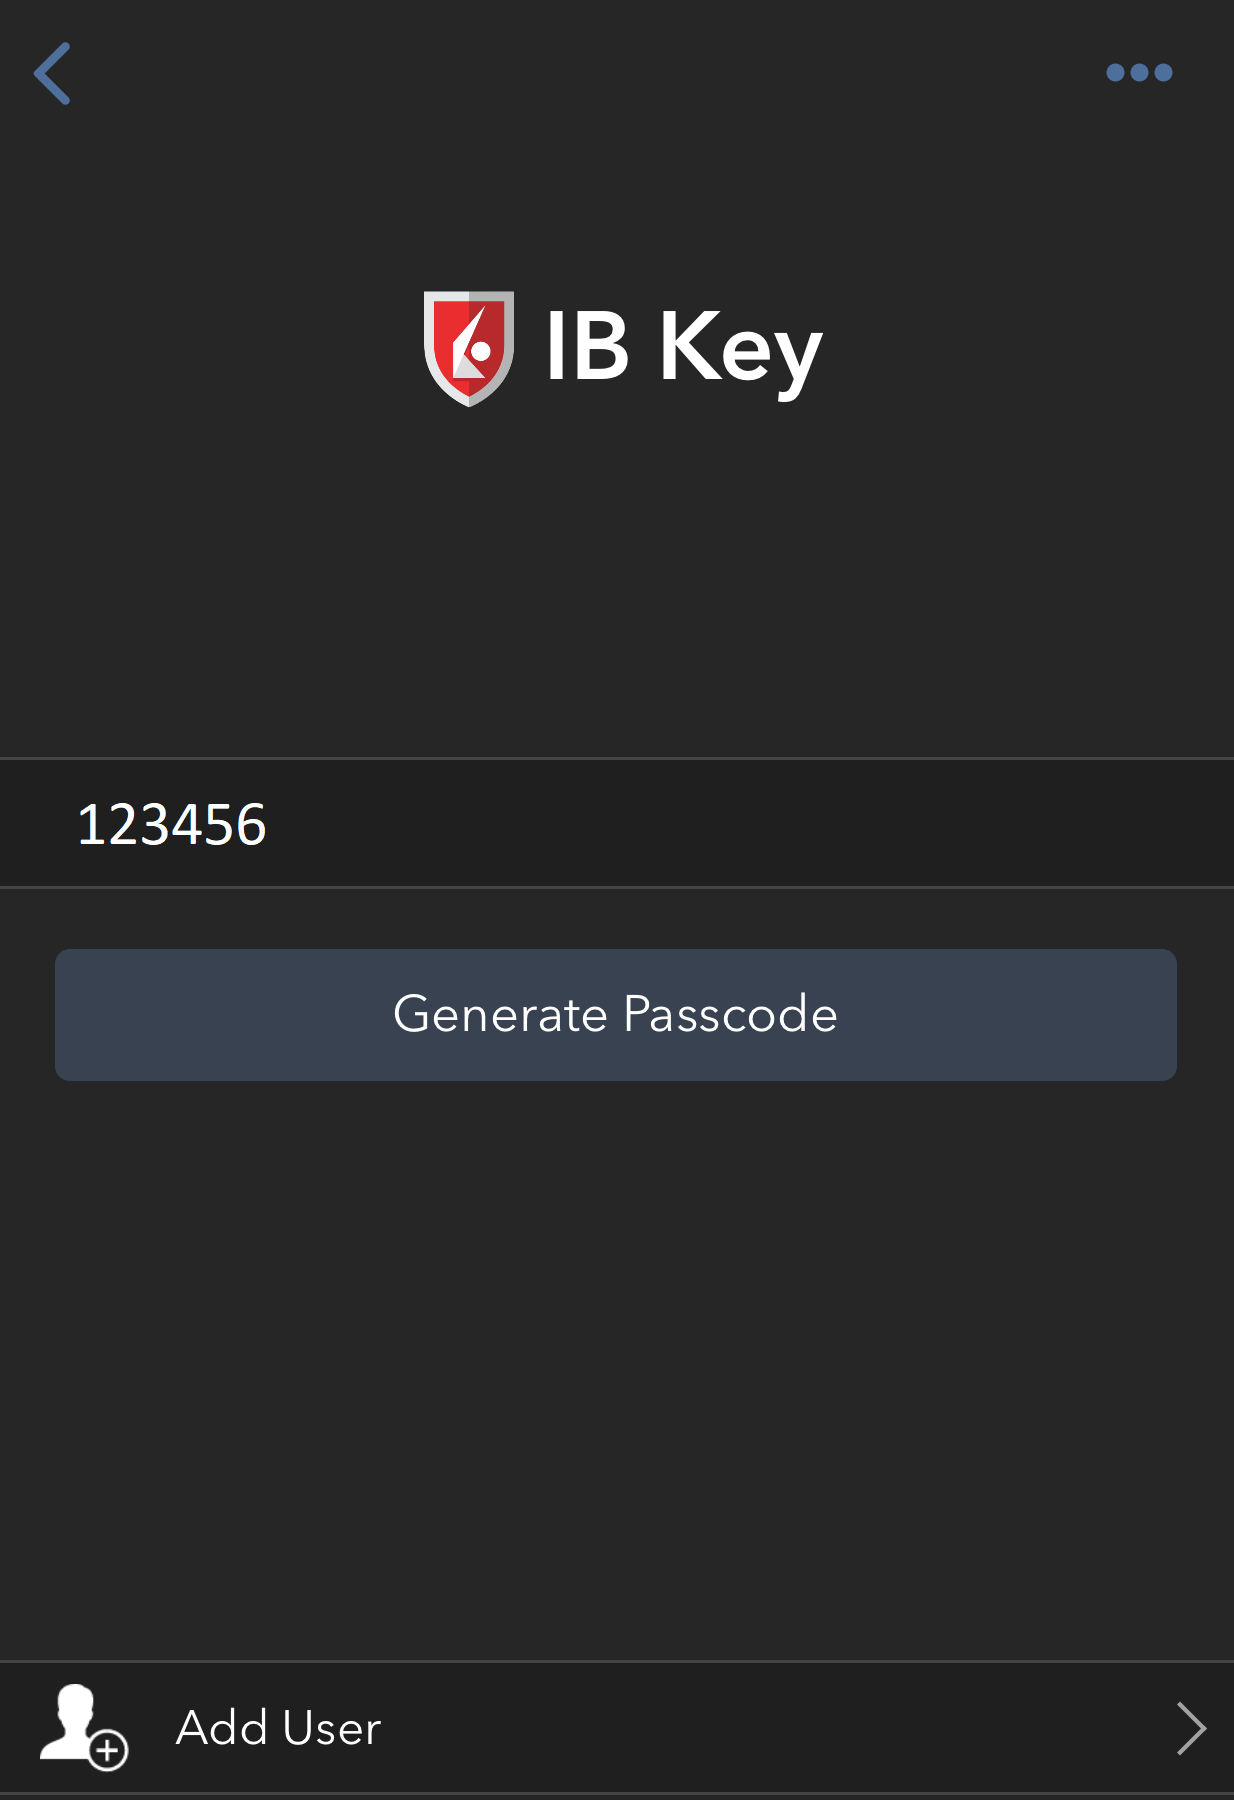
4. Type the Challenge Code from Client Portal (see step 2.) into the corresponding field and select Generate Passcode (Figure 8).
Figure 8.
5. Use Touch ID or Face ID for two-factor authentication.
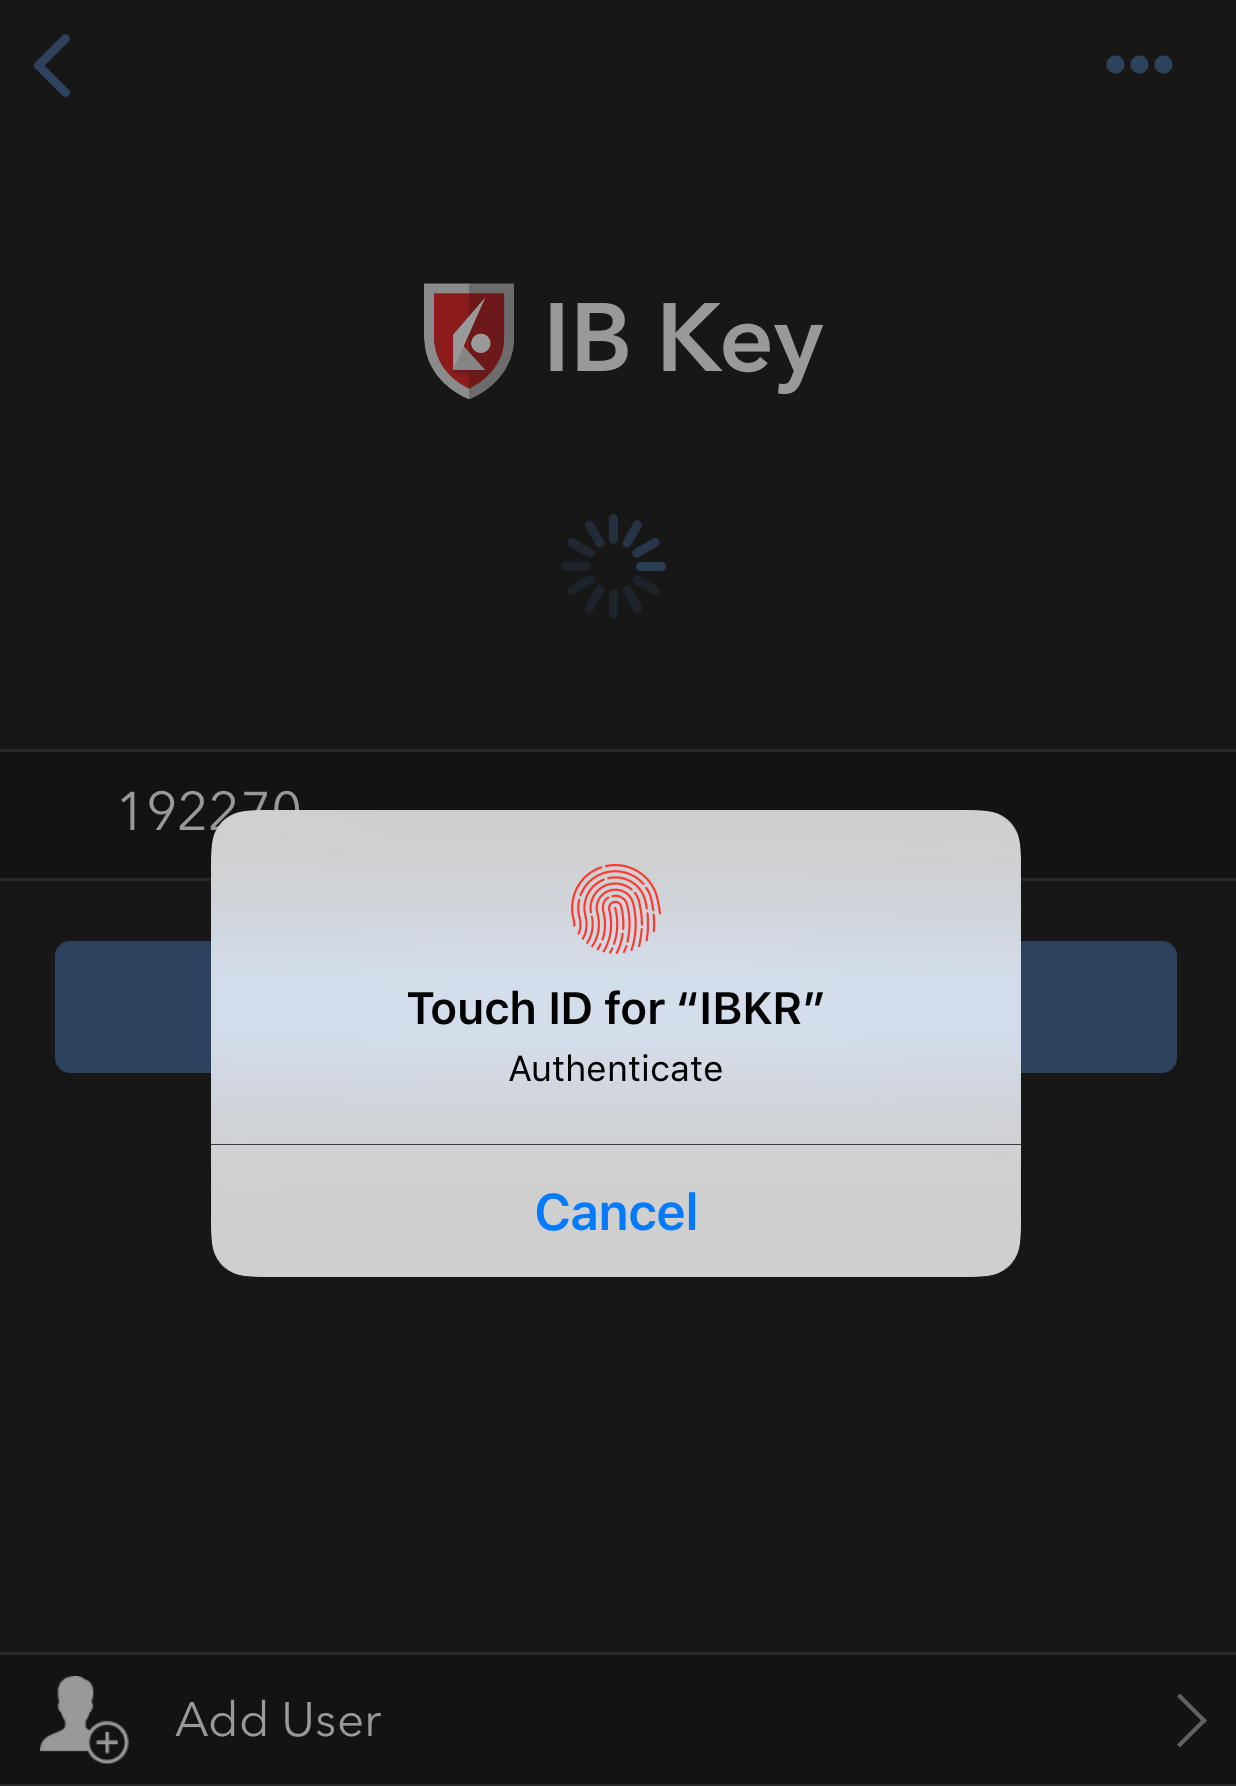
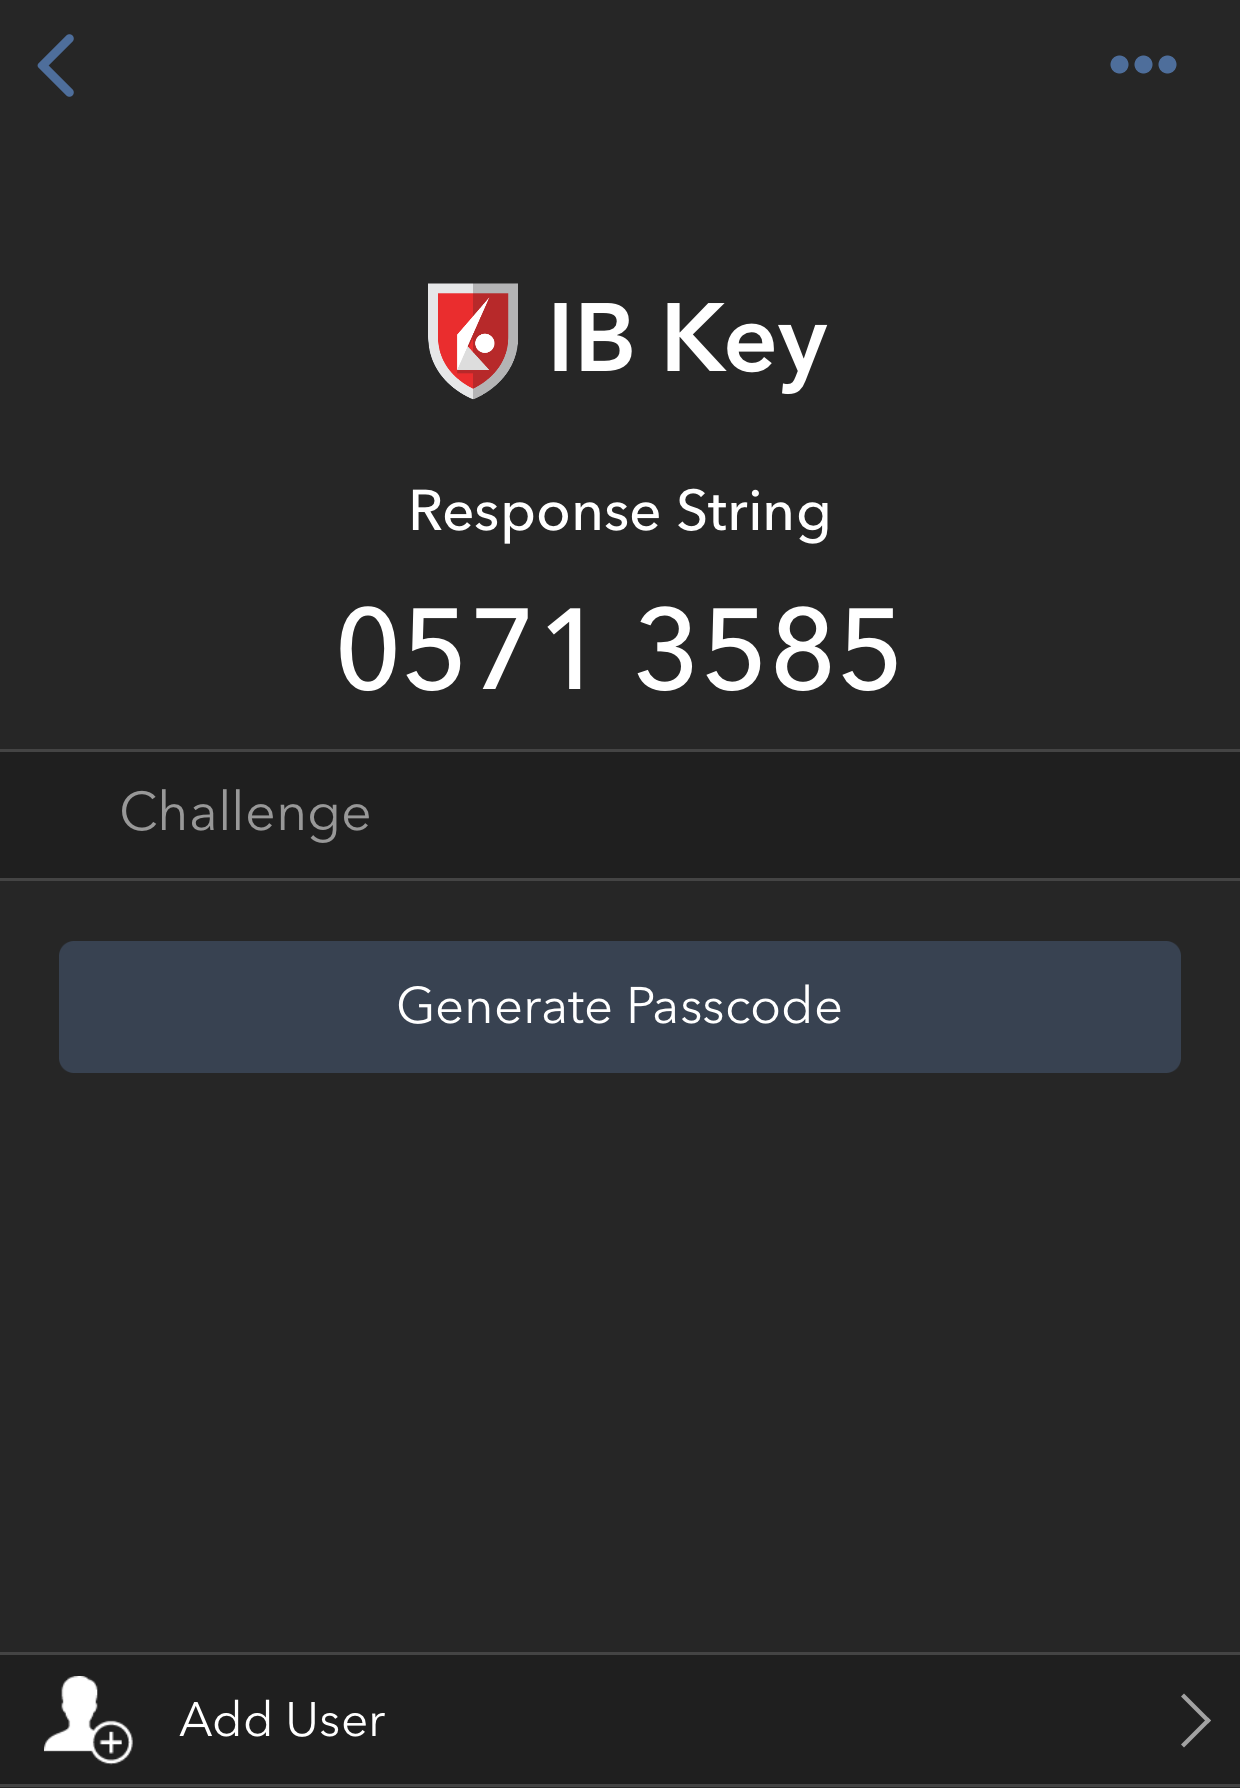
If Touch ID has not been activated, IB Key will prompt you to enter your smartphone's passcode. A response string will then be generated (Figure 9).
5.1 If you use Touch ID, place your registered finger on the Home Button (Figure 9). A response string will then be generated (Figure 10).
Figure 9. Figure 10.
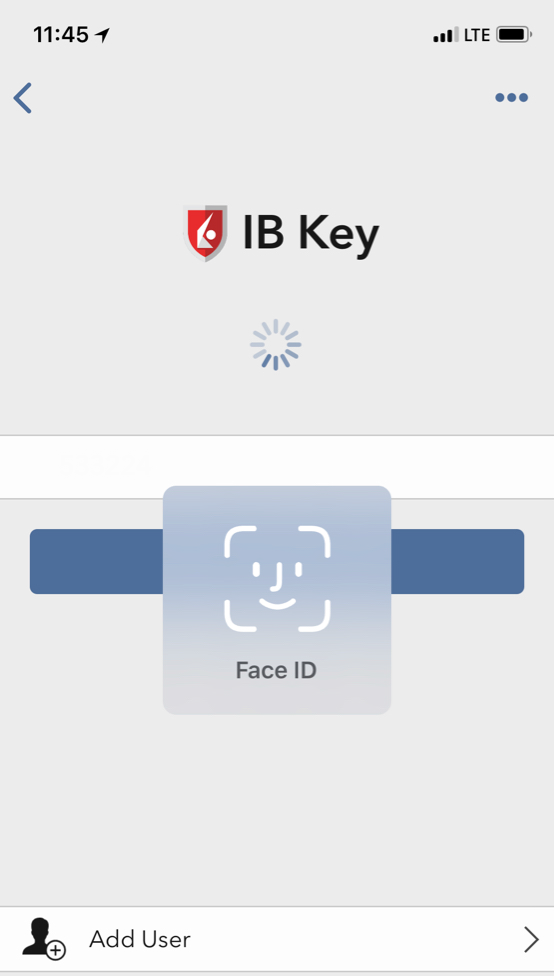
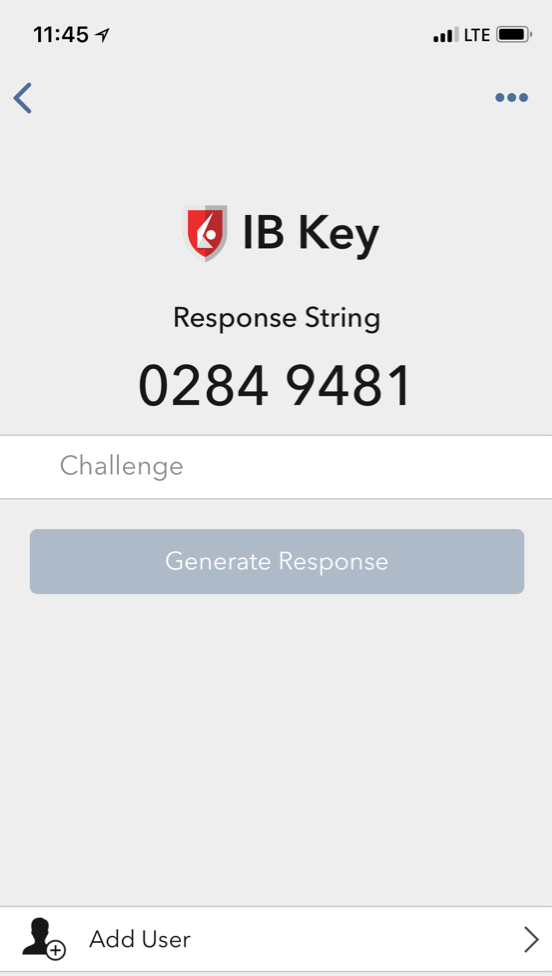
5.2 If you use Face ID, look at your iOS smartphone screen (Figure 11). A response string will then be generated (Figure 12).
Figure 11. Figure 12.
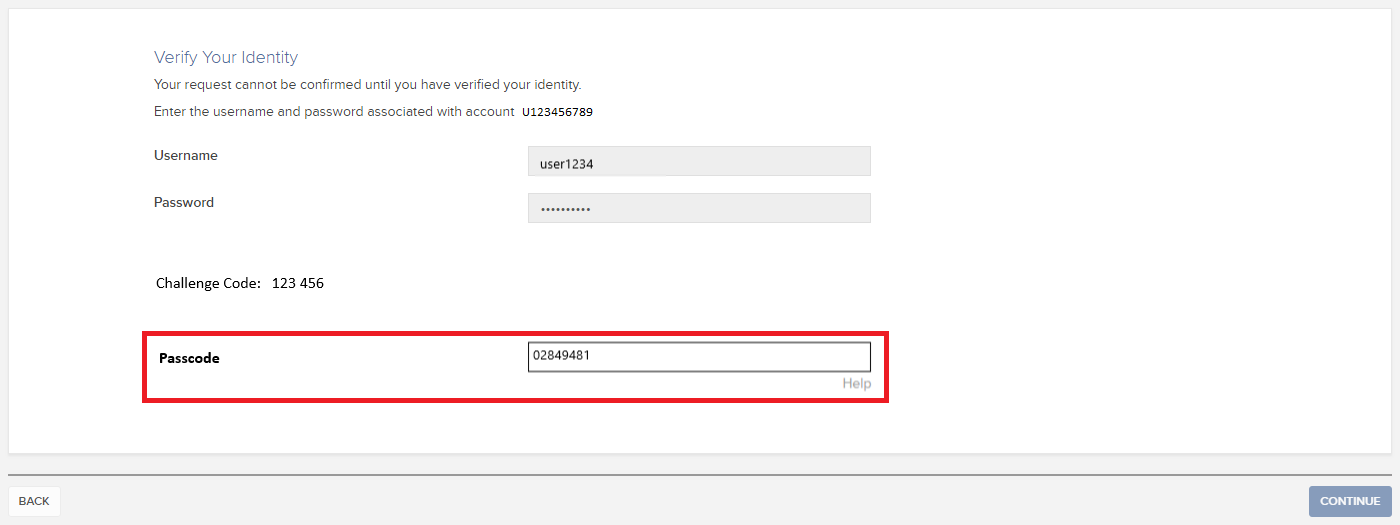
6. Enter the response string from IB Key into the passcode field of Client Portal and click Continue (Figure 13).
Figure 13.
-----------------------------------------------------------------------------------------------------------------------------------------------------------
Verify your identity with IB Key (Android)
1. When you initiate a task that requires a verification, you will be prompted to enter Username and Password. Fill out the information and click on Continue (Figure 1A).
Figure 1A.
2. A Challenge Code will be displayed, along with a passcode field to enter a response (Figure 2A). You will enter this Challenge Code onto your phone.
Figure 2A.
3. Launch IBKR Mobile on your Android smartphone, and...
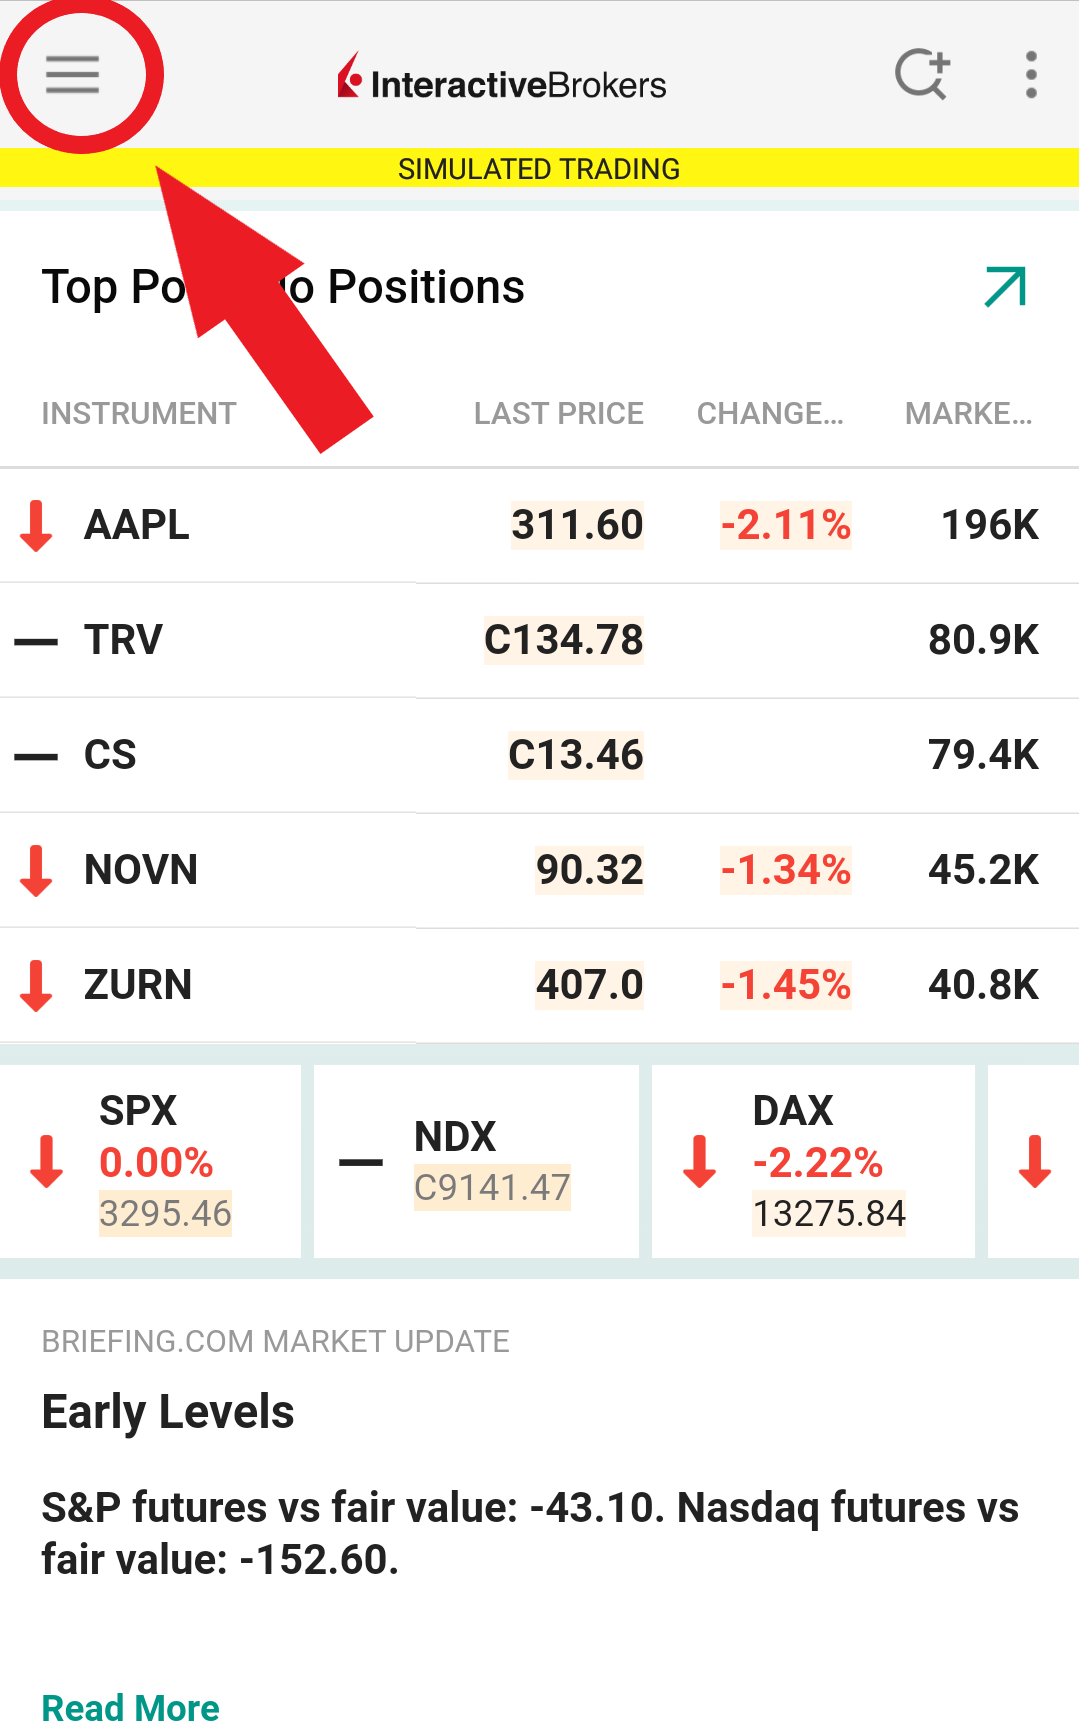
3.a. If the app opens with the home screen (Figure 3A), select Authenticate then proceed with step 4.
3.b. If the app opens with the login screen (Figure 4A), tap Services on the top left (red arrow), select Authenticate (Figure 3A) and proceed with step 4.
3.c. If the app opens with your Home Page, Portfolio, Watchlists, or similar (Figure 5A), tap More on the bottom-right (red arrow). Then tap Two-Factor Authentication (Figure 6A), followed by Generate Response (Figure 7A), and proceed with step 4.
Figure 3A. Figure 4A.

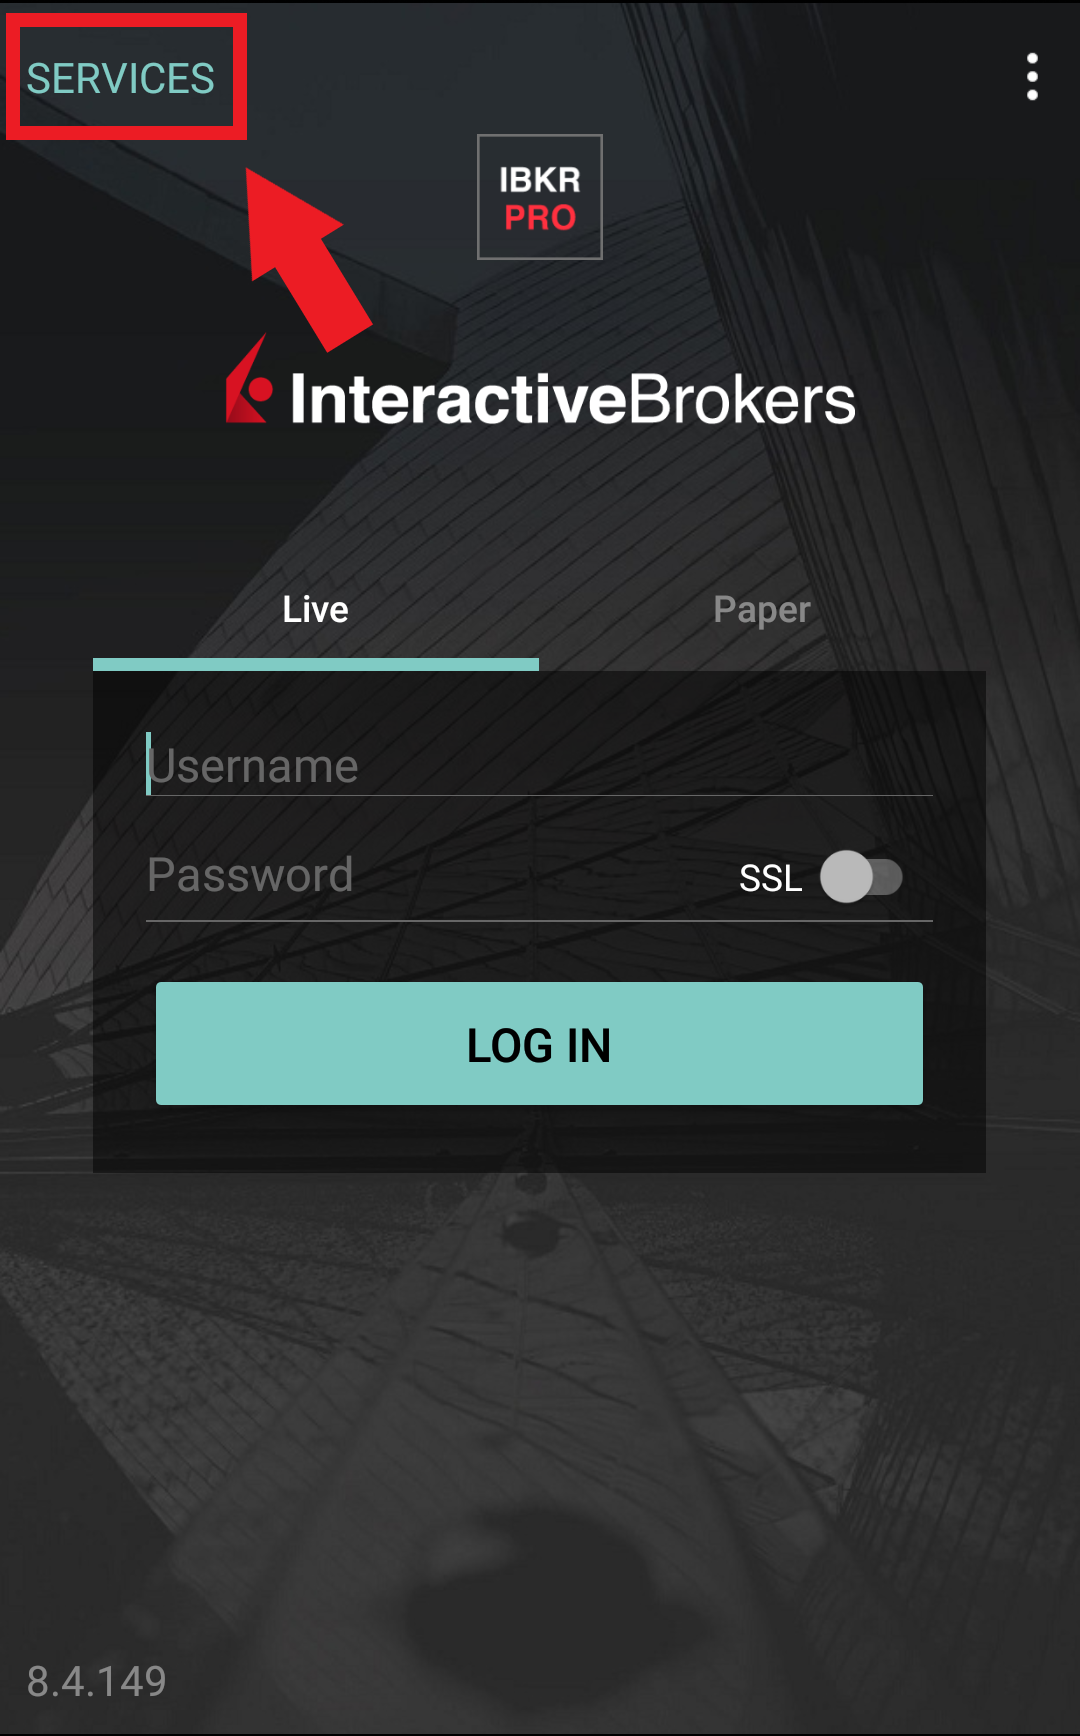
Figure 5A. Figure 6A. Figure 7A.
.jpeg)
.jpeg)
4. Type the PIN that you determined during the IB Key registration process and the Challenge Code from Client Portal into the corresponding fields, then select Generate Passcode. A response string will then be generated (Figure 8A).
Figure 8A.
.png)
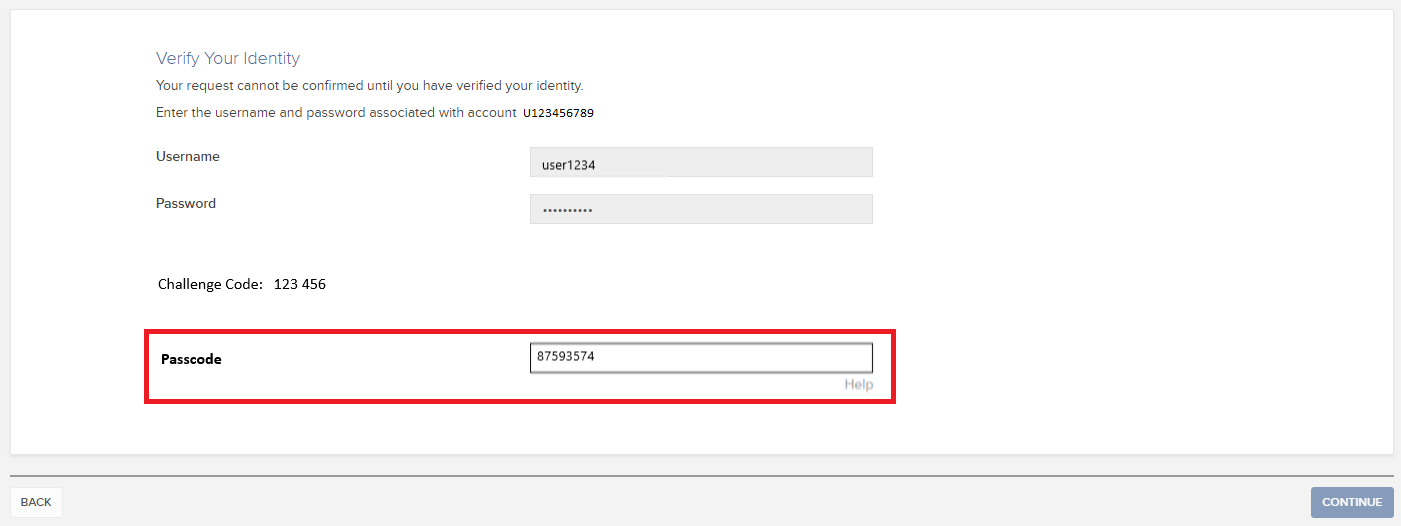
5. Enter the response string from IB Key into the passcode field of Client Portal and click Continue (Figure 9A).
Figure 9A.
-----------------------------------------------------------------------------------------------------------------------------------------------------------
Verify your identity with Digital Security Card+ (DSC+)
1. When you initiate a task that requires a verification, you will be prompted to enter Username and Password. Fill out the information and click on Continue (Figure 1B).
Figure 1B.
2. A Challenge Code will be displayed, along with a passcode field to enter a response (Figure 2B). You will enter this Challenge Code onto your DSC+.
Figure 2B.
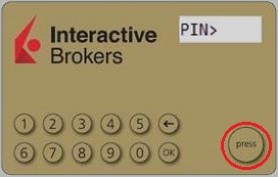
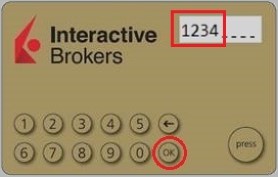
3. Turn on your DSC+ using the “press” button until 'PIN>' is displayed (Figure 3B). Enter the 4-digit PIN code you specified at the time you requested the device, then confirm with the “OK” button (Figure 4B).
Figure 3B. Figure 4B.
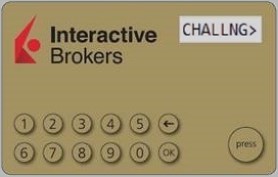
4. When 'CHALLNG>' is displayed (Figure 5B), enter the 6-digit Challenge Code from the Client Portal screen into the DSC+, then confirm with the "OK" button (Figure 6B).
Figure 5B. Figure 6B.
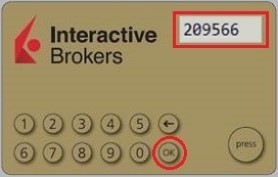
5. A response code will appear (Figure 7B).
Figure 7B.
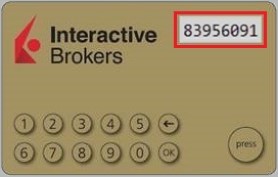
6. Enter the response string from your DSC+ into the passcode field of Client Portal and click Continue (Figure 8B).
Figure 8B.
How to send documents to IBKR using your smartphone
Interactive Brokers allows you to send us a copy of a document even if you do not currently have access to a scanner. You can take a picture of the requested document with your smartphone.
Below you will find the instructions on how to take a picture and send it per email to Interactive Brokers with the following smartphone operating systems:
If you already know how to take and send pictures per email using your smartphone, please click HERE - Where to send the email to and what to include in the subject.
iOS
1. Swipe up from the bottom of your smartphone screen and tap the camera icon.
If you do not have the Camera icon, you can tap the Camera app icon from the home screen of your iPhone.
Normally your phone should now activate the rear camera. If it activates the front one, tap the camera switch button.
2. Place your iPhone above the document and frame the desired portion or page of the document.

3. Make sure to have uniform, sufficient lighting and not to cast any shadow on the document due to your position. Hold the smartphone firmly with your hand/s and avoid shaking. Tap on the shutter button to take the photo.
4. Tap the thumbnail image in the lower left-hand corner to access the picture you have just taken.
5. Make sure that the picture is clear and the document is well legible. You can enlarge the picture and see it in detail by swiping apart two fingers on the picture itself.

If the picture does not present a good quality or lighting, please repeat the previous steps in order to take a sharper one.
6. Tap the share icon in the lower left-hand corner of the screen.

7. Tap the Mail icon.

Note: to send emails your phone has to be configured for that. Please contact your email provider if you are not familiar with this procedure.
8. Please see HERE how to populate the To: and Subject: fields of your email. Once the email is ready, tap the up arrow icon on the top right to send it.

Android
1. Open your applications list and start the Camera app. Alternatively start it from your Home screen. Depending on your phone model, maker or setup, the app might be called differently.

Normally your phone should now activate the rear camera. If it activates the front one, tap the camera switch button.
2. Place your Android above the document and frame the desired portion or page of the document.

3. Make sure to have uniform, sufficient lighting and not to cast any shadow on the document due to your position. Hold the smartphone firmly with your hand/s and avoid shaking. Tap on the shutter button to take the photo.
4. Make sure that the picture is clear and the document is well legible. You can enlarge the picture and see it in detail by swiping apart two fingers on the picture itself.

If the picture does not present a good quality or lighting, please repeat the previous steps in order to take a sharper one.
5. Tap the empty circle icon in the lower right-hand corner of the screen.

6. Tap the share icon in the lower left-hand corner of the screen.

7. In the sharing menu that will be displayed now tap the icon of the email client set up on your phone. In the example picture below, it is called Gmail but the name may vary according to your specific setup.
.png)
Note: to send emails your phone has to be configured for that. Please contact your email provider if you are not familiar with this procedure.
8. Please see HERE how to populate the To and Subject fields of your email. Once the email is ready, tap the airplane icon on the top right to send it.

WHERE TO SEND THE EMAIL AND WHAT TO INCLUDE IN THE SUBJECT
The email has to be created observing the below instructions:
1. In the field To: type:
- newaccounts@interactivebrokers.com if you are a resident of a non-European country
- newaccounts.uk@interactivebrokers.co.uk if you are a European resident
2. The Subject: field must contain all of the below:
- Your account number (it usually has the format Uxxxxxxx, where x are numbers) or your username
- The purpose of sending the document. Please use the below convention:
- PoRes for a proof of residential address
- PID for a proof of identity
Come ottenere una Online Security Code Card (la carta dei codici di sicurezza online)
La Online Security Code Card (la carta dei codici di sicurezza online) fornisce un accesso temporaneo al tuo conto e alla piattaforma di trading per una durata di 21 giorni. Si tratta di una soluzione provvisoria che di solito è necessaria nelle seguenti situazioni:
A. Per un breve periodo di tempo non hai modo di consultare il tuo dispositivo di sicurezza permanente e sei in attessa di rientrarne in possesso.
B. Hai smarrito il tuo dispositivo di sicurezza permanente e desideri richiederne uno sostitutivo o poter continuare accedere al tuo conto mentre attendi l'arrivo del nuovo dispositivo.
Nei casi menzionati qui sopra, diamo per sottointeso che tu abbia già informato il Servizio Clienti di IBKR e che tu abbia ottenuto un codice temporaneo, come illustrato nell'articolo KB70. Ora puoi estendere la durata del tuo accesso temporaneo nella seguente maniera:
Procedura di attivazione
1. Avvia il tuo browser e apri la pagina web ibkr.com/it
2. Clicca su Accedi.
.png)

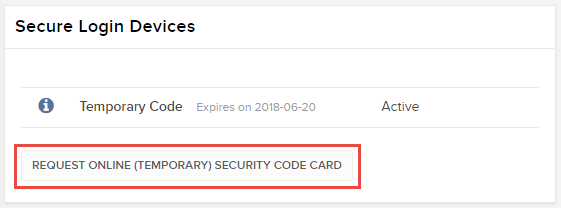
6. Verrà quindi mostrata la tua Online Securtiy Card (ossia la carta codici di sicurezza online). Clicca su Stampa.2
(1).png)
7. Assicurati che la carta venga stampata correttamente e che tutte le sue parti siano chiaramente leggibili. Clicca quindi su Continua.

8. Sulla schermata di attivazione appariranno quindi due "numeri di indice". Individua il primo numero sulla sua carta e inserisci il corrispondente codice di tre caratteri nel campo Valori sulla carta. Ripeti di nuovo l'operazione con il secondo numero di indice, senza lasciare alcuno spazio tra i due codici. Clicca quindi su Continua.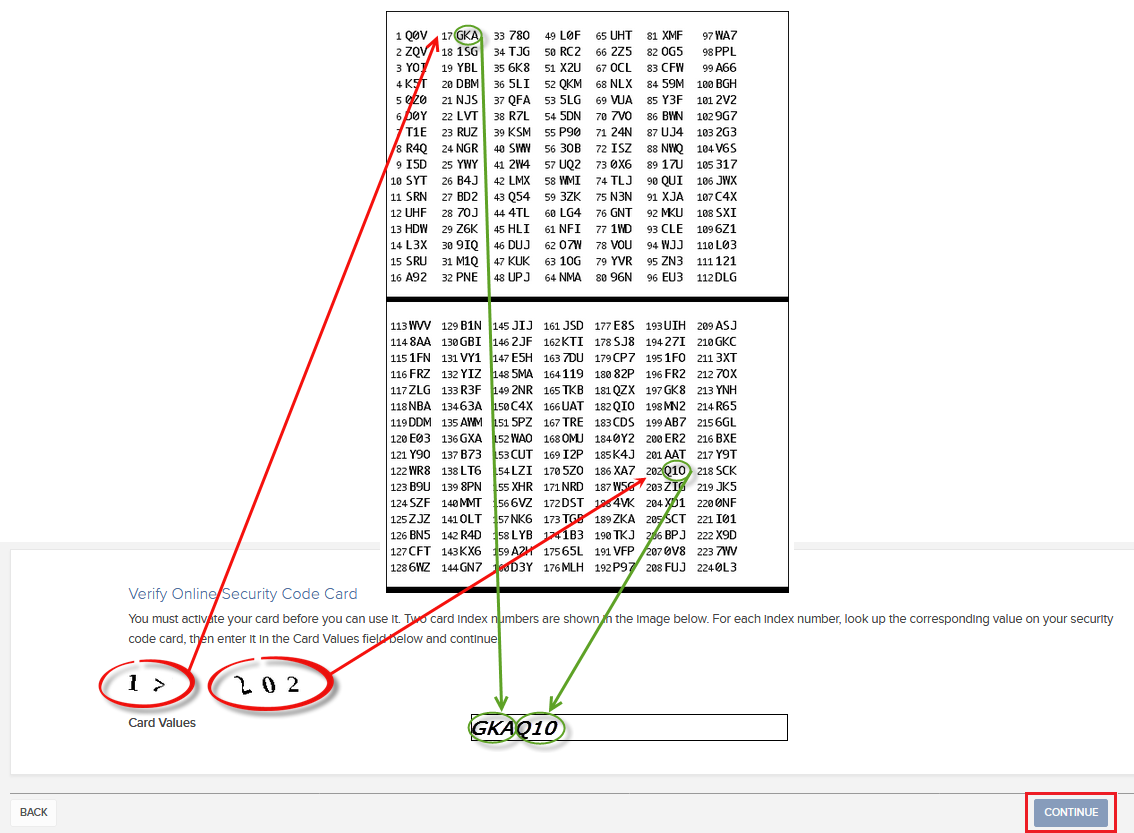
9. Apparirà quindi un messaggio di conferma contenente la data di scadenza della carta. Clicca su OK per portare a termine la procedura.
.png)
Note
1. Se utilizzi la versione classica di Gestione Conto clicca sul menu in alto e seleziona Gestisci conto> Sicurezza > Sistema di Accesso Sicuro > Dispositivo di sicurezza.

Riferimenti
- Consulta l'articolo KB1131 per una panoramica del Sistema di Accesso Sicuro
- L'articolo KB1955 spiega come richiedere una Digital Security Card+ sostitutiva
- L'articolo KB2662 contiene una serie di link ad altri articoli sulle procedure legate ai dispositivi di sicurezza
- L'articolo KB2481 spiega come condividere il dispositivo di accesso sicuro con altri utenti
- L'articolo KB2545 spiega come rientrare nel Sistema di accesso sicuro
- L'articolo KB1962 spiega come restituire il proprio dispositivo di sicurezza a IBKR
- L'articolo KB2260 spiega come attivare il sistema di autenticazione IB Key tramite IBKR Mobile
- Consulta l'articolo KB2895 per sapere di più sul Sistema multiplo di autenticazione a due livelli (M2FS)
- Consulta l'articolo KB1861 per sapere di più su spese e costi legati ai dispositivi di sicurezza
- Consulta l'articolo KB69 per sapere di più sulla durata dei codice di accesso temporaneo
How to obtain an Online Security Code Card
The Online Security Code Card provides you temporary access to your account and trading platform for a duration of 21 days. This is an ad-interim solution usually needed in those cases:
A. You are temporarily away from your permanent security device and you are waiting to regain access to it.
B. You have lost your permanent security device and you want to either request a replacement or maintain access to your account while waiting for the delivery to happen.
For the cases mentioned above, we assume you have already notified IBKR Client Services and obtained a Temporary Code, as explained in KB70. You can now extend the duration of your temporary access as follows:
Activation procedure
1. Open your browser and go to the web page ibkr.com
2. Click on Login
.png)
.png)

6. Your Online Security Card will be displayed. Click on Print2
(1).png)
7. Please make sure the card has been printed correctly in all its parts and it is clearly readable. Then click on Continue 
8. Two index numbers will appear on the activation screen. Locate the first index number on your card and enter the correspondent three digits code into the Card Values field. Then repeat the same operation for the second index number, leaving no spaces between the codes. Then click on Continue
9. You will see a confirmation message stating the expiration date of the card. Click on OK to finalize the procedure.png)
Notes
1. If you use the Classic Account Management, click on the top menu Manage Account > Security > Secure Login System > Security Device

References
- See KB1131 for an overview of the Secure Login System
- See KB1943 for instructions on requesting a replacement Digital Security Card+
- See KB2636 for information and procedures related to Security Devices
- See KB2481 for instructions about sharing the Security Login Device between two or more users
- See KB2545 for instructions on how to opt back in to the Secure Login System
- See KB975 for instructions on how to return your security device to IBKR
- See KB2260 for instructions on activating the IB Key authentication via IBKR Mobile
- See KB2895 for information about Multiple Two-Factor Authentication System (M2FS)
- See KB1861 for information about charges or expenses associated with the security devices
- See KB69 for information about Temporary passcode validity
Troubleshooting Trading Platform Login Failures
Click on the link below which best describes your situation:
a. If operating with a temporary passcode, note that alpha characters are case sensitive and are required to be input in upper case format
b. If operating a security card or electronic device, note that there are no spaces between characters
c. Ports 4000/4001 are being blocked. These ports are often blocked from public connections such as hotels, cafes, etc. and required to be open to accommodate Inbound/Outbound TCP protocol. In addition, if you have a router connected to your computer, these ports must be open on the router.*
*Please click here to check your connectivity status: IBKR Dedicated Connectivity Test Page.


