Financial Advisor How To: Linking Related Client Accounts
Overview:
Account linkage provides account holders who maintain multiple accounts under a single advisor, the ability to group the accounts together under a single user name. The benefits of account linking include the following:
- The ability to log into all accounts via a single user name and password;
- Account accessed using a common security device;
- Activity fee minimums, when applicable, are determined based on commissions consolidated across the linked accounts;
- Consolidated reporting of accounts.
While linking may be performed by the client, this article outlines the steps by which an advisor may link accounts on behalf of the client
Steps:
1. Linkage begins by logging into Account Management at the master account level and selecting the Manage Clients, Accounts and then Link Client Accounts menu options.
.jpg)
2. You will then be provided with a drop down list of client which are eligible to be linked. While multiple clients may be linked in a given session, the linkage steps must be completed for a given client before proceeding to another.
.jpg)
3. After selecting the client to be linked, a list of all of the client's accounts that are eligible to be linked will be presented. Here, you will be prompted to specify which of the user names is to be retained for future account access. Once the linkage process has been completed, all other user names will be deactivated.
.jpg)
4. Next you will be presented with the Account Information page where confirmation of the client's personal information will be performed. In the event the client maintains information which differs among accounts (e.g., residential address), you will be prompted to select that which is accurate and is to be retained following completion of linkage.
.jpg)
5. Next, select any or all of the standing banking instructions which will be retained.
.jpg)
6. Confirmation of the linkage request is then provided.
.jpg)
IMPORTANT NOTES:
- You must select the client account with the highest level security device.
- Once the accounts are linked, the unique usernames and passwords for the accounts to be linked with this account will no longer function. The surviving username and password associated with the account will function for all linked accounts.
- Interactive Brokers will link these accounts on Fridays.
- Once the accounts are linked, the security devices for the accounts to be linked with this account will no longer function and the device associated with this account will function for all linked accounts. Those device do not need to be returned to IB, as per KB975
Welcome to Interactive Brokers
Overview:
Now that your account is funded and approved you can start trading. The information below will help you getting
started as a new customer of Interactive Brokers.
- Your Money
- Configure your account to trade
- How to trade
- Trade all over the World
- Five points to enrich your IB experience
1. Your Money
Deposits & Withdrawals General Info. All transactions are administered through your secure Account Management
Deposits
First, you create a deposit notification through your Account Management > Funding > Fund Transfers > Transaction Type: “Deposit” How to create a deposit notification. The second step is to instruct your Bank to do the wire transfer with the bank details provided in your Deposit Notification.
Withdrawals
Create a withdrawal instruction via your secure Account Management > Funding > Fund Transfers > Transaction Type: "Withdrawals" How to create a withdrawal instruction
If you instruct a withdrawal over the Withdrawal limits, it will be considered an exceptional withdrawal and we will therefore need to match bank account holder and IB account. If destination bank account has been used for a deposit, withdrawal will be processed; otherwise, you must contact customer service and provide the documents needed.
Troubleshooting
Deposits: My bank sent the money but I do not see it credited into my IB account. Possible reasons:
a) A fund transfer takes 1-4 business days
b) A Deposit Notification is missing. You have to create it via your Account Management and send a ticket to Customer Service
c) Amending details are missing. Your name or IB account number is missing in the transfer details. You have to contact your bank and ask for the full amending details.
d) ACH initiated by IB is limited to 100k USD in a 7 business period. If you opened a Portfolio Margin account where the initial requirement is 110k, a wire deposit might be the better deposit option to reduce wait time for your first trade. If selecting ACH a wait time of almost 2 weeks or a temporary downgrade to RegT can be possible solutions.
Withdrawals: I have requested a withdrawal but I do not see the money credited to my bank account. Possible reasons:
a) A fund transfer takes 1-4 business days
b) Rejected. Over the max it can be withdrawn. Please check your account cash balance. Note that for regulatory requirements, when the funds are deposited, there is a 3 day holding period before they can be withdrawn.
c) Your bank returned the funds. Probably because receiving bank account and remitting bank account names do not match.
2. Configure your account to trade
Difference between Cash and Margin accounts: If you have chosen the FastTrack application, by default your account type is a cash account with US stock permission. If you would like to get leverage and trade on margin, here how to upgrade to a RegT Margin account
Trading Permissions
In order to be able to trade a particular asset class in a particular country, you need to get the trading permission for it via your Account Management. Please note that trading permissions are free. You might however be asked to sign risk
disclosures required by local regulatory authorities. How to Request Trading Permissions
Market Data
If you want to have market data in real-time for a particular product/exchange, you need to subscribe to a market data package charged by the exchange. How to subscribe to Market data
The Market data assistant will help you choose the right package. Please watch this Video explaining how it works.
Customers have the option to receive delayed market data for free by clicking the Free Delayed Data button from a non-subscribed ticker row.
Advisor Accounts
Have a look at the user guide getting started as advisors. Here you see how to create additional users to your advisor account and grant them access and much more.
3. How to trade
The Trader's University is the place to go when you want to learn how to use our Platforms. Here you will find our webinars, live and recorded in 10 languages and tours and documentation about our various Trading Platforms.
Trader Workstation (TWS)
Traders who require more sophisticated trading tools can use our market maker-designed Trader Workstation (TWS), which optimizes your trading speed and efficiency with an easy-to-use spreadsheet interface, support for more than 60 order types, task-specific trading tools for all trading styles, and real-time account balance and activity monitoring. Try the two models
TWS Mosaic: for intuitive usability, easy trading access, order management, watchlist, charts all in one window or
TWS Classic: the Advanced Order Management for traders who need more advanced tools and algos.
General Description and Information / Quick start guide / Usersguide
Interactive Tours: TWS Basics / TWS configuration / TWS Mosaic
How to place a trade: Video Classic TWS / Video Mosaic
Trading tools: General Description and Information / Users guide
Requirements: How to install Java for Windows / How to install Java for MAC / Port 4000 and 4001 needs to be open
Login TWS / Download TWS
WebTrader
Traders who prefer a clean and simple interface can use our HTML-based WebTrader, which makes it easy to view market data, submit orders, and monitor your account and executions. Use the latest WebTrader from every browser
Quick Start Guide / WebTrader User's Guide
Introduction: Video WebTrader
How to place a Trade: Video WebTrader
Login WebTrader
MobileTrader
Our mobile solutions allow you to trade your IB account on the go. The mobileTWS for iOS and the mobileTWS for BlackBerry are custom-designed for these popular models, while the generic MobileTrader supports most other Smart phones.
General Description and Information
Order Types Order Types available and Description / Videos / Tour / Users guide
Paper Trading General Description and Information / How to get a Paper Trading Account
Once your paper account is created, you can share the market data of your real account with your paper trading account: Account Management > Manage Account > Settings > Paper trading
4. Trade all over the World
IB accounts are multi-currency accounts. Your account can hold different currencies at the same time, this allows you to trade multiple products around the world from a single account.
Base Currency
Your base currency determines the currency of translation for your statements and the currency used for determining margin requirements. Base currency is determined when you open an account. Customers may change their base currency at any time through Account Management.
We do not automatically convert currencies into your Base currency
Currency conversions must be done manually by the customer. In this video you can learn how to do a currency conversion.
In order to open a position denominated in a currency that you do not have in your account, you have two possibilities:
A) Currency conversion.
B) IB Margin Loan. (Not available for Cash Accounts)
Please see this course explaining the mechanics of a foreign transaction.
5. Five points to enrich your IB experience
1. Contract Search
Here you will find all our products, symbols and specifications.
2. IB Knowledge Base
The Knowledge Base is a repository of glossary terms, how-to articles, troubleshooting tips and guidelines designed to assist IB customers with the management of their IB accounts. Just enter in the search button what you are looking for and you will get the answer.
3. Account Management
As our trading platforms give you access to the markets, the Account Management grants you access to your IB account. Use Account Management to manage account-related tasks such as depositing or withdrawing funds, viewing your statements, modifying market data and news subscriptions, changing your trading permissions, and verifying or changing your personal information.
Log In Account Management / AM Quick Start Guide / AM Users Guide
4. Secure Login System
To provide you with the highest level of online security, Interactive Brokers has implemented a Secure Login System (SLS) through which access to your account is subject to two-factor authentication. Two-factor authentication serves to confirm your identity at the point of login using two security factors: 1) Something you know (your username and password combination); and 2) Something you have (an IB issued security device which generates a random, single-use security code). As both knowledge of your username/password and physical possession of the security device are required to login to your account, participation in the Secure Login System virtually eliminates the possibility of anyone other than you accessing your account.
How to Activate your Security Device / How to Obtain a Security Code Card / How to return Security device
In case you forgot your password or lost your security code card, please call us for immediate assistance.
5. Statements and Reports
Easy to view and customize, our statements and reports cover all aspects of your Interactive Brokers account. How to view an Activity Statement
Cloud Watchlists
Overview:
This article explains how to setup Cloud Watchlists.
Background:
It is now possible to synchronize the watchlists on your mobile devices with the watchlists of Trader Workstation on your computer. You will no longer need to worry about adding same tickers over and over again. The Cloud Watchlists feature is available in Trader Workstation build 936 and higher. Once the Cloud Watchlists have been enabled, they can be then imported in mobileTWS using the "Import" option from the Configuration menu.
Enable the Cloud Watchlists in Trader Workstation
- Login into the Trader Workstation
- Click on Edit in top menu, then on Global Configuration (or File -> Global Configuration if TWS is in the Mosaic layout)
- In the left column of the configuration window, click on Lock and Exit
- In the right pane, mark the checkbox "Save watchlists to cloud" (as shown in the screenshot below)
.jpg)
- Click Apply, then OK to close the configuration window
Enable Cloud Watchlists on a mobile device
iPhone
- After the Cloud Watchlists feature has been enabled in TWS, login into mobileTWS
- Upon login, you will be prompted with a screen asking you to try the new feature
- Select "Try It", and then select the device/computer to import the watchlist from
- If you are not shown the "Try It" prompt, please go to the Configuration menu and select Watchlist Import and select the device/computer to import from
- In the Configuration meny, enable the option "Save Cloud Watchlists"
iPad
- After the Cloud Watchlists feature has been enabled in TWS, login into mobileTWS
- Upon login, you will be prompted with a screen asking you to try the new feature
- Select "Try It", and then select the device/computer to import the watchlist from
- If you are not shown the "Try It" prompt, tap on "Setup" in top left corner and enable "Save cloud watchlists"
- Back in the main screen, in top left section, tap on the Import button and select the device/computer from which to import the Cloud Watchlist
Android mobile or tablet
- After the Cloud Watchlists feature has been enabled in TWS, login into mobileTWS
- Upon login, you will be shown the Watchlist Import wizard
- Select the device/computer from which to import the watchlist
- To see the imported watchlists, navigate to Quotes and Charts from the main menu and select an imported watchlist from the dropdown
Please note that it is not possible to sync watchlists from mobileTWS to your desktop TWS.
IRA: Retirement Account Resource Center
IMPORTANT NOTE: This article has been customized for use by self-directed Individual Retirement Account (IRA) owners for information purposes only. Persons are encouraged to consult a qualified tax professional with the investments and elections within the IRA. IB does not provide tax advice. For detailed information regarding IRAs, you may consult the IRS Publication 590-A about IRA contributions and the IRS Publication 590-B about IRA distributions.
This resource center provides a central reference point for information concerning the various IRA account types offered by IB.
Important Notice - Select IRA Tax Reporting for key information with transaction and tax reporting in your IRA.
Account Management IRA Reference
Beneficiary Options
Recharacterizations from a Roth IRA
Required Minimum Distributions
IRS Circular 230 Notice: These statements are provided for information purposes only, are not intended to constitute tax advice which may be relied upon to avoid penalties under any federal, state, local or other tax statutes or regulations, and do not resolve any tax issues in your favor.
How to send documents to IBKR using your smartphone
Overview:
Interactive Brokers allows you to send us a copy of a document even if you do not currently have access to a scanner. You can take a picture of the requested document with your smartphone.
Below you will find the instructions on how to take a picture and send it per email to Interactive Brokers with the following smartphone operating systems:
If you already know how to take and send pictures per email using your smartphone, please click HERE - Where to send the email to and what to include in the subject.
iOS
1. Swipe up from the bottom of your smartphone screen and tap the camera icon.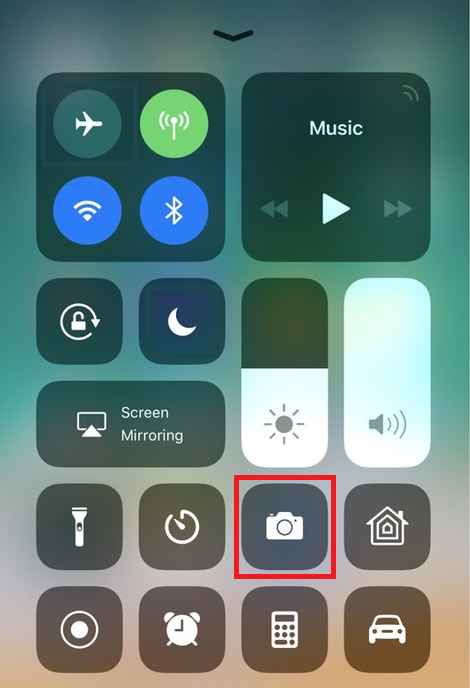
If you do not have the Camera icon, you can tap the Camera app icon from the home screen of your iPhone.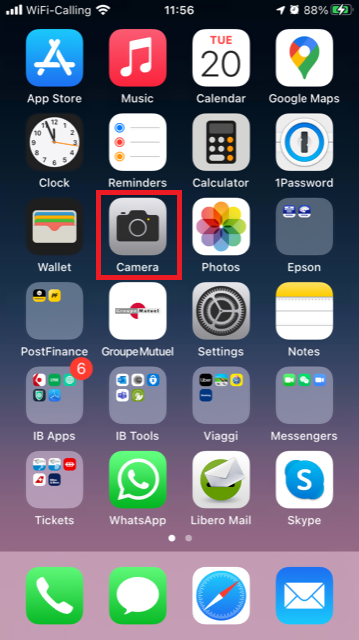
Normally your phone should now activate the rear camera. If it activates the front one, tap the camera switch button.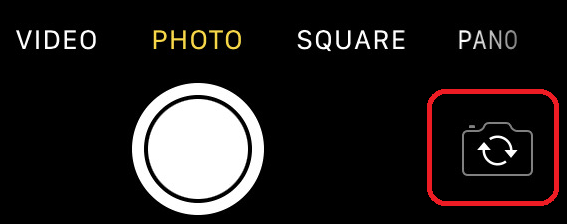
2. Place your iPhone above the document and frame the desired portion or page of the document.
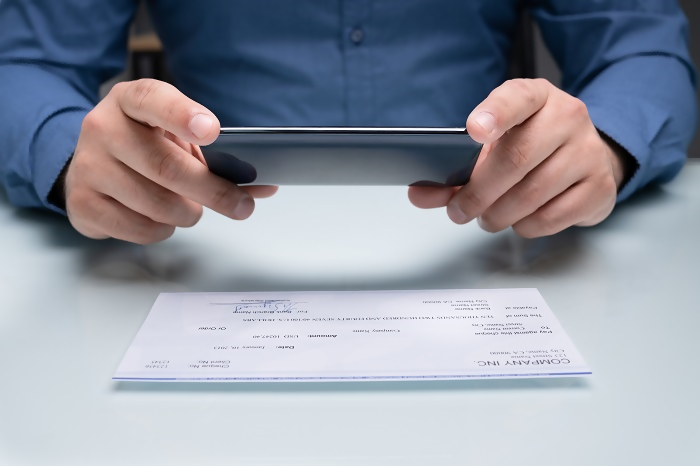
3. Make sure to have uniform, sufficient lighting and not to cast any shadow on the document due to your position. Hold the smartphone firmly with your hand/s and avoid shaking. Tap on the shutter button to take the photo.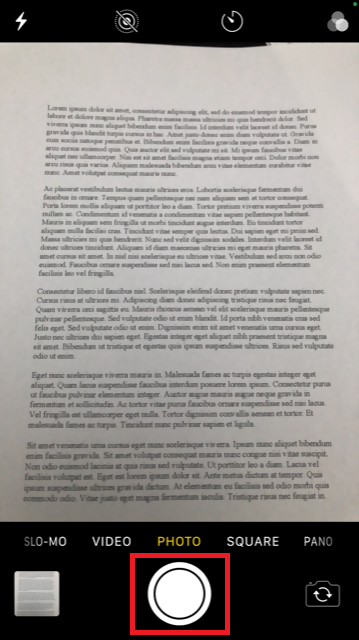
4. Tap the thumbnail image in the lower left-hand corner to access the picture you have just taken.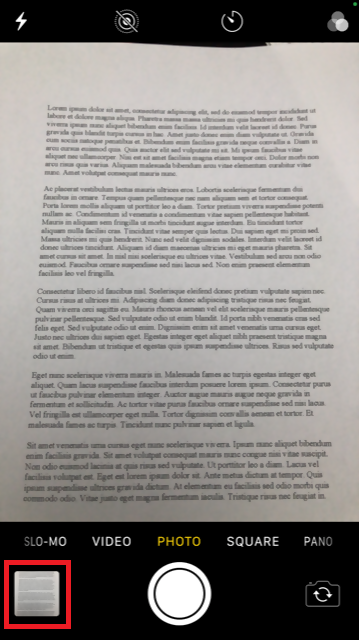
5. Make sure that the picture is clear and the document is well legible. You can enlarge the picture and see it in detail by swiping apart two fingers on the picture itself.

If the picture does not present a good quality or lighting, please repeat the previous steps in order to take a sharper one.
6. Tap the share icon in the lower left-hand corner of the screen.

7. Tap the Mail icon.
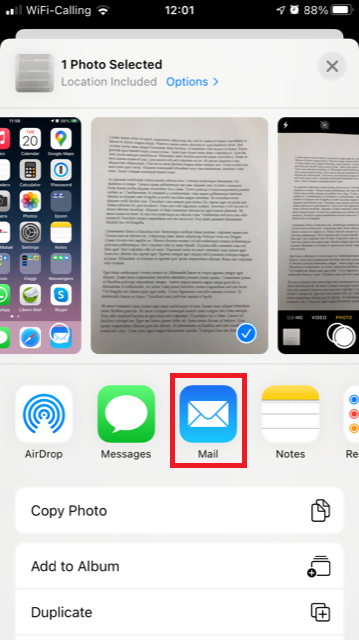
Note: to send emails your phone has to be configured for that. Please contact your email provider if you are not familiar with this procedure.
8. Please see HERE how to populate the To: and Subject: fields of your email. Once the email is ready, tap the up arrow icon on the top right to send it.

Android
1. Open your applications list and start the Camera app. Alternatively start it from your Home screen. Depending on your phone model, maker or setup, the app might be called differently.
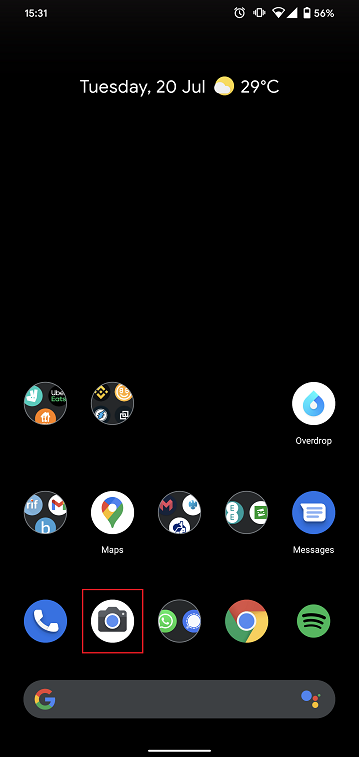
Normally your phone should now activate the rear camera. If it activates the front one, tap the camera switch button.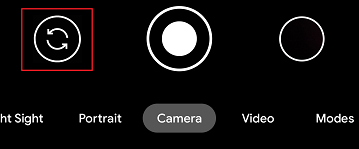
2. Place your Android above the document and frame the desired portion or page of the document.
3. Make sure to have uniform, sufficient lighting and not to cast any shadow on the document due to your position. Hold the smartphone firmly with your hand/s and avoid shaking. Tap on the shutter button to take the photo.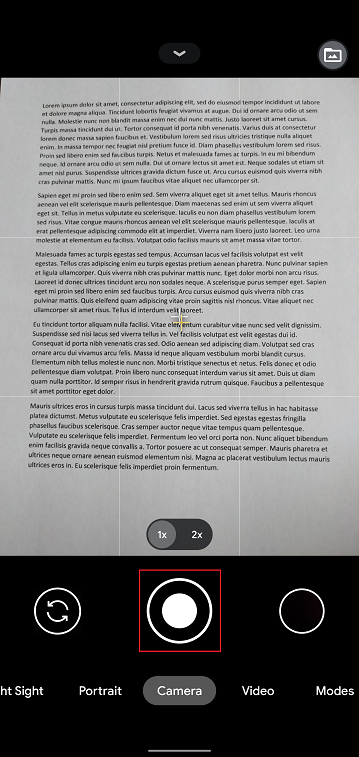
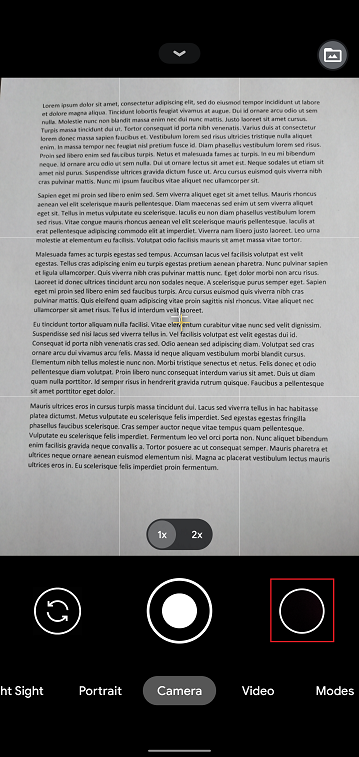
4. Make sure that the picture is clear and the document is well legible. You can enlarge the picture and see it in detail by swiping apart two fingers on the picture itself.
If the picture does not present a good quality or lighting, please repeat the previous steps in order to take a sharper one.
5. Tap the empty circle icon in the lower right-hand corner of the screen.
6. Tap the share icon in the lower left-hand corner of the screen.
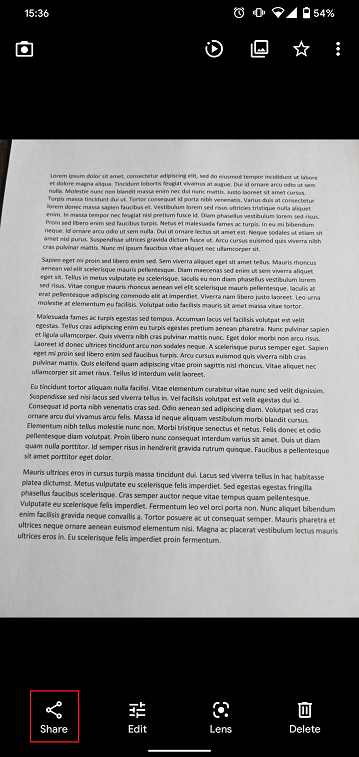
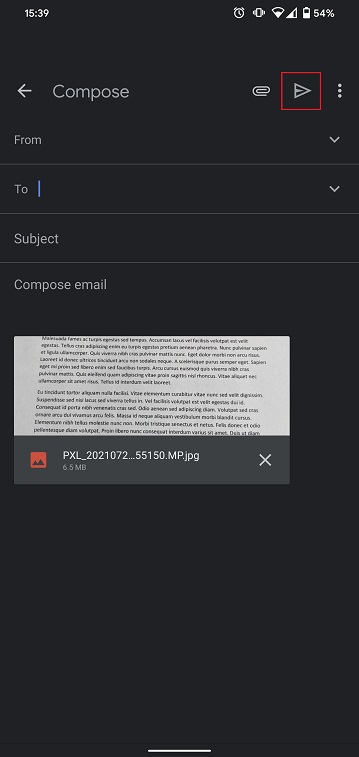
7. In the sharing menu that will be displayed now tap the icon of the email client set up on your phone. In the example picture below, it is called Gmail but the name may vary according to your specific setup.
.png)
Note: to send emails your phone has to be configured for that. Please contact your email provider if you are not familiar with this procedure.
8. Please see HERE how to populate the To and Subject fields of your email. Once the email is ready, tap the airplane icon on the top right to send it.
WHERE TO SEND THE EMAIL AND WHAT TO INCLUDE IN THE SUBJECT
The email has to be created observing the below instructions:
1. In the field To: type:
- newaccounts@interactivebrokers.com if you are a resident of a non-European country
- newaccounts.uk@interactivebrokers.co.uk if you are a European resident
2. The Subject: field must contain all of the below:
- Your account number (it usually has the format Uxxxxxxx, where x are numbers) or your username
- The purpose of sending the document. Please use the below convention:
- PoRes for a proof of residential address
- PID for a proof of identity
如何申请替换数码安全卡+(DSC+)
Overview:
进行下方操作需遵循以下步骤:
- 更换遗失、被盗或无法使用的数码安全卡+
- 持有当前安全设备的同时申请数码安全卡+(账户资产不低于100万美元)
Background:
1. 通知IBKR客户服务- 联系IBKR客户服务获取临时账户访问。此服务只可通过电话提供,并且需要核实账户持有人的身份,详情请见IBKR知识库。
2. 获取在线安全代码卡 - 激活在线安全代码卡,此卡可供您在21天内安全地访问客户端全部功能。如需相关指南,请参见IBKR知识库。
3. 申请替换DSC+ - 完成在线安全代码卡激活后,请前往客户端的安全登录系统界面,申请替换DSC。
申请DSC+
1. 点击请求实物设备按钮。
.png)
2. 设备信息界面将会显示邮寄地址。如果地址已过期或失效,您可点击更改地址然后按页面说明操作进行修改。如果无需进行任何修改,请继续第3步。
.png)
3. 为您的DSC+输入四位Soft PIN码1。请牢记输入的PIN码,之后激活和操作设备需要用到。 如需要,您可更改将暂扣20美元设备预备金的账户2。点击继续完成此步。
.png)
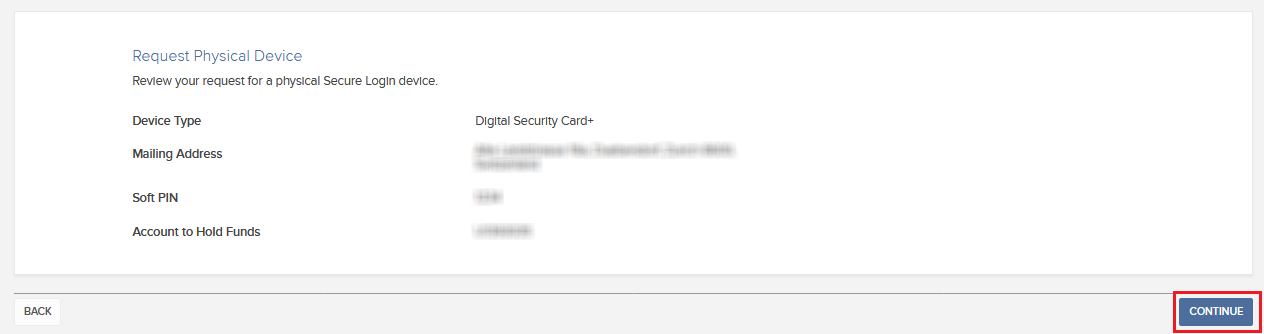
4. 系统将显示概览信息。请确保显示的信息均准确无误。如果需要修改,请点击页面底部的返回按钮(不是浏览器的返回按钮);如无需修改,请点击继续提交申请。
5. 您会看到最终的确认信息,其中会给出预估的寄件日期3。点击确定完成程序。

1. PIN码相关指南请参见IBKR知识库。
2. 安全设备和设备邮寄均为免费。 但是,在您申请设备时,我们会冻结您的一小笔资金(20美元)。 如果设备遗失、故意损坏、被盗或者如果您关闭账户时未能将设备退回IBKR,我们将扣除该笔资金以补偿硬件损失。任何其它情况下,在您将设备退回IBKR后,该笔资金便会解除冻结。更多信息请参见IBKR知识库。
3. 出于安全考虑,替换设备会在寄出之日起三周内自动激活。 临近自动激活时,IBKR会通知您。
IBKR知识库参考
- KB1131:安全登录系统概述
- KB2636:安全设备相关信息与程序
- KB2481:如何在多个使用者之间共享安全登录设备的说明
- KB2545:如何在退出后重新加入安全登录系统的说明
- KB975:如何将安全设备退回IBKR的说明
- KB2260:通过移动IBKR激活IB Key验证的说明
- KB2895:多重双因素系统(M2FS)
- KB1861:安全设备费用信息
- KB69:临时密码有效期的相关信息
How to request a Digital Security Card+ (DSC+) replacement
Overview:
The below steps are required in order to:
- Replace a Digital Security Card+ which has been lost, stolen or has become inoperable
- Request a Digital Security Card+ alongside your current security device (if you are a new or existing Client with equity above $1,000,000, or equivalent)
Background:
1. Notify IBKR Client Services- Contact IBKR Client Services to obtain a temporary account access. This service can only be provided via telephone and requires the identity of the account holder to be verified, as detailed in the IBKR Knowledge Base.
2. Obtain an Online Security Code Card - Activate an Online Security Code Card, which offers enhanced protection and full Client Portal functionality for an extended period of 21 days. Please consult the IBKR Knowledge Base should you need guidance for this specific step.
3. Request the DSC+ replacement - Once you have completed the Online Security Code Card activation, please remain in the Secure Login System section of the Client Portal and order your replacement DSC.
Request a DSC+
1. Click on the button Request Physical Device.
2. The shipping address will be shown in the device information screen. If your address is outdated or invalid, you can amend it by clicking on Change Address and following the on-screen instructions. If you do not need to update your address, please proceed to step 3.
3. Enter a four-digit Soft PIN1 for your DSC+. Please make sure to remember the PIN you are typing since it will be necessary to activate and to operate your device. When applicable and desired, you may change the account on which the 20 USD deposit will be kept on hold2. Complete this step by clicking on Continue.
4. The system will show you a summary of your selection. Please make sure the information displayed is correct. Should you need to perform changes, click on the white Back button under the information field (not your browser back button), otherwise submit the request by clicking on Continue.
5. You will receive a final confirmation containing the estimated shipment date3. Click on Ok to finalize the procedure.
1. For PIN guidelines, please consult the IBKR Knowledge Base.
2. The Security token and the shipment are both free of charge. Nevertheless, when you order your device, we will freeze a small amount of your funds (20 USD). If your device is lost, intentionally damaged, stolen or if you close your account without returning it to IBKR, we will use that amount as a compensation for the loss of the hardware. In any other case, the hold will be released once your device has been returned to IBKR. More details on the IBKR Knowledge Base.
3. For security reasons, the replacement device is set to auto-activate within three weeks from the shipment date. IBKR will notify you when the auto-activation is approaching and when it is imminent.
IBKR Knowledge Base References
- See KB1131 for an overview of the Secure Login System
- See KB2636 for information and procedures related to Security Devices
- See KB2481 for instructions about sharing the Security Login Device between two or more users
- See KB2545 for instructions on how to opt back in to the Secure Login System
- See KB975 for instructions on how to return your security device to IBKR
- See KB2260 for instructions on activating the IB Key authentication via IBKR Mobile
- See KB2895 for information about Multiple 2Factor System (M2FS)
- See KB1861 for information about charges or expenses associated with the security devices
- See KB69 for information about Temporary passcode validity