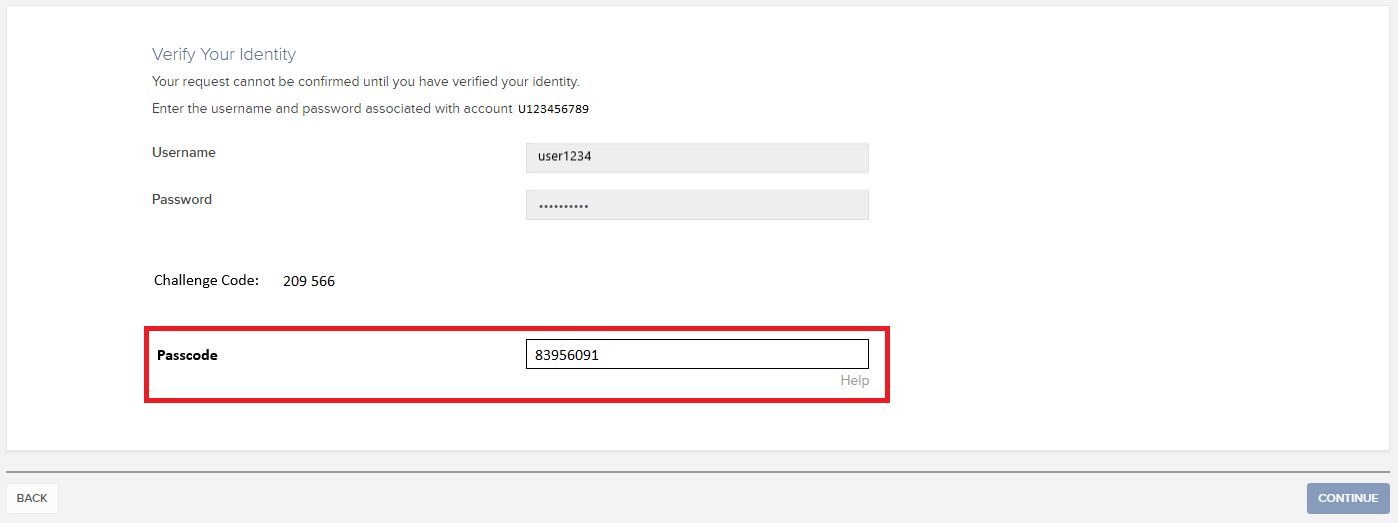
Comment envoyer des documents à IBKR avec votre smartphone
Interactive Brokers vous permet de nous envoyer une copie du document même si vous n'avez pas accès à un scanner. Vous pouvez prendre une photo du document avec votre smartphone
Vous trouverez ci-dessous les instructions sur comment prendre une photo et l'envoyer à Interactive Brokers par e-mail avec les systèmes d'exploitation de smartphone suivants :
Si vous savez déjà comment prendre des photos et les envoyer par e-mail avec votre smartphone, cliquez ICI - Où envoyer l'e-mail et que mettre en objet.
iOS
1. Balayez votre écran depuis le bas et appuyez sur l'icône Appareil photo.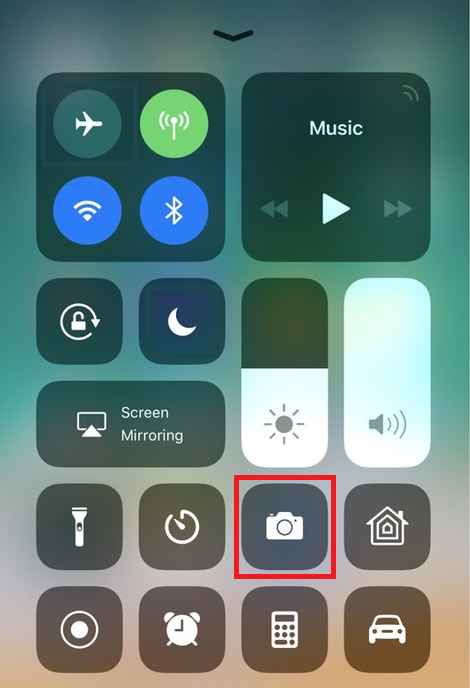
Si vous n'avez pas l'icône Appareil photo, vous pouvez appuyer sur l'appli Appareil photo dans l'écran d'accueil de votre iPhone.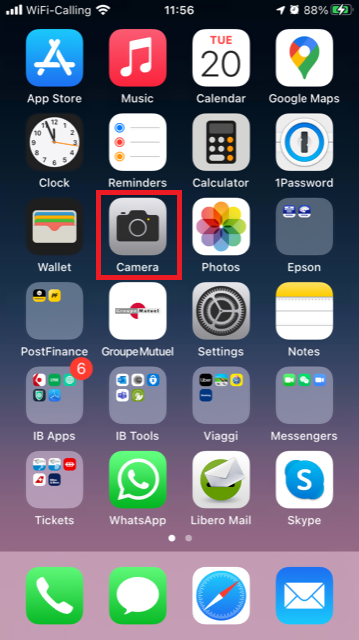
Votre téléphone devrait activer la caméra arrière. S'il active la caméra frontale, touchez le bouton pour la changer.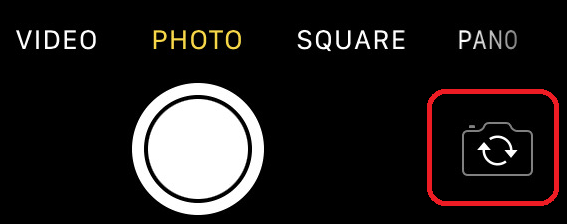
2. Placez votre iPhone au-dessus du document et cadrez la portion ou la page du document que vous souhaitez.

3. Assurez-vous d'avoir une lumière suffisante et uniforme pour n'avoir aucune ombre sur le document. Tenez le téléphone fermement dans vos mains pour éviter de bouger. Appuyz sur le déclencheur pour prendre la photo.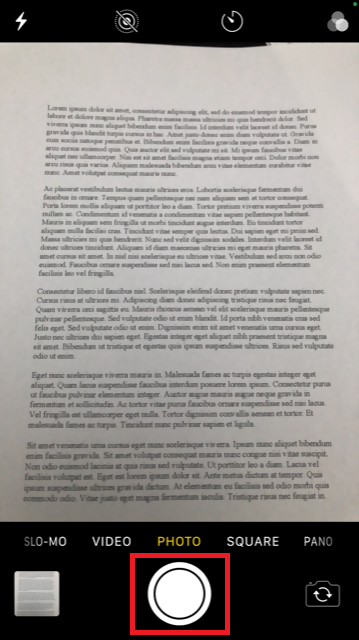
4. Appuyez sur l'image miniature en bas à gauche pour voir la photo que vous venez de prendre.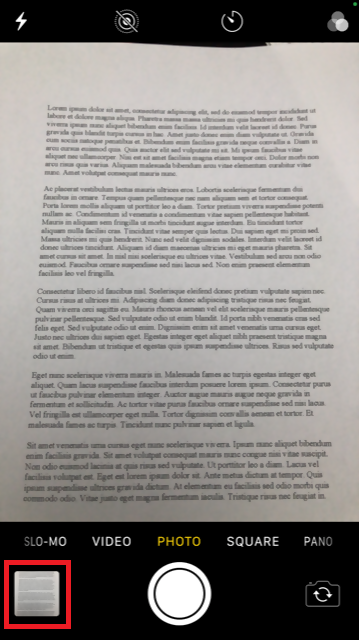
5. Assurez-vous que l'image est claire et que le document est bien lisible. Vous pouvez élargir l'image et la voir en détails en faisant glisser deux doigts écartés sur la photo.

Si la photo ne présente pas une bonne qualité ou une bonne lumière, veuillez réitérer les étapes précédentes pour en prendre une plus nette.
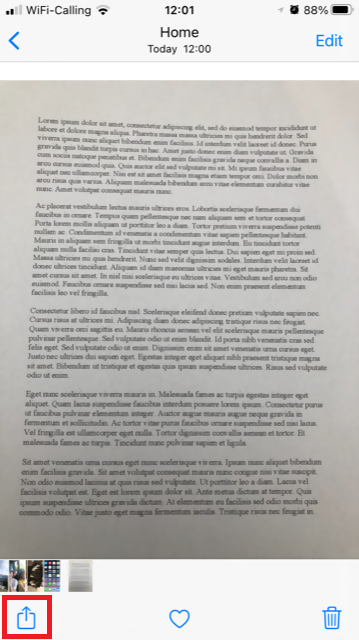
6. Appuyez sur l'icône de partage en bas à gauche de l'écran.
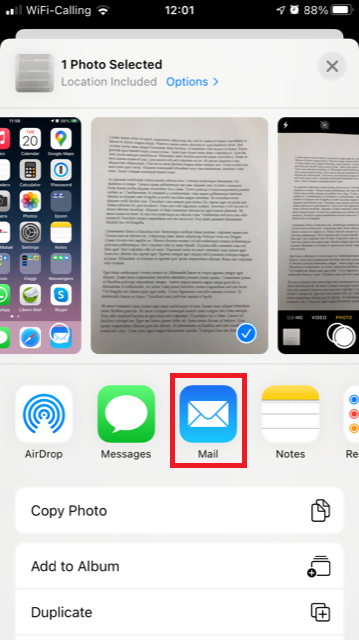
7. Appuyez sur l'icône E-mail.
Remarque : pour envoyer des e-mails votre téléphone doit être configuré pour. Veuillez contacter votre prestataire d'e-mail si vous ne connaissez pas la procédure.
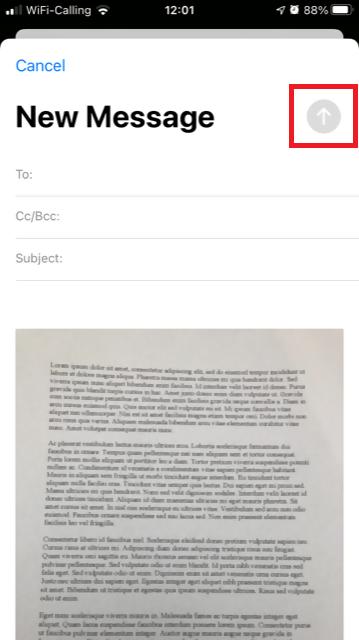
8. Veuillez cliquer ICI pour plus d'informations sur comment remplir les champs À : et Objet : de votre e-mail. Une fois que l'e-mail est prêt, cliquez sur l'icône en flèche en haut à droite pour l'envoyer.
Android
1. Ouvrez la liste d'applications ou ouvrez l'appli Appareil photo. Vous pouvez aussi l'ouvrir depuis l'écran d'accueil. Selon le modèle, le constructeur ou la configuration de votre téléphone, l'appli peut être appelée différemment.
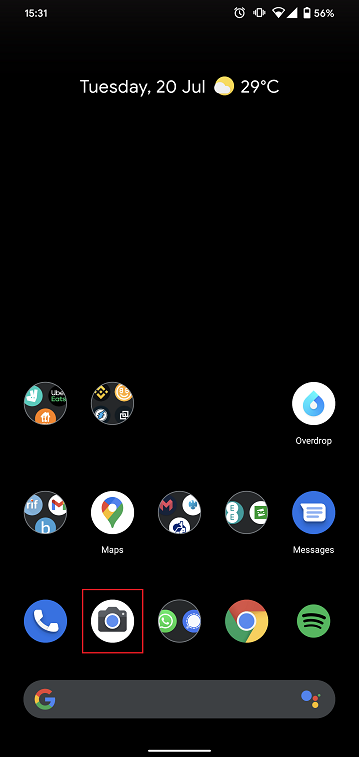
Votre téléphone devrait activer la caméra arrière. S'il active la caméra frontale, touchez le bouton pour la changer.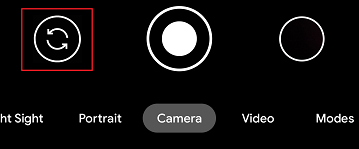
2. Placez votre Android au-dessus du document et cadrez la portion ou la page du document que vous souhaitez.

3. Assurez-vous d'avoir une lumière suffisante et uniforme pour n'avoir aucune ombre sur le document. Tenez le téléphone fermement dans vos mains pour éviter de bouger. Appuyz sur le déclencheur pour prendre la photo.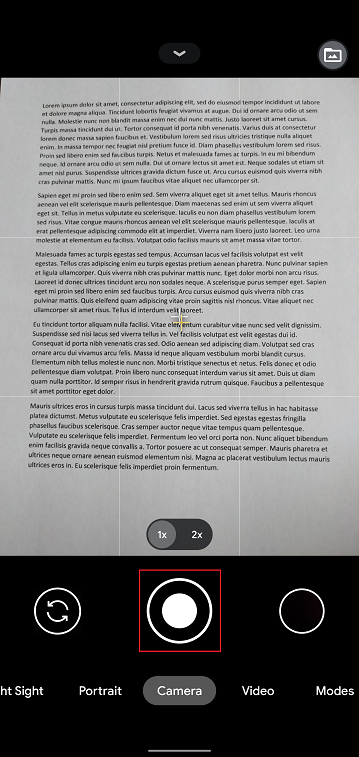
4. Assurez-vous que l'image est claire et que le document est bien lisible. Vous pouvez élargir l'image et la voir en détails en faisant glisser deux doigts écartés sur la photo.

Si la photo ne présente pas une bonne qualité ou une bonne lumière, veuillez réitérer les étapes précédentes pour en prendre une plus nette.
5. Appuyez sur l'icône rond vide en bas à droite de l'écran.
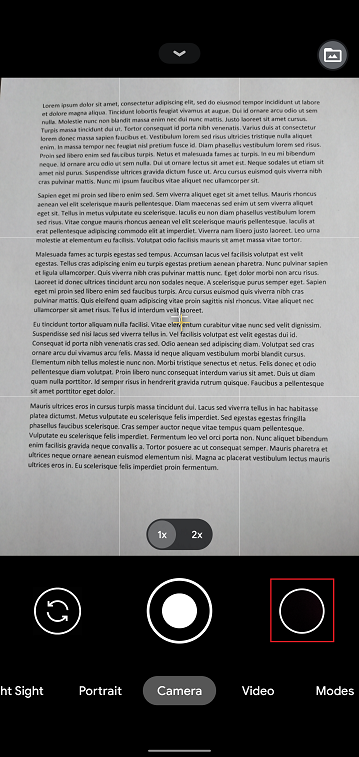
6. Appuyez sur l'icône de partage en bas à gauche de l'écran.
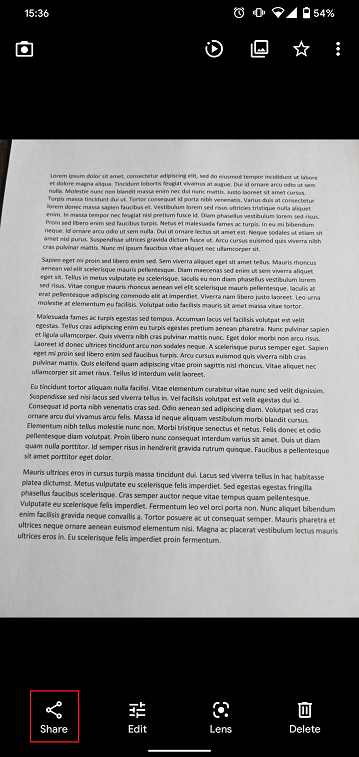
7. Dans le menu de partage qui s'affichera, touchez l'icône e-mail configurée sur votre téléphone. Dans la photo exemple ci-dessous, il s'agit de Gmail mais le nom peut varier selon la configuration.
.png)
Remarque : pour envoyer des e-mails votre téléphone doit être configuré pour. Veuillez contacter votre prestataire d'e-mail si vous ne connaissez pas la procédure.
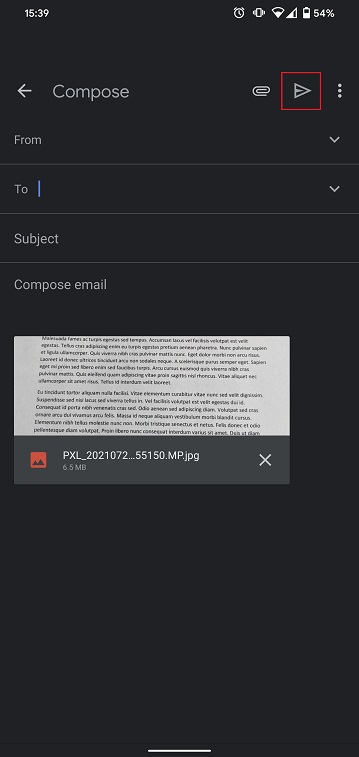
8. Veuillez cliquer ICI pour plus d'informations sur comment remplir les champs À : et Objet : de votre e-mail. Une fois que l'e-mail est prêt, cliquez sur l'icône avion en haut à droite pour l'envoyer.
OÙ ENVOYER L'E-MAIL ET QUE METTRE EN OBJET
L'e-mail doit être créé en respectant les instructions ci-dessous :
1. Dans le champ À : écrivez :
- newaccounts@interactivebrokers.com si vous résidez dans un pays hors-Europe
- newaccounts.uk@interactivebrokers.co.uk si vous résidez dans un pays en Europe
2. Le champ Objet : doit contenir les informations suivantes :
- Votre numéro de compte (le format est généralement le suivant Uxxxxxxx, où les x sont des nombres) ou votre nom d'utilisateur
- Le but de l'envoi du document. Veuillez utiliser les conventions ci-dessous :
- PoRes pour un justificatif d'adresse résidentielle
- PID pour une preuve d'identité
Résolution des problèmes d'échec de connexion aux plateformes de trading
Cliquez sur le lien ci-dessous qui décrit le mieux votre situation :
a. Si vous utilisez un mot de passe temporaire, veuillez noter que les caractères alphanumériques sont sensibles à la casseet doivent être saisis en majuscules
b. Si vous utilisez un carte de sécurité ou un appareil électronique, veuillez noter qu'il n'y a pas d'espace entre les caractères
c. Les ports 4000/4001 sont bloqués. Ces ports sont souvent bloqués dans les connexions Internet publiques comme les hôtels, cafés... et doivent être ouverts pour héberger un protocole TPC entrant/sortant. De plus, si un routeur est connecté à votre ordinateur, ces ports doivent être ouverts sur le routeur.*
*Veuillez cliquer ici pour vérifier l'état de votre connexion : IBKR Dedicated Connectivity Test Page.
How to verify your identity using your Secure Login Device
Some tasks in Client Portal will ask you to verify your identity by using the Challenge Code/Response String method in order to proceed further.
This article will guide you in completing these tasks with the following Secure Login Devices:
-----------------------------------------------------------------------------------------------------------------------------------------------------------
Verify your identity with IB Key (iOS)
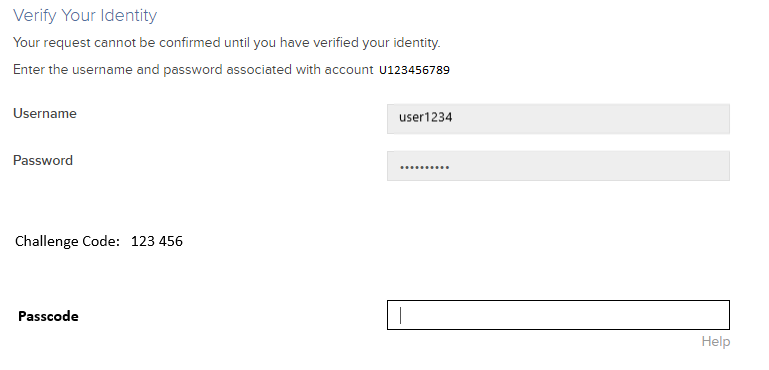
1. When you initiate a task that requires a verification, you will be prompted to enter Username and Password. Fill out the information and click on Continue (Figure 1).
Figure 1.
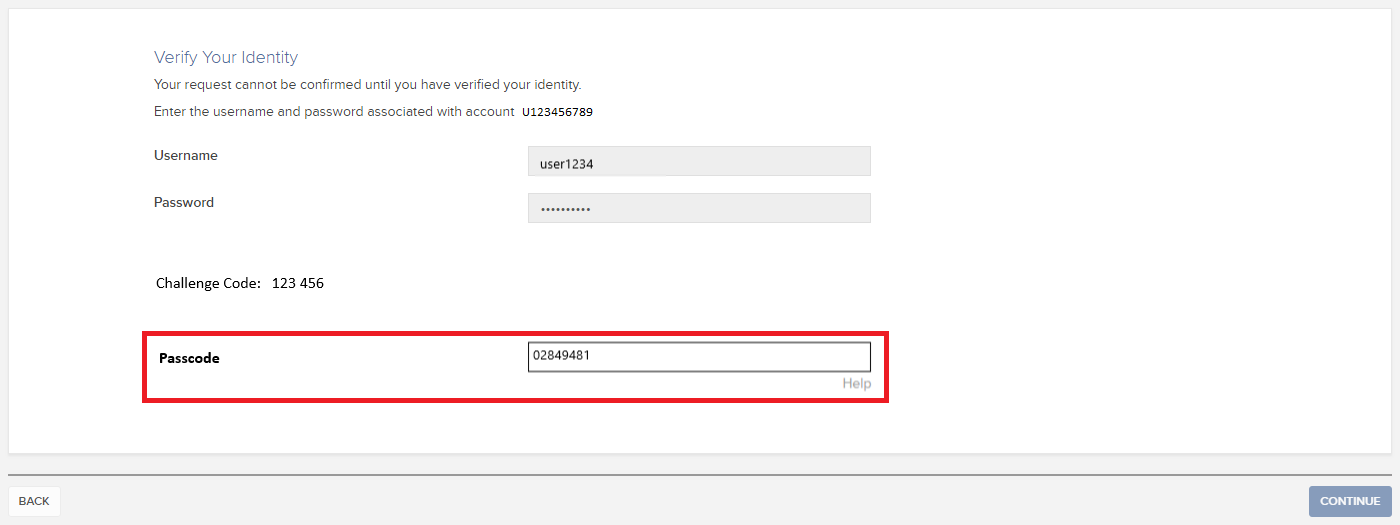
2. A Challenge Code will be displayed, along with a passcode field to enter a response (Figure 2). You will enter this Challenge Code onto your phone.
Figure 2.
3. Launch IBKR Mobile on your iOS smartphone, and...
3.a. If the app opens with the home screen (Figure 3), select Authenticate then proceed with step 4.
3.b. If the app opens with the login screen (Figure 4), tap Services on the top left (red arrow), select Authenticate (Figure 3) and proceed with step 4.
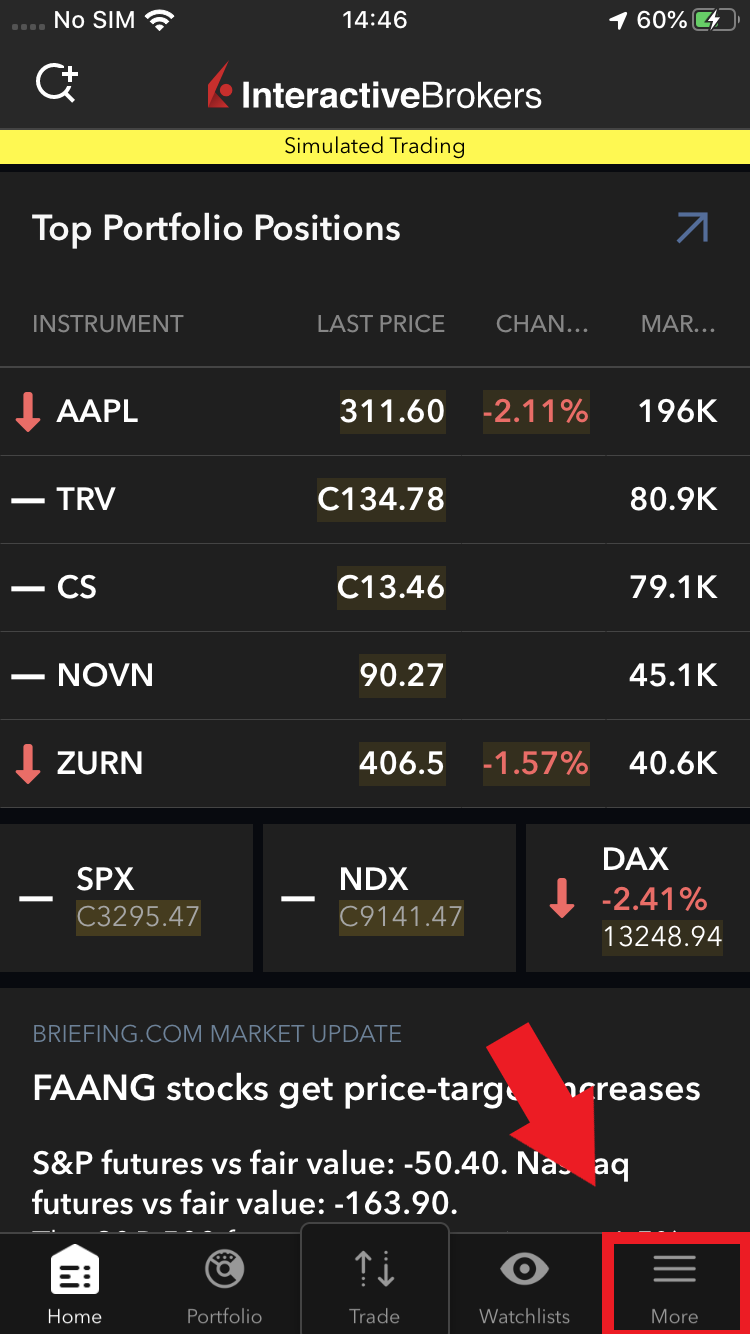
3.c. If the app opens with your Home Page, Portfolio, Watchlists, or similar (Figure 5), tap More on the bottom-right (red arrow). Then tap Two-Factor Authentication (Figure 6), tap Generate Code (Figure 7) and proceed with step 4.
Figure 3. Figure 4.
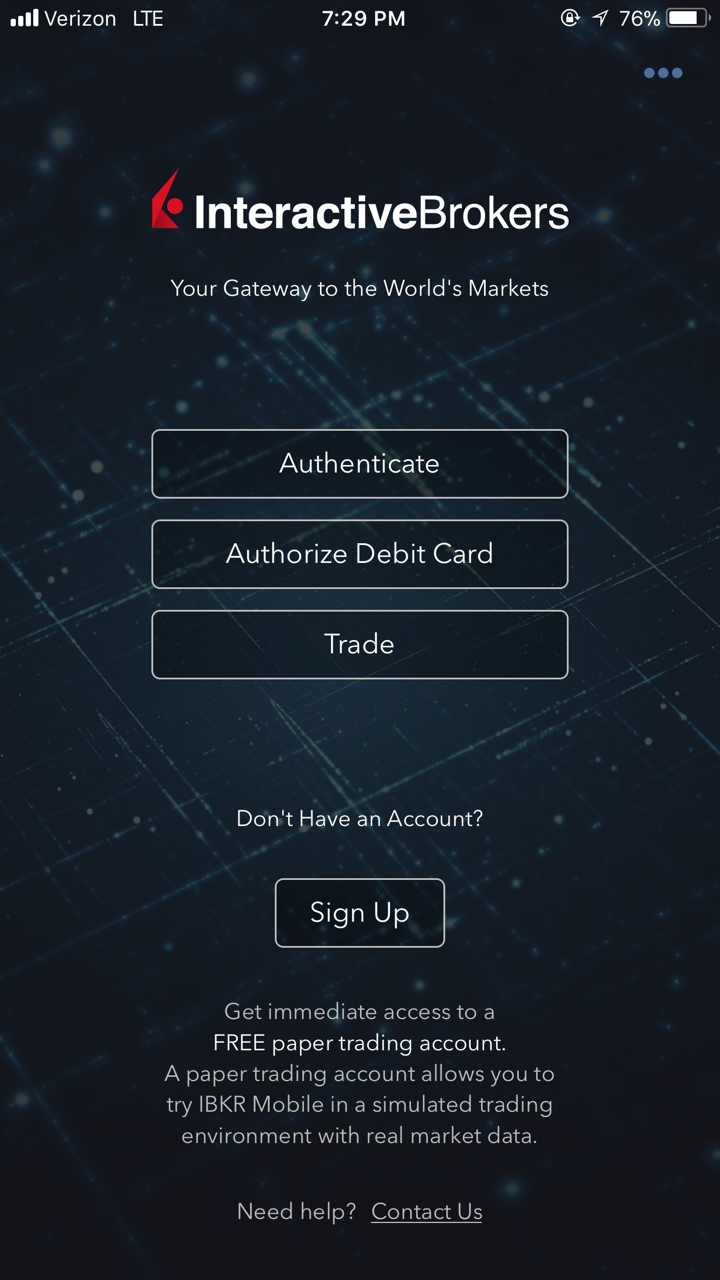
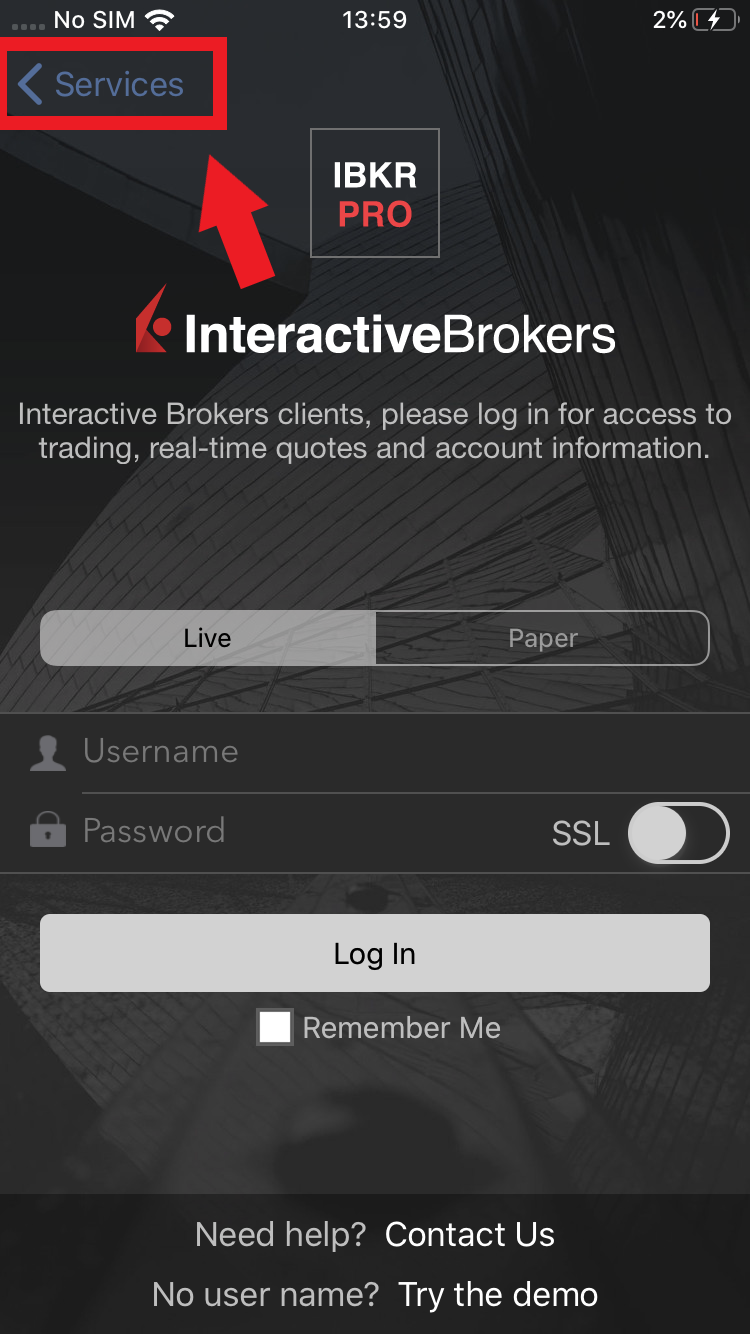
Figure 5. Figure 6. Figure 7.
.jpeg)
.jpeg)
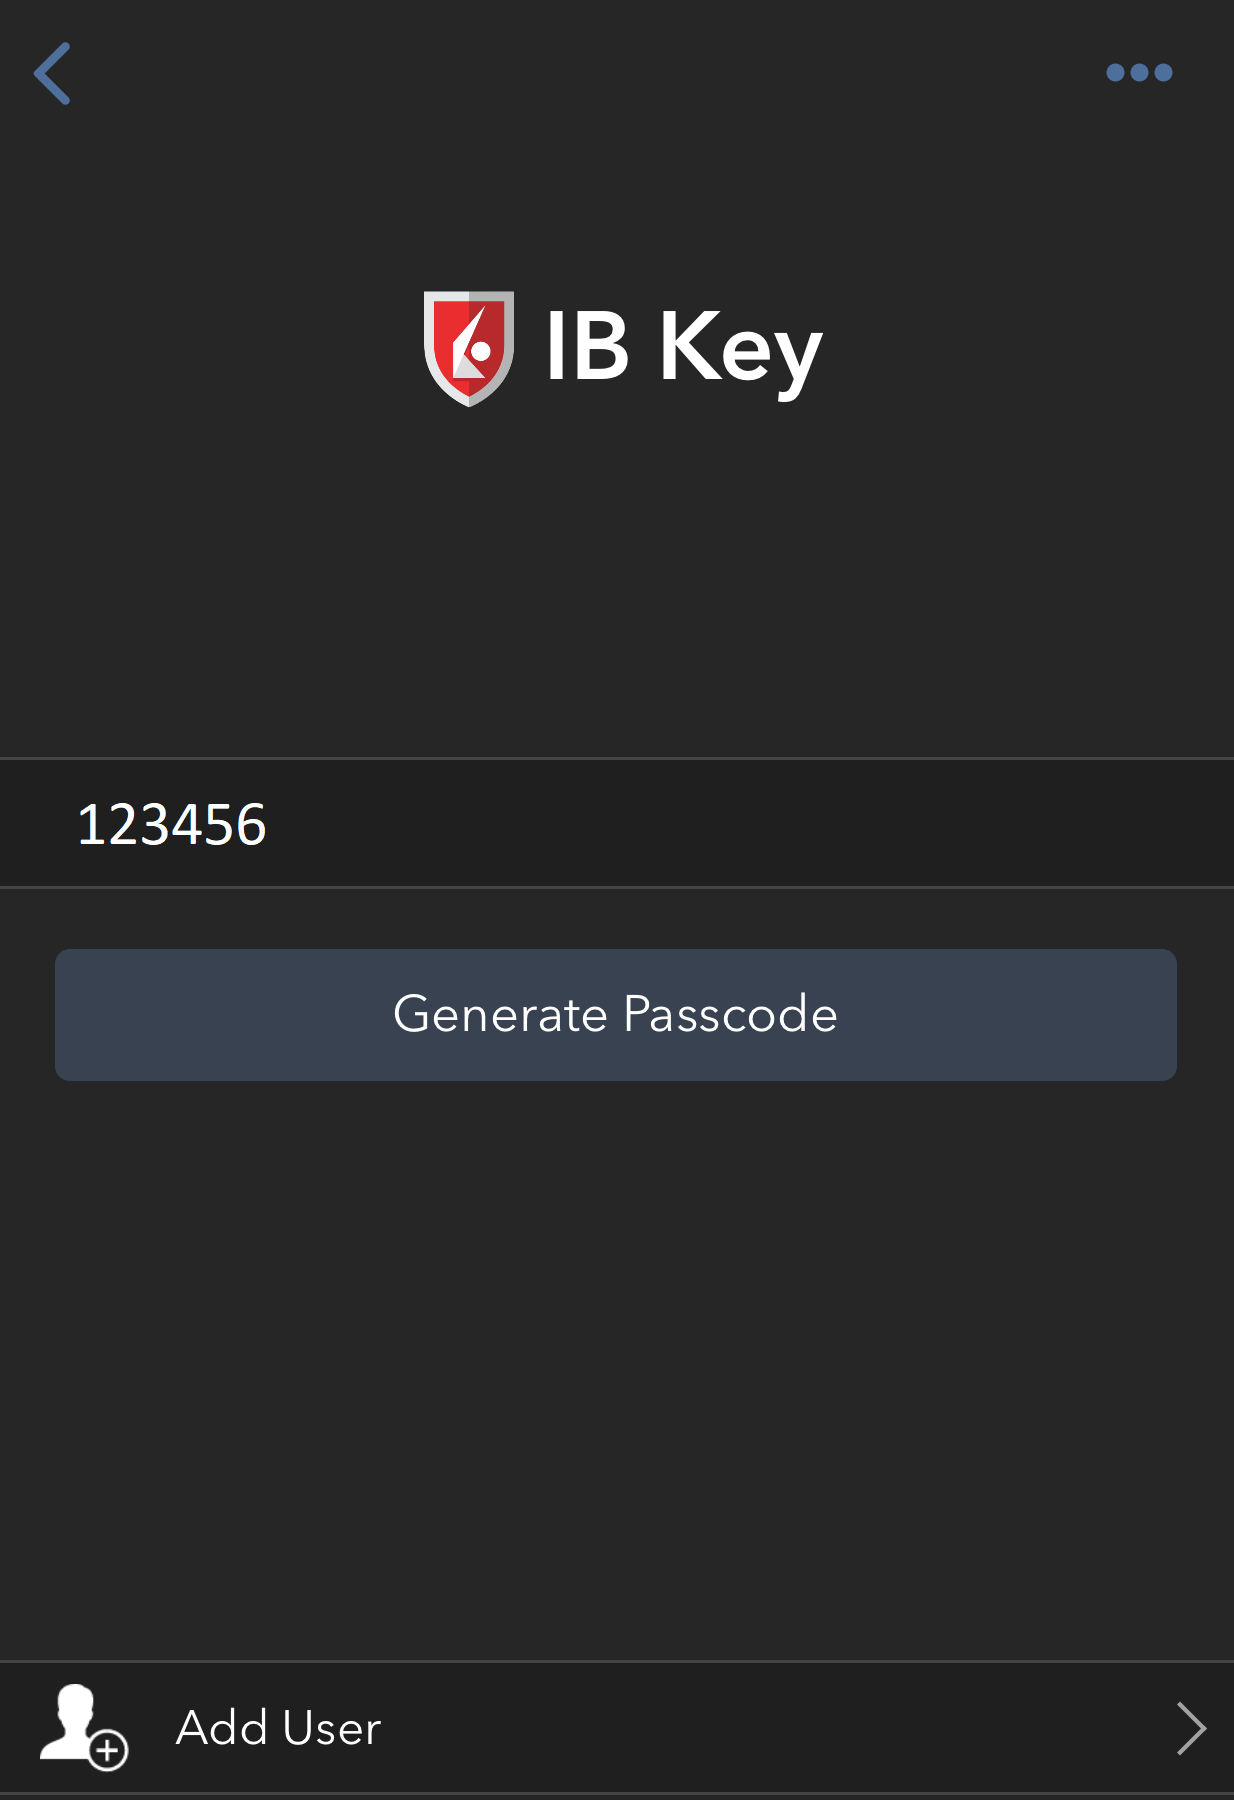
4. Type the Challenge Code from Client Portal (see step 2.) into the corresponding field and select Generate Passcode (Figure 8).
Figure 8.
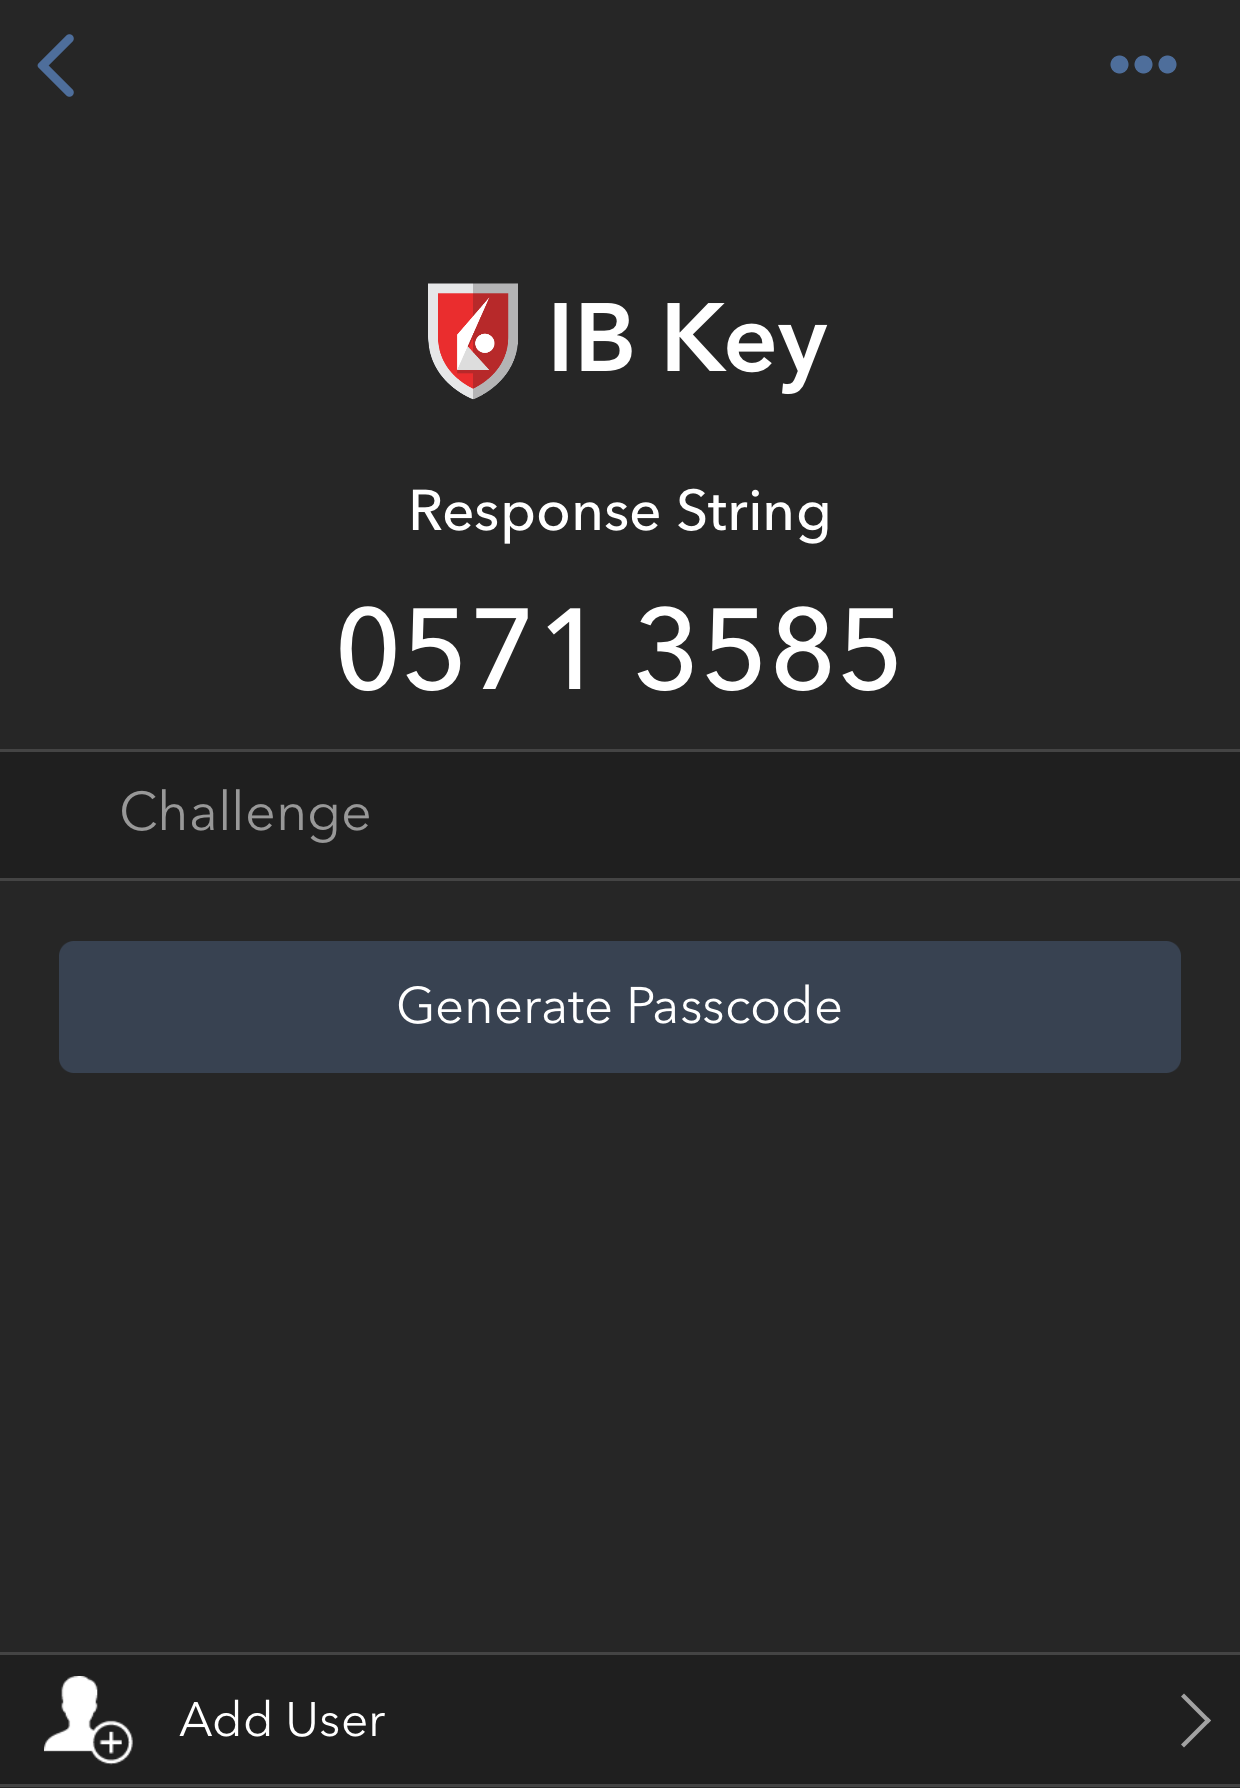
5. Use Touch ID or Face ID for two-factor authentication.
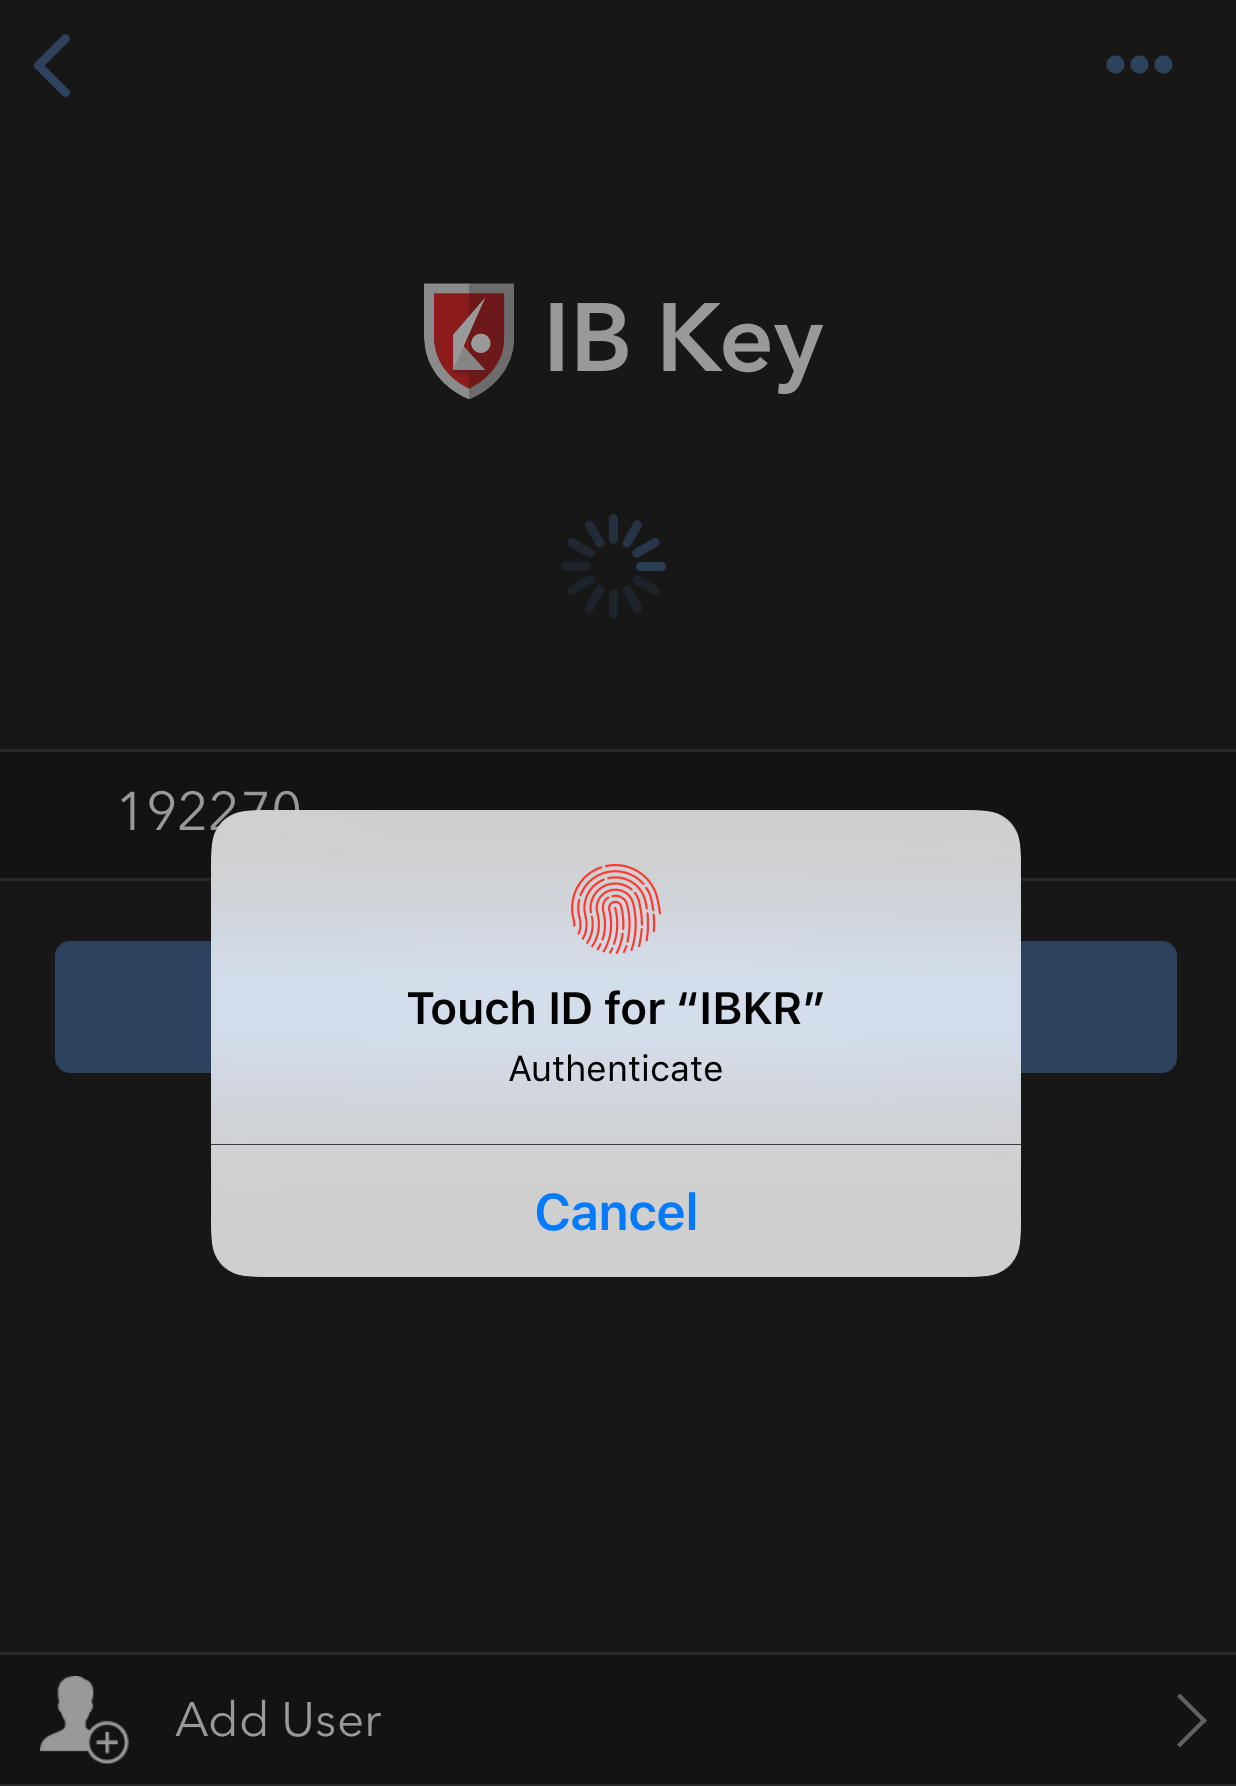
If Touch ID has not been activated, IB Key will prompt you to enter your smartphone's passcode. A response string will then be generated (Figure 9).
5.1 If you use Touch ID, place your registered finger on the Home Button (Figure 9). A response string will then be generated (Figure 10).
Figure 9. Figure 10.
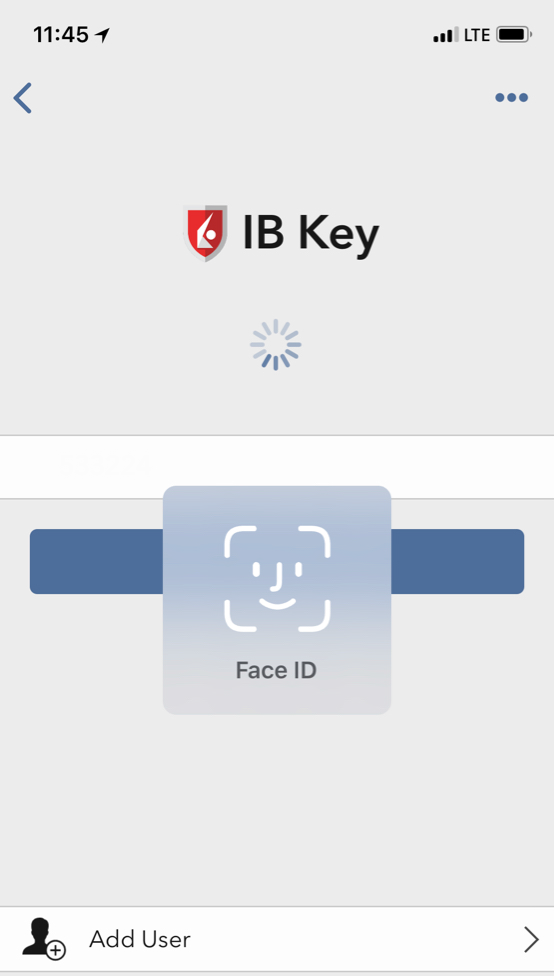
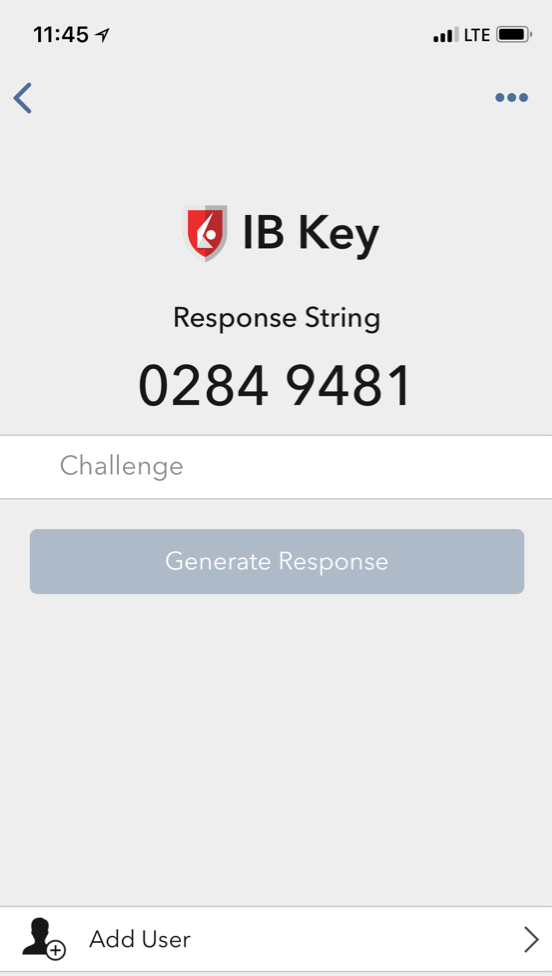
5.2 If you use Face ID, look at your iOS smartphone screen (Figure 11). A response string will then be generated (Figure 12).
Figure 11. Figure 12.
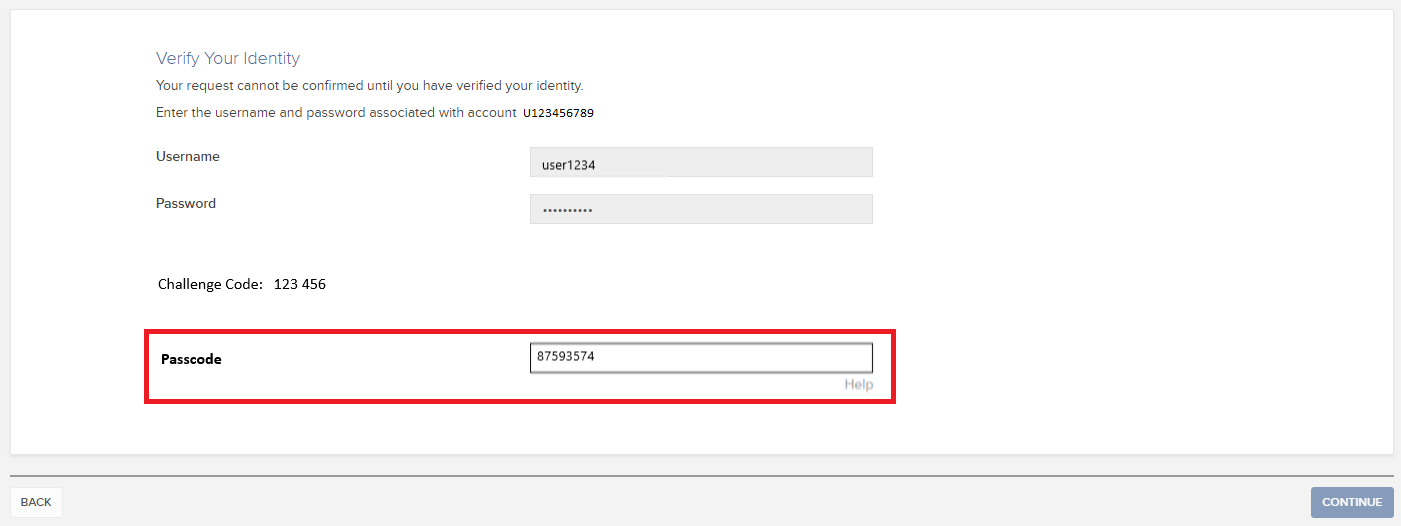
6. Enter the response string from IB Key into the passcode field of Client Portal and click Continue (Figure 13).
Figure 13.
-----------------------------------------------------------------------------------------------------------------------------------------------------------
Verify your identity with IB Key (Android)
1. When you initiate a task that requires a verification, you will be prompted to enter Username and Password. Fill out the information and click on Continue (Figure 1A).
Figure 1A.
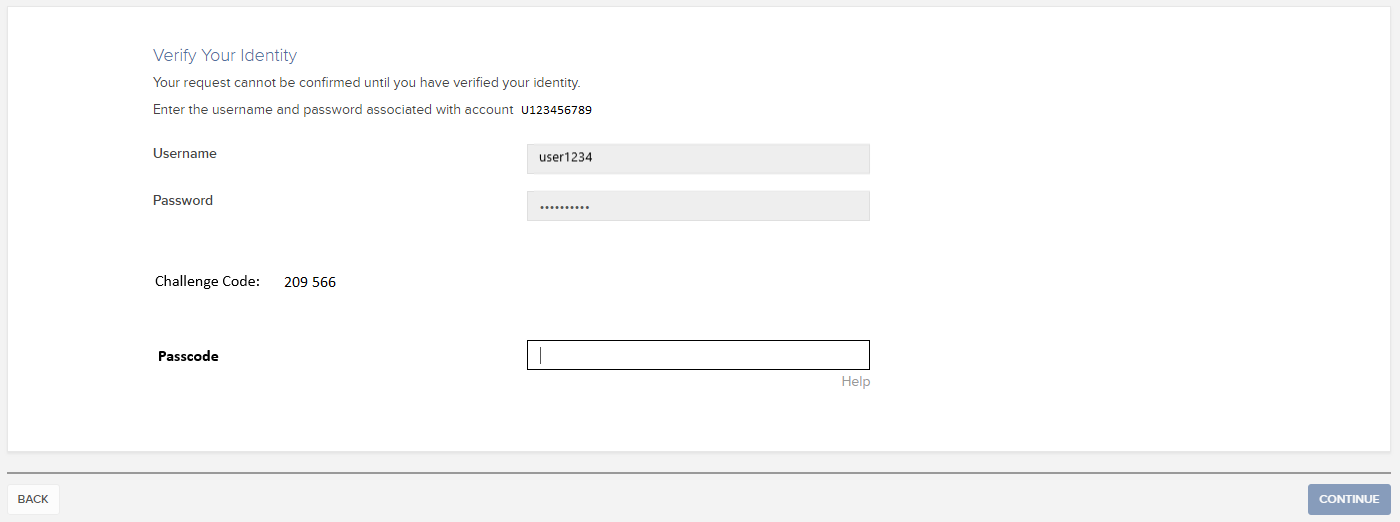
2. A Challenge Code will be displayed, along with a passcode field to enter a response (Figure 2A). You will enter this Challenge Code onto your phone.
Figure 2A.
3. Launch IBKR Mobile on your Android smartphone, and...
3.a. If the app opens with the home screen (Figure 3A), select Authenticate then proceed with step 4.
3.b. If the app opens with the login screen (Figure 4A), tap Services on the top left (red arrow), select Authenticate (Figure 3A) and proceed with step 4.
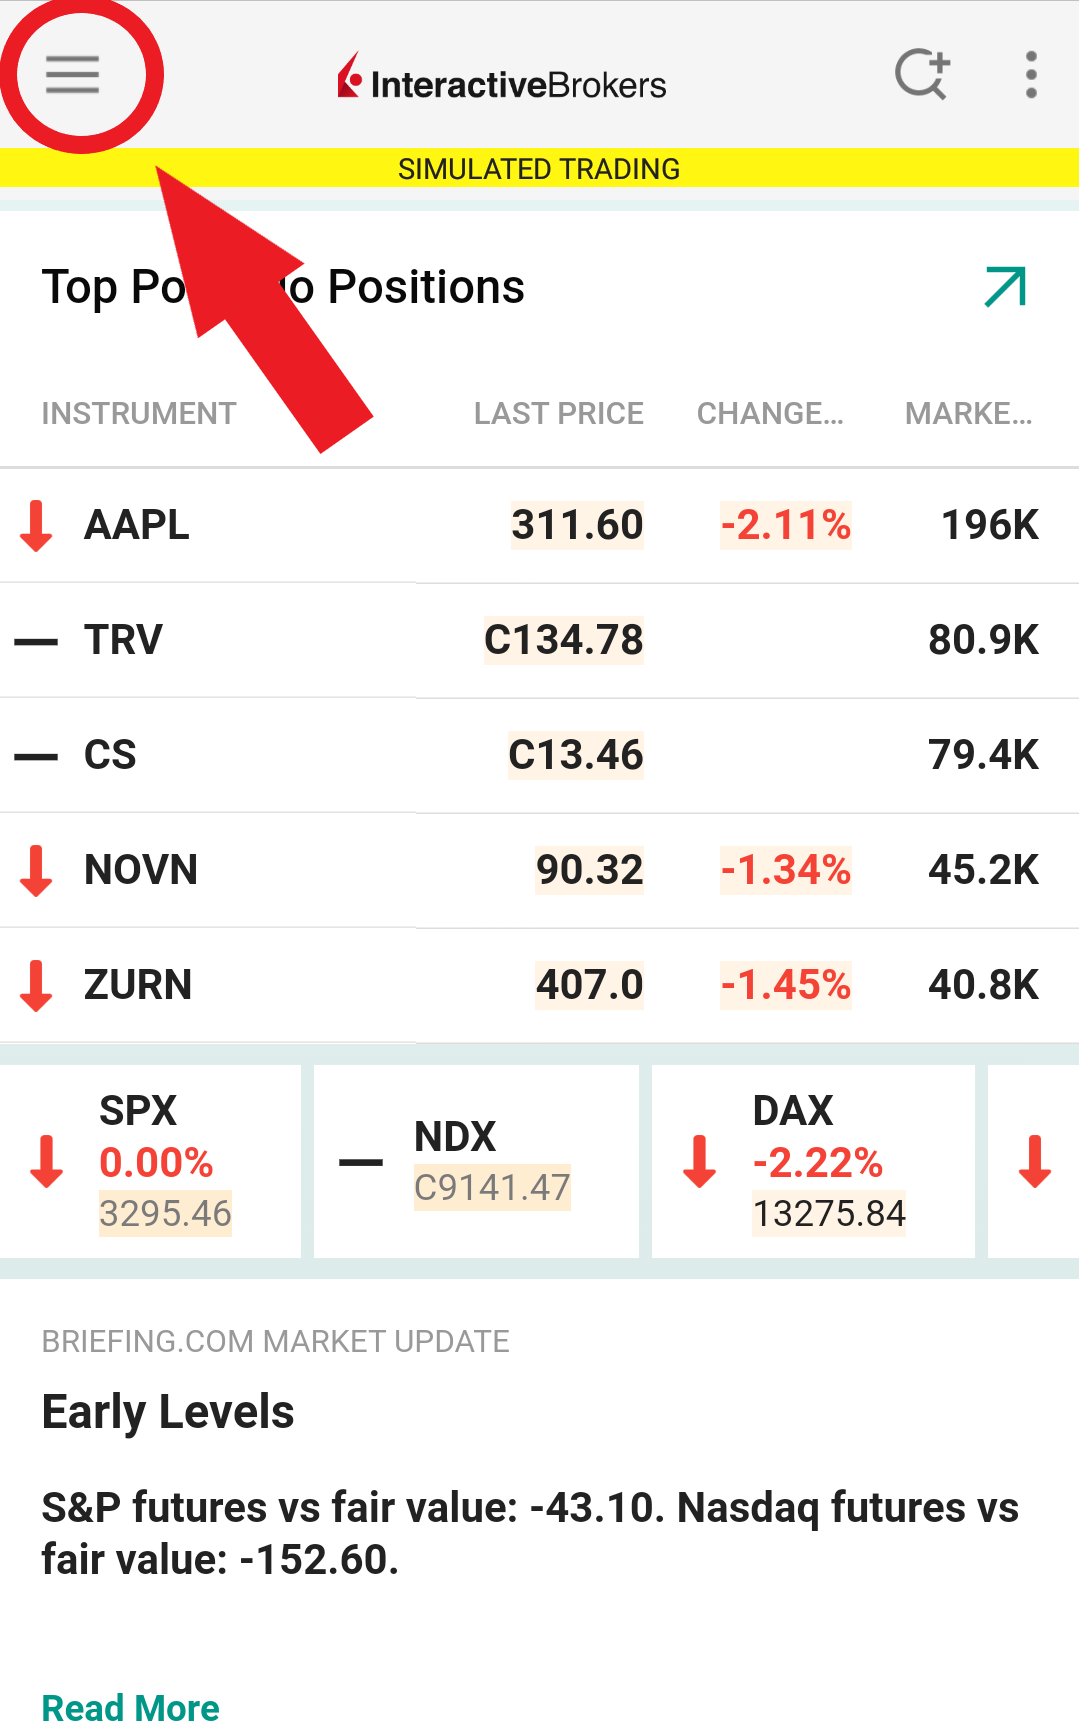
3.c. If the app opens with your Home Page, Portfolio, Watchlists, or similar (Figure 5A), tap More on the bottom-right (red arrow). Then tap Two-Factor Authentication (Figure 6A), followed by Generate Response (Figure 7A), and proceed with step 4.
Figure 3A. Figure 4A.
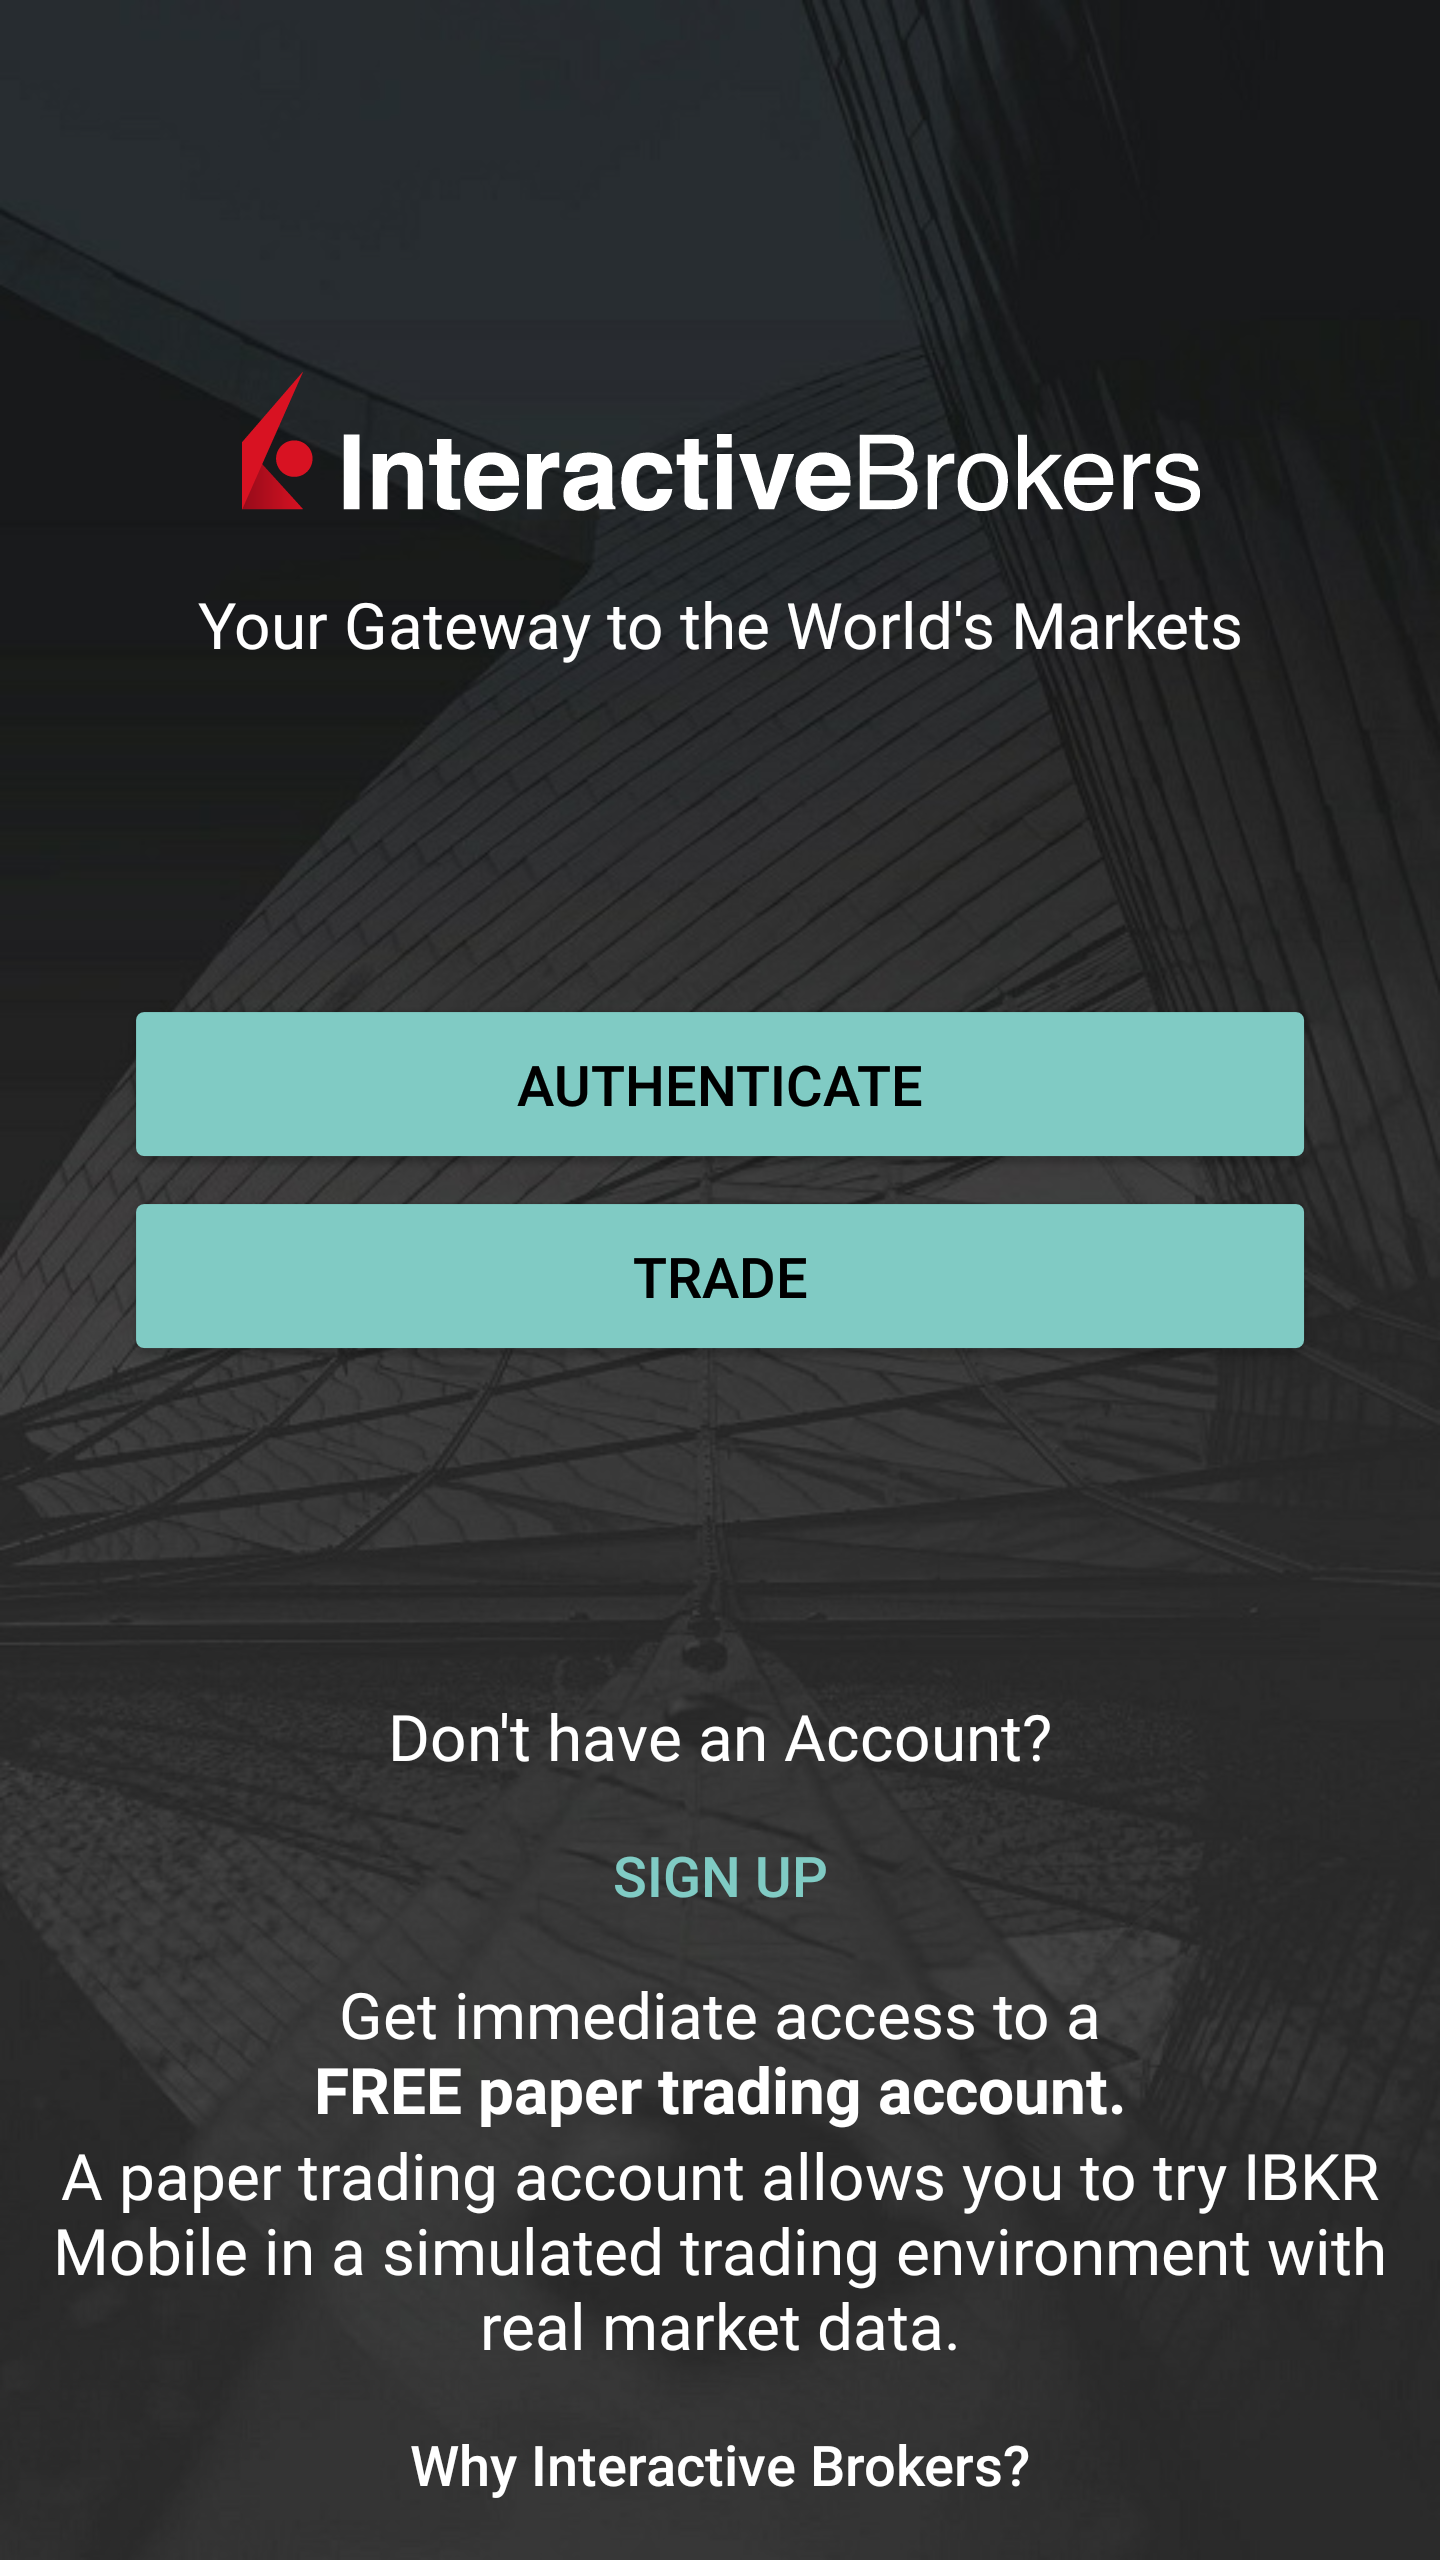
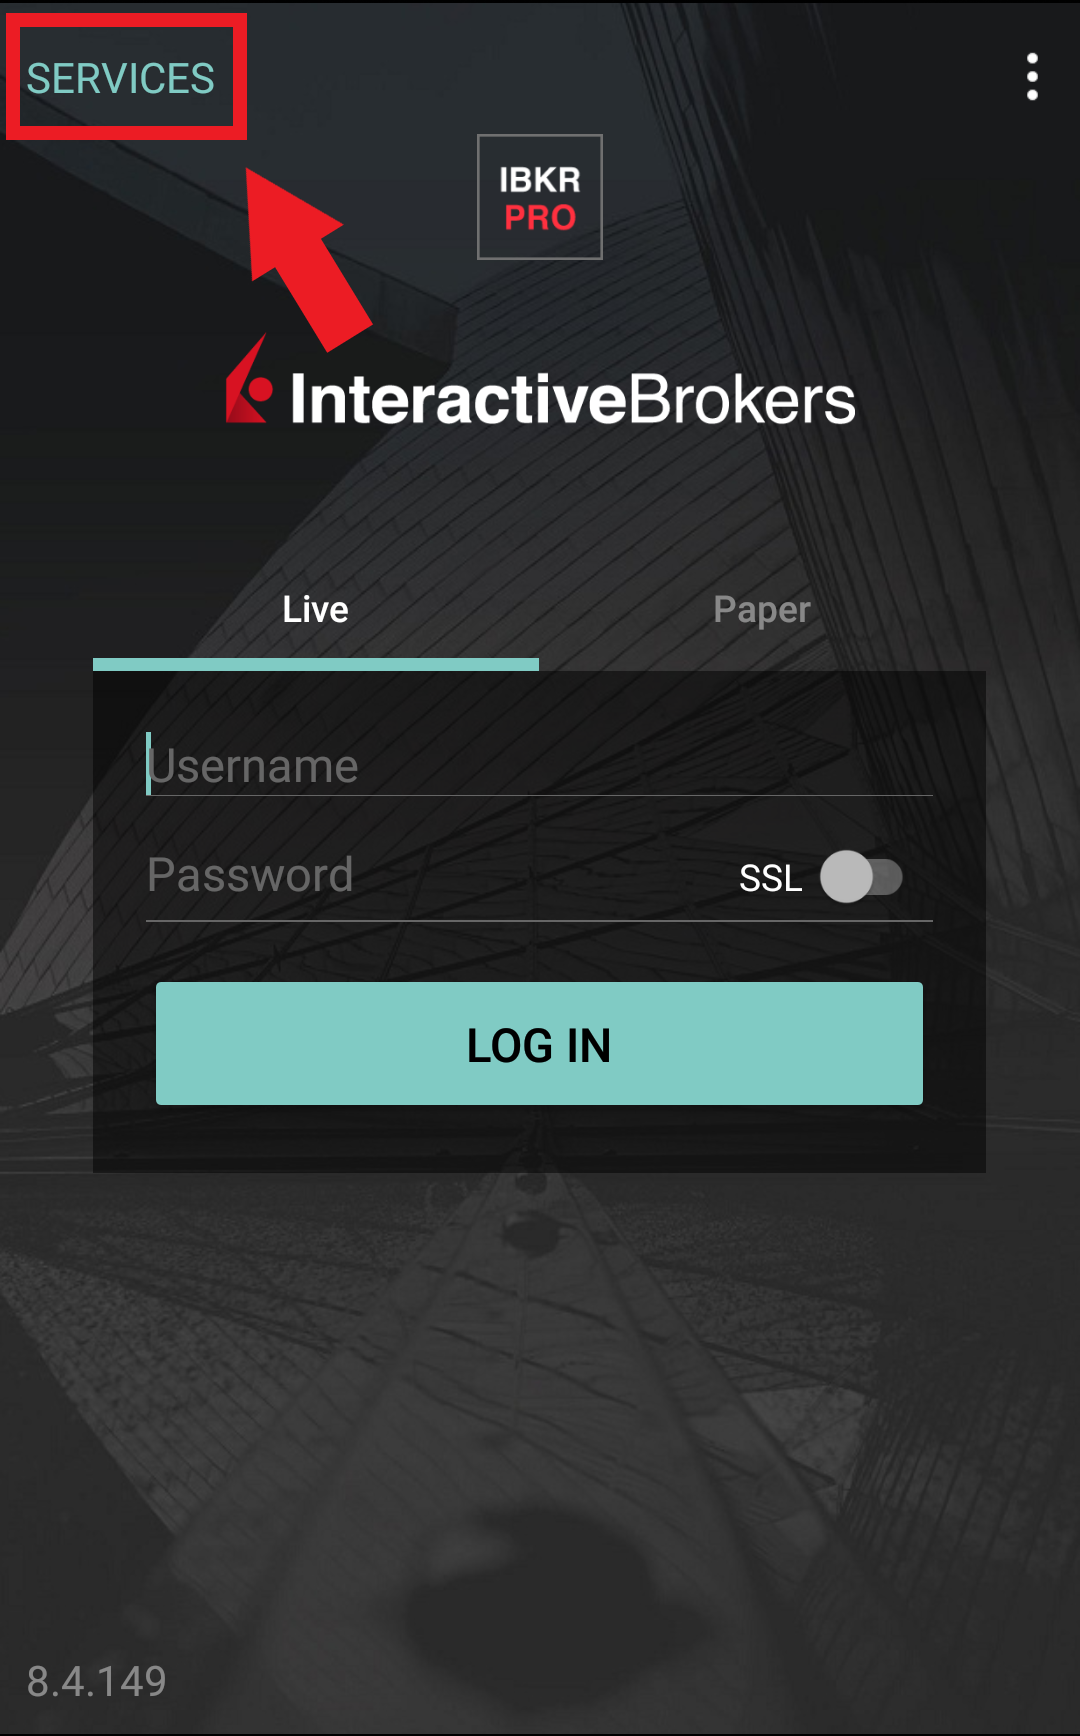
Figure 5A. Figure 6A. Figure 7A.
.jpeg)
.jpeg)
4. Type the PIN that you determined during the IB Key registration process and the Challenge Code from Client Portal into the corresponding fields, then select Generate Passcode. A response string will then be generated (Figure 8A).
Figure 8A.
.png)
5. Enter the response string from IB Key into the passcode field of Client Portal and click Continue (Figure 9A).
Figure 9A.
-----------------------------------------------------------------------------------------------------------------------------------------------------------
Verify your identity with Digital Security Card+ (DSC+)
1. When you initiate a task that requires a verification, you will be prompted to enter Username and Password. Fill out the information and click on Continue (Figure 1B).
Figure 1B.
2. A Challenge Code will be displayed, along with a passcode field to enter a response (Figure 2B). You will enter this Challenge Code onto your DSC+.
Figure 2B.
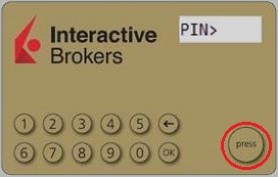
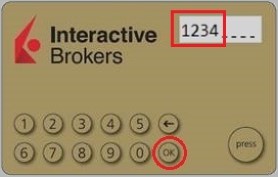
3. Turn on your DSC+ using the “press” button until 'PIN>' is displayed (Figure 3B). Enter the 4-digit PIN code you specified at the time you requested the device, then confirm with the “OK” button (Figure 4B).
Figure 3B. Figure 4B.
4. When 'CHALLNG>' is displayed (Figure 5B), enter the 6-digit Challenge Code from the Client Portal screen into the DSC+, then confirm with the "OK" button (Figure 6B).
Figure 5B. Figure 6B.
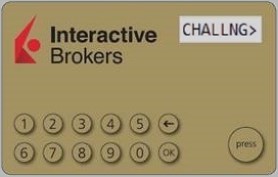
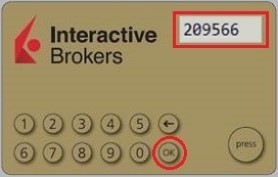
5. A response code will appear (Figure 7B).
Figure 7B.
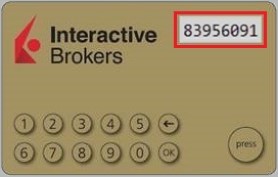
6. Enter the response string from your DSC+ into the passcode field of Client Portal and click Continue (Figure 8B).
Figure 8B.
Comment obtenir une carte de codes de sécurité en ligne
La carte de sécurité en ligne vous permet d'obtenir un accès temporaire à votre compte et plateforme de trading pendant 21 jours. Il s'agit d'une solution provisoire généralement utilisée dans les cas suivants :
A. Vous n'êtes actuellement pas en possession de votre appareil de sécurité permanent et vous attendez d'y avoir accès à nouveau.
B. Vous avez perdu votre appareil de sécurité et vous souhaitez faire une demande pour un nouveau ou maintenir l'accès à votre compte en attendant.
Pour les cas mentionnés ci-dessus, nous supposons que vous avez déjà contacté le Service clientèle IBKR et reçu un code de sécurité temporaire, comme expliqué dans KB70. Pour prolonger la durée de votre accès temporaire, veuillez procéder comme suit :
Procédure d'activation
1. Ouvrez votre navigateur et rendez vous sur la page ibkr.com
2. Cliquez sur Se connecter
.png)

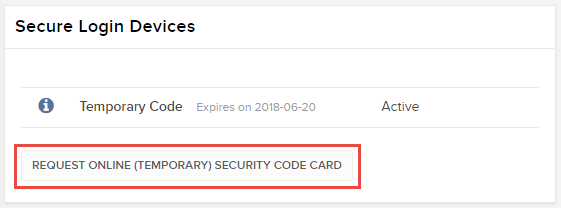
6. Votre carte de sécurité en ligne sera affichée. Cliquez sur Imprimer2
(1).png)
7. Veuillez vous assurez que la carte a bien été imprimée et que toutes les parties sont clairement lisibles. Cliquez ensuite sur Poursuivre 
8. Deux chiffres apparaîtrons sur l'écran d'activation. Repérez le premier chiffre sur votre carte et saisissez le code à 3 caractères correspondant dans le champ Codes de sécurité. Répétez la même opération pour le deuxième nombre, sans espace entre les deux codes. Puis cliquez sur Poursuivre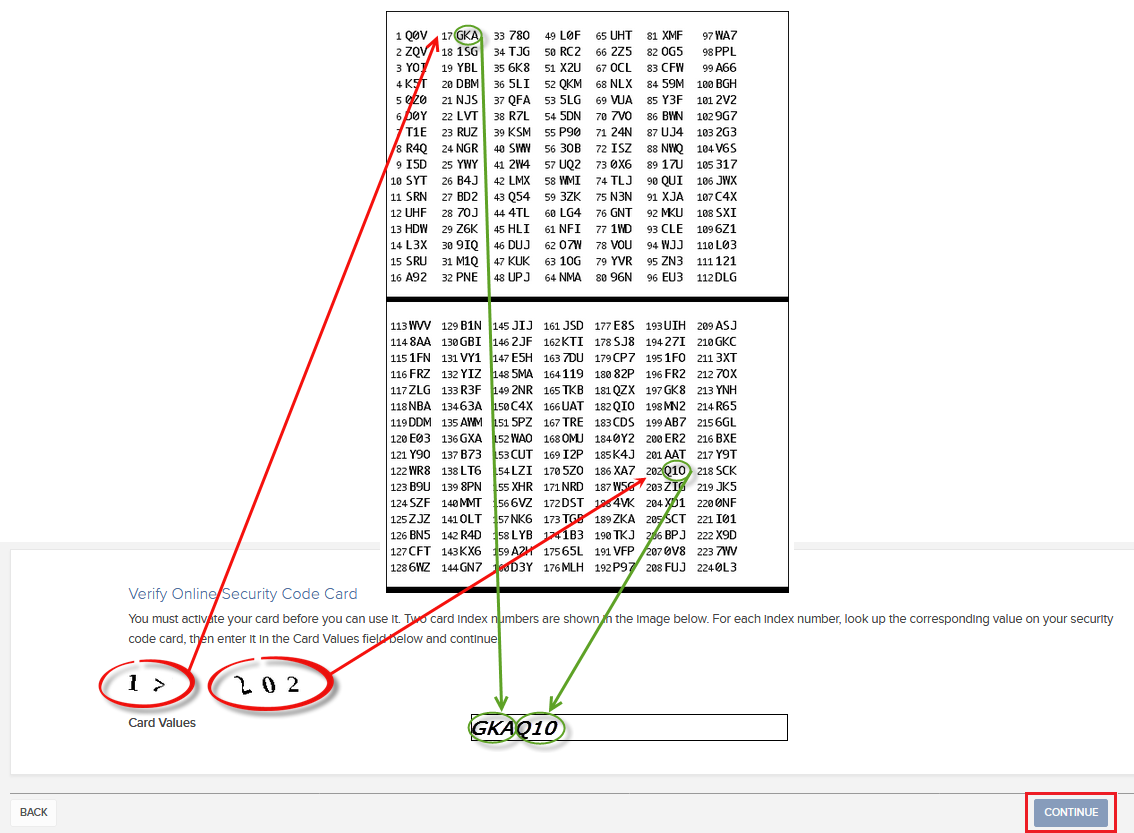
9. Un message de confirmation apparaîtra pour indiquer la date d'expiration de la carte. Cliquez sur OK pour finaliser la procédure.png)
Remarques
1. SI vous utiliser la Gestion de compte classique, cliquez sur le menu Gérer compte > Securité > Connexion sécurisée Systême > Appareil de sécurité

Références
- Consultez KB1131 pour une présentation du Système d'accès sécurisé
- Consultez KB2204 pour la procédure de remplacement de la Digital Security Card+
- Consultez KB2663 pour plus d'informations et procédures concernant les dispositifs de sécurité
- Consultez KB2481 pour le partage de l'appareil de connexion sécurisée entre deux ou plus d'utilisateurs
- Consultez KB2545 pour la procédure d'adhésion complète au Système d'accès sécurisé
- Consultez KB2067 pour savoir comment retourner votre appareil de connexion sécurisée à IBKR
- Consultez KB2260 pour la procédure d'activation de l'authentification IB Key via IBKR Mobile
- Consultez KB2895 pour plus d'informations sur le système d'authentification à 2 facteurs (M2FS)
- Consultez KB1861 pour plus d'informations sur les frais liés aux appareils de connexion sécurisée
- Consultez KB69 pour plus d'informations sur la validité des codes de sécurité temporaires
How to send documents to IBKR using your smartphone
Interactive Brokers allows you to send us a copy of a document even if you do not currently have access to a scanner. You can take a picture of the requested document with your smartphone.
Below you will find the instructions on how to take a picture and send it per email to Interactive Brokers with the following smartphone operating systems:
If you already know how to take and send pictures per email using your smartphone, please click HERE - Where to send the email to and what to include in the subject.
iOS
1. Swipe up from the bottom of your smartphone screen and tap the camera icon.
If you do not have the Camera icon, you can tap the Camera app icon from the home screen of your iPhone.
Normally your phone should now activate the rear camera. If it activates the front one, tap the camera switch button.
2. Place your iPhone above the document and frame the desired portion or page of the document.

3. Make sure to have uniform, sufficient lighting and not to cast any shadow on the document due to your position. Hold the smartphone firmly with your hand/s and avoid shaking. Tap on the shutter button to take the photo.
4. Tap the thumbnail image in the lower left-hand corner to access the picture you have just taken.
5. Make sure that the picture is clear and the document is well legible. You can enlarge the picture and see it in detail by swiping apart two fingers on the picture itself.

If the picture does not present a good quality or lighting, please repeat the previous steps in order to take a sharper one.
6. Tap the share icon in the lower left-hand corner of the screen.

7. Tap the Mail icon.

Note: to send emails your phone has to be configured for that. Please contact your email provider if you are not familiar with this procedure.
8. Please see HERE how to populate the To: and Subject: fields of your email. Once the email is ready, tap the up arrow icon on the top right to send it.

Android
1. Open your applications list and start the Camera app. Alternatively start it from your Home screen. Depending on your phone model, maker or setup, the app might be called differently.

Normally your phone should now activate the rear camera. If it activates the front one, tap the camera switch button.
2. Place your Android above the document and frame the desired portion or page of the document.

3. Make sure to have uniform, sufficient lighting and not to cast any shadow on the document due to your position. Hold the smartphone firmly with your hand/s and avoid shaking. Tap on the shutter button to take the photo.
4. Make sure that the picture is clear and the document is well legible. You can enlarge the picture and see it in detail by swiping apart two fingers on the picture itself.

If the picture does not present a good quality or lighting, please repeat the previous steps in order to take a sharper one.
5. Tap the empty circle icon in the lower right-hand corner of the screen.

6. Tap the share icon in the lower left-hand corner of the screen.

7. In the sharing menu that will be displayed now tap the icon of the email client set up on your phone. In the example picture below, it is called Gmail but the name may vary according to your specific setup.
.png)
Note: to send emails your phone has to be configured for that. Please contact your email provider if you are not familiar with this procedure.
8. Please see HERE how to populate the To and Subject fields of your email. Once the email is ready, tap the airplane icon on the top right to send it.

WHERE TO SEND THE EMAIL AND WHAT TO INCLUDE IN THE SUBJECT
The email has to be created observing the below instructions:
1. In the field To: type:
- newaccounts@interactivebrokers.com if you are a resident of a non-European country
- newaccounts.uk@interactivebrokers.co.uk if you are a European resident
2. The Subject: field must contain all of the below:
- Your account number (it usually has the format Uxxxxxxx, where x are numbers) or your username
- The purpose of sending the document. Please use the below convention:
- PoRes for a proof of residential address
- PID for a proof of identity
How to obtain an Online Security Code Card
The Online Security Code Card provides you temporary access to your account and trading platform for a duration of 21 days. This is an ad-interim solution usually needed in those cases:
A. You are temporarily away from your permanent security device and you are waiting to regain access to it.
B. You have lost your permanent security device and you want to either request a replacement or maintain access to your account while waiting for the delivery to happen.
For the cases mentioned above, we assume you have already notified IBKR Client Services and obtained a Temporary Code, as explained in KB70. You can now extend the duration of your temporary access as follows:
Activation procedure
1. Open your browser and go to the web page ibkr.com
2. Click on Login
.png)
.png)

6. Your Online Security Card will be displayed. Click on Print2
(1).png)
7. Please make sure the card has been printed correctly in all its parts and it is clearly readable. Then click on Continue 
8. Two index numbers will appear on the activation screen. Locate the first index number on your card and enter the correspondent three digits code into the Card Values field. Then repeat the same operation for the second index number, leaving no spaces between the codes. Then click on Continue
9. You will see a confirmation message stating the expiration date of the card. Click on OK to finalize the procedure.png)
Notes
1. If you use the Classic Account Management, click on the top menu Manage Account > Security > Secure Login System > Security Device

References
- See KB1131 for an overview of the Secure Login System
- See KB1943 for instructions on requesting a replacement Digital Security Card+
- See KB2636 for information and procedures related to Security Devices
- See KB2481 for instructions about sharing the Security Login Device between two or more users
- See KB2545 for instructions on how to opt back in to the Secure Login System
- See KB975 for instructions on how to return your security device to IBKR
- See KB2260 for instructions on activating the IB Key authentication via IBKR Mobile
- See KB2895 for information about Multiple Two-Factor Authentication System (M2FS)
- See KB1861 for information about charges or expenses associated with the security devices
- See KB69 for information about Temporary passcode validity
Troubleshooting Trading Platform Login Failures
Click on the link below which best describes your situation:
a. If operating with a temporary passcode, note that alpha characters are case sensitive and are required to be input in upper case format
b. If operating a security card or electronic device, note that there are no spaces between characters
c. Ports 4000/4001 are being blocked. These ports are often blocked from public connections such as hotels, cafes, etc. and required to be open to accommodate Inbound/Outbound TCP protocol. In addition, if you have a router connected to your computer, these ports must be open on the router.*
*Please click here to check your connectivity status: IBKR Dedicated Connectivity Test Page.


